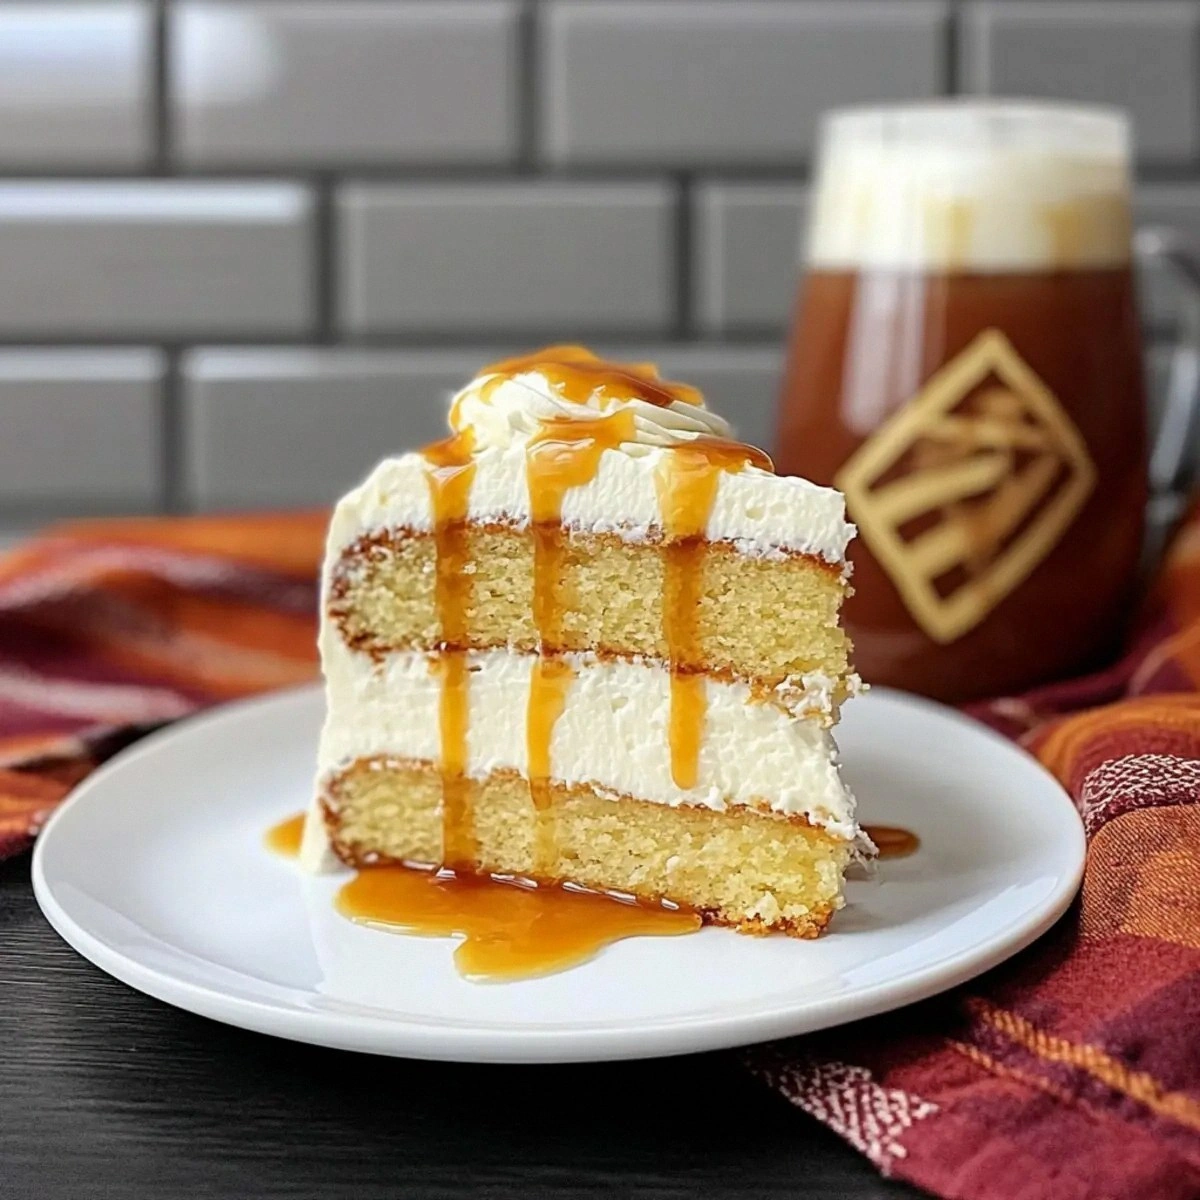
I was standing in my kitchen, half‑asleep, with a half‑baked banana bread staring at me from the counter, when my roommate burst in, eyes wide, demanding something “sweet, impressive, and totally Instagram‑worthy.” I laughed, tossed the banana bread into the trash (it was a tragedy, but the world moves on), and grabbed three crisp apples. I’ll be honest — I ate half the batch before anyone else got a chance to try it, but the moment that golden‑brown caramel met the fluffy, cloud‑like cake, I knew I had stumbled onto something magical. This isn’t just any upside‑down cake; it’s a fluffy, buttery masterpiece that makes the classic look like a flat pancake.
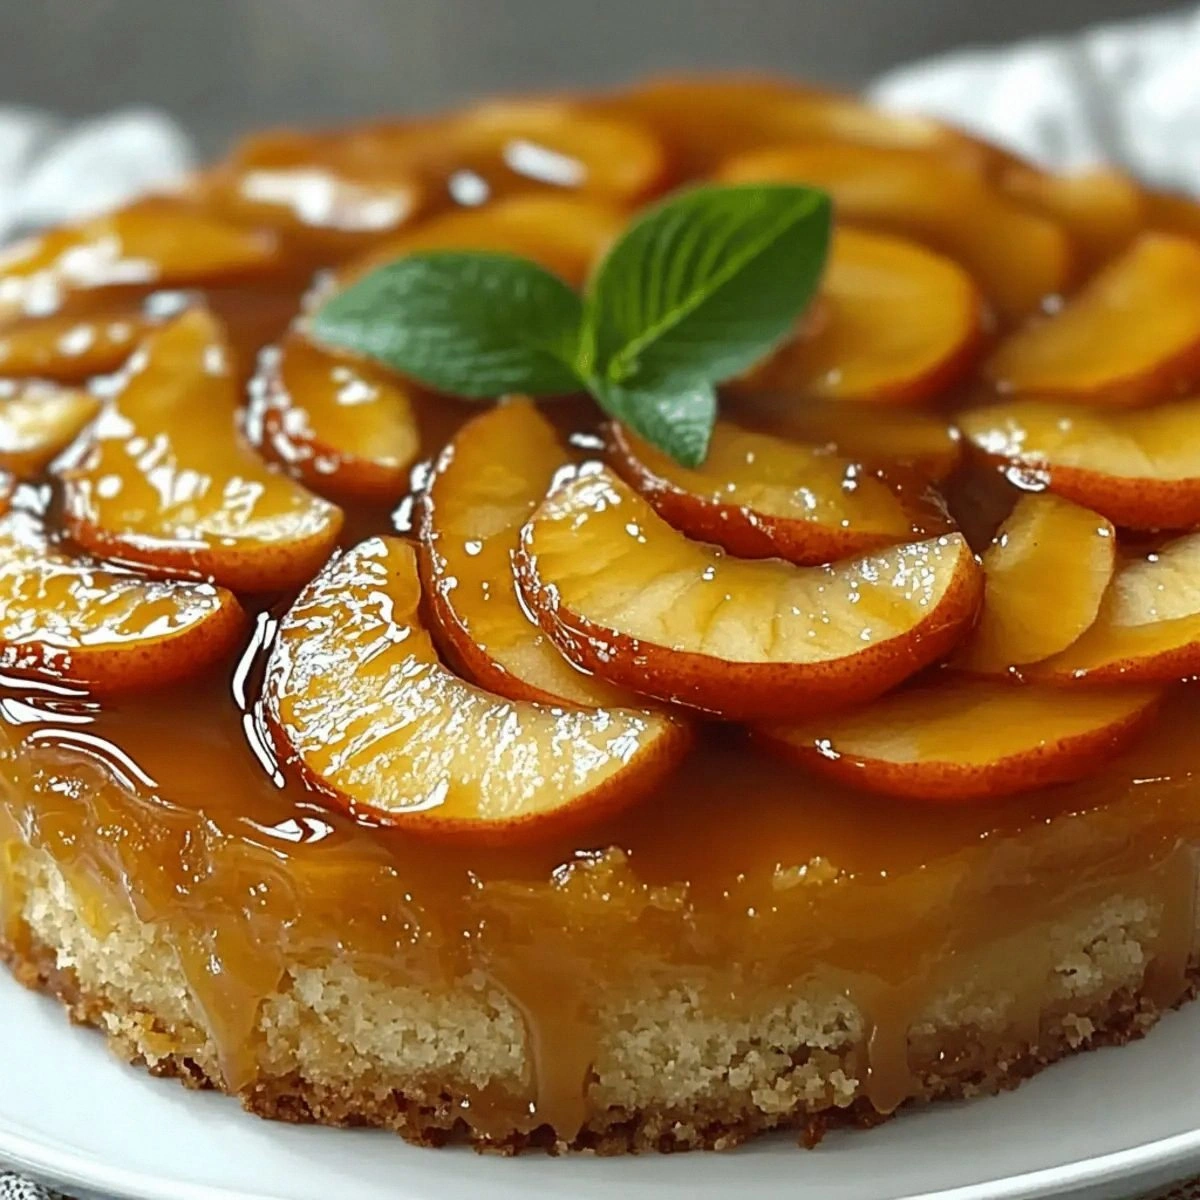
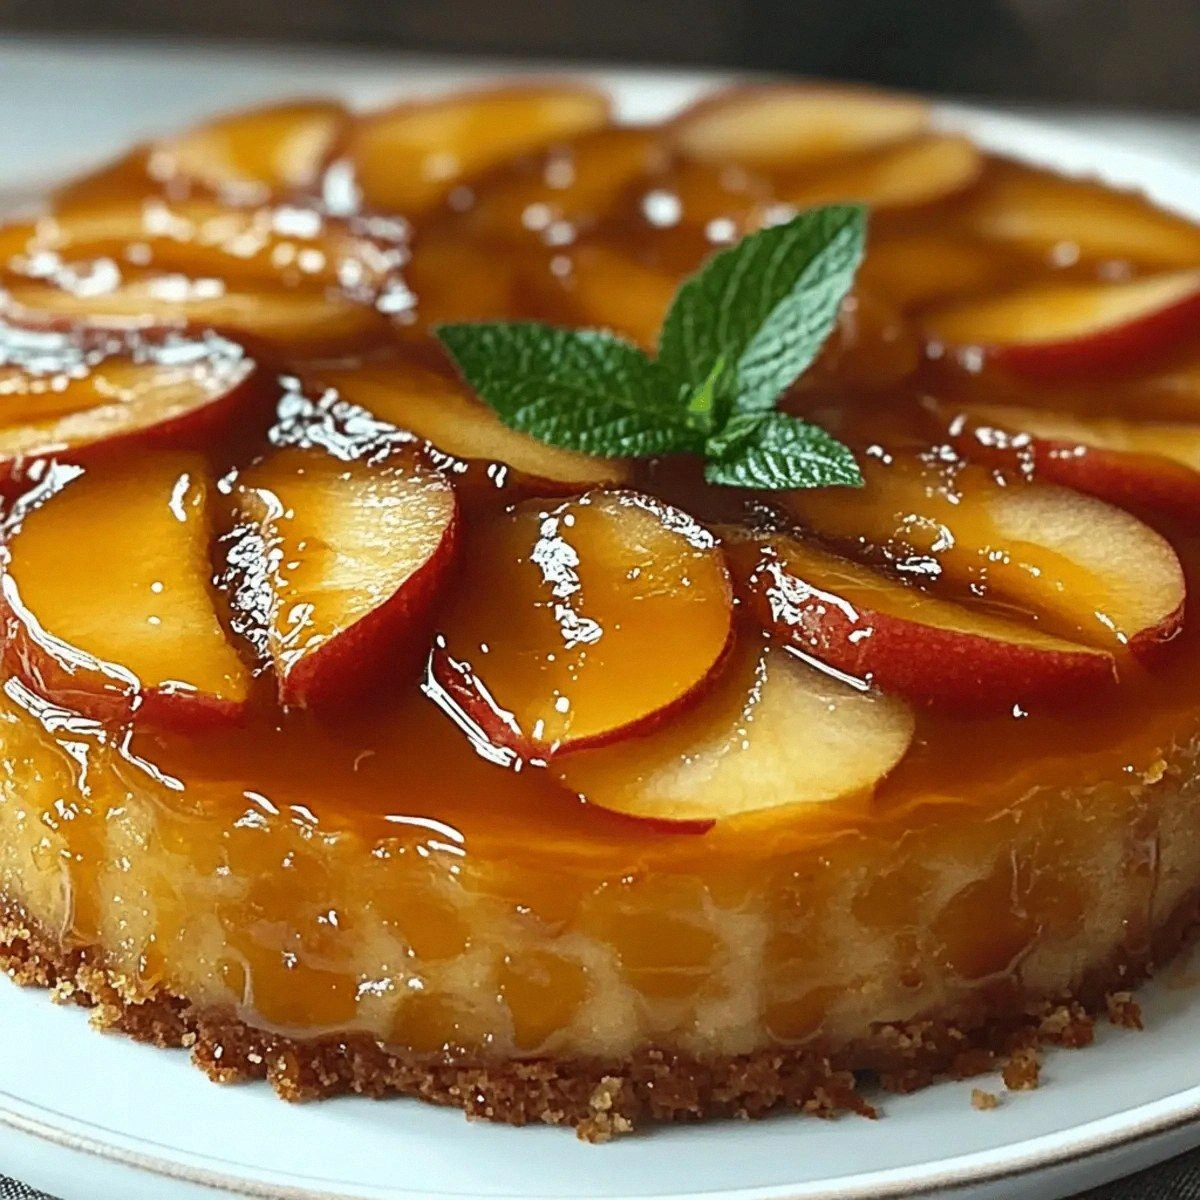
Picture yourself pulling this out of the oven, the whole kitchen smelling like a crisp autumn orchard mixed with a buttery bakery. The caramelized apples glisten like tiny jewels, the edges are crisp enough to snap with a gentle tap, and the interior? Oh, it’s so light it practically floats. When you slice into it, the steam rises like a soft veil, and the aroma of cinnamon and vanilla wraps around you like a warm blanket. I dare you to taste this and not go back for seconds — the combination of sweet, tart, and buttery fluff is downright addictive.
Most recipes get this completely wrong. They either drown the apples in a syrupy swamp or bake a dense, soggy cake that collapses the moment you flip it. Here’s what actually works: a caramel base that’s just the right thickness, a batter that’s aerated with the perfect amount of leavening, and a technique that lets the apples stay firm while the cake rises like a dream. I’m talking about a method that feels like a secret handshake between the pan and the oven, and a few hacks that will make you look like a culinary wizard.
One unexpected star in this recipe is the brown sugar‑butter caramel. It’s not just a sweetener; it’s a flavor conduit that carries the spice of cinnamon into every bite and gives the cake a caramel‑kissed crust that shatters like thin ice when you press it. Okay, ready for the game‑changer? We’ll be using melted butter to create a glossy, glossy base that locks in moisture and adds a subtle richness you’ll taste on the very first forkful. Let me walk you through every single step — by the end, you’ll wonder how you ever made it any other way.
What Makes This Version Stand Out
- Flavor Explosion: The caramelized apples soak up butter, brown sugar, and a whisper of cinnamon, creating a sweet‑tart harmony that sings with every bite.
- Feather‑Light Texture: A careful balance of baking powder and soda lifts the batter into a cloud‑like crumb that stays moist without being gummy.
- Simplicity: Only twelve pantry staples are needed, and the technique is straightforward enough for a weekend rookie yet impressive for a dinner party.
- Unique Caramel Base: Instead of a watery syrup, we melt butter with brown sugar for a glossy, buttery glaze that sets the stage for the apples.
- Crowd Reaction: Guests often ask for the recipe before the first slice is even served — a true testament to its wow factor.
- Ingredient Quality: Using crisp Granny Smith or honey‑crisp apples adds a firm bite that contrasts beautifully with the soft cake.
- Cooking Method: The pan‑flip technique ensures the caramel never burns while the cake bakes evenly from the bottom up.
- Make‑Ahead Potential: This cake stores beautifully; reheat it and it’s as fresh as the day you baked it.
Alright, let's break down exactly what goes into this masterpiece...
Inside the Ingredient List
The Flavor Base
The apples are the heart of this cake. Granny Smith offers a tart crunch that balances the sweet caramel, while Honeycrisp brings a juicy sweetness that melds beautifully with the butter. If you skip the apples, you lose the essential contrast that makes each bite exciting. A good rule of thumb: choose apples that are firm to the touch and have a bright skin — they’ll hold their shape during the bake.
The Texture Crew
Unsalted butter provides richness without the surprise of extra salt, and when melted with brown sugar, it creates that glossy caramel that clings to the apples. All‑purpose flour gives structure, while the combination of baking powder and baking soda introduces the lift that makes the cake fluffy. If you replace the butter with margarine, expect a slightly greasy texture and a less pronounced caramel flavor.
The Unexpected Star
Ground cinnamon is the secret spice that ties the whole dish together. Its warm, woody notes elevate the apples from ordinary to extraordinary. If you’re feeling adventurous, a pinch of nutmeg or allspice can add a subtle depth, but don’t overdo it — you want the cinnamon to shine, not be buried.
The Final Flourish
Granulated sugar sweetens the batter without overwhelming the caramel, while the eggs act as a binding agent and add moisture. Vanilla extract adds a fragrant backdrop that rounds out the flavor profile. If you’re avoiding dairy, substitute the butter with a high‑quality coconut oil, but be prepared for a faint coconut undertone.
Everything's prepped? Good. Let's get into the real action...
The Method — Step by Step
Preheat your oven to 350°F (175°C). While the oven warms up, melt 1/2 cup of unsalted butter in a 9‑inch cast‑iron skillet over medium heat. As soon as the butter bubbles, stir in 1 cup of brown sugar until it dissolves into a thick, amber‑colored caramel. That sizzle when it hits the pan? Absolute perfection. Watch the color closely — you want a deep caramel, not a burnt mess.
Slice the three apples into 1/4‑inch wedges, toss them with 1 tsp ground cinnamon and a pinch of salt, then arrange them in a single, overlapping layer over the caramel. Press them gently so the caramel seeps into every crevice. This step is where the apple‑cinnamon fragrance really starts to bloom, and trust me, you’ll smell it from the hallway.
In a large mixing bowl, whisk together 1 1/2 cups of all‑purpose flour, 1 tsp baking powder, 1/2 tsp baking soda, and 1/2 tsp salt. This dry mix is the scaffold that will keep the cake airy. Sift the flour mixture once or twice; it removes any lumps and introduces air, which is essential for that fluffy texture.
In a separate bowl, beat 2 large eggs with 1 cup granulated sugar until the mixture turns a pale, creamy yellow and triples in volume. This is the point where the batter gains its lift — the whisked eggs trap air bubbles that will expand in the oven. Add 1 tsp vanilla extract and keep whisking for another 30 seconds.
Gradually fold the dry ingredients into the egg‑sugar mixture, alternating with 1/2 cup milk. Start and end with the flour mixture. Use a rubber spatula and a gentle folding motion — you’re coaxing the batter, not beating it. Over‑mixing will develop gluten and make the cake dense, which is the exact opposite of what we want.
Pour the batter over the arranged apples, spreading it evenly with the spatula. The batter should sit on top of the caramel, not soak it completely; this creates a beautiful “upside‑down” effect when you invert the cake. Give the pan a gentle tap on the counter three times to release any air pockets and settle the batter.
Slide the skillet into the preheated oven and bake for 30‑35 minutes. Around the 20‑minute mark, peek through the oven window — the edges should start pulling away from the sides, and the top will turn a light golden‑brown. If you have a kitchen thermometer, the internal temperature should read about 200°F (93°C) at the center.
When the timer dings, turn off the oven but leave the door ajar for 5 minutes; this gentle cooling prevents the cake from collapsing. Then, place a large serving plate upside‑down over the skillet and, with a swift and confident motion, flip the cake. The caramel‑glazed apples will now crown the cake, shimmering like a jewel‑encrusted tiara.
Let the cake rest for another 10 minutes before slicing. This short rest allows the caramel to set slightly, so it won’t run everywhere when you cut. Serve warm, perhaps with a dollop of vanilla‑bean whipped cream or a scoop of vanilla ice cream. That first bite? Pure, buttery bliss that will make you shout, “This is hands down the best version you'll ever make at home.”
That's it — you did it. But hold on, I've got a few more tricks that'll take this to another level...
Insider Tricks for Flawless Results
The Temperature Rule Nobody Follows
Never rush the oven preheat. A fully heated oven ensures the caramel sets instantly, creating that coveted crust. If you slide the pan into a still‑warming oven, the butter will melt too slowly and the apples can become soggy. I once tried to speed things up and ended up with a soggy bottom — lesson learned.
Why Your Nose Knows Best
Your sense of smell is a more reliable indicator than a timer. When the caramel starts to emit a nutty, caramelized aroma and the batter edges turn a deep amber, you know the cake is nearly done. Trust that nose; it will save you from an over‑baked disaster.
The 5‑Minute Rest That Changes Everything
After flipping, let the cake sit for five minutes before slicing. This brief pause lets the caramel thicken just enough to hold its shape, preventing a messy plate. Skipping this step leads to a runny topping that slides off the slice like a waterfall.
The Butter‑Brown Sugar Bond
Melt the butter and brown sugar together, but do it over medium‑low heat. This slow melt creates tiny caramel crystals that coat the apples uniformly. If you melt them too fast, the sugar can crystallize and create a gritty texture.
The Egg‑Sugar Whip Secret
Add a pinch of cream of tartar when beating the eggs and sugar; it stabilizes the foam, giving you a taller, more stable batter. I tried skipping it once — the batter collapsed mid‑bake, and the result was a flat pancake, not a fluffy cake.
Creative Twists and Variations
This recipe is a playground. Here are some of my favorite ways to switch things up:
Pear & Cardamom Dream
Swap the apples for ripe Bartlett pears and add ½ tsp ground cardamom to the caramel. The pear’s subtle sweetness pairs beautifully with the warm spice, creating a sophisticated twist that’s perfect for a holiday brunch.
Berry Burst Upside‑Down
Replace the apples with a mix of fresh blueberries, raspberries, and blackberries. Toss the berries with a tablespoon of lemon zest and a dash of almond extract for a bright, tangy version that’s ideal for summer gatherings.
Nutty Crunch Variation
Add ½ cup chopped toasted pecans or walnuts to the caramel before arranging the apples. The nuts introduce a pleasant crunch that contrasts the soft cake, and their buttery flavor deepens the overall richness.
Spiked Adult Edition
Stir 2 tbsp of dark rum or bourbon into the caramel after it’s melted. The alcohol evaporates slightly during baking, leaving behind a subtle warmth that makes this cake a perfect after‑dinner treat.
Vegan Velvet
Replace the butter with coconut oil, use flax‑egg “eggs” (1 tbsp ground flaxseed + 3 tbsp water per egg), and swap milk for almond milk. The result is a dairy‑free version that still boasts a fluffy crumb and caramelized apple topping.
Storing and Bringing It Back to Life
Fridge Storage
Allow the cake to cool completely, then cover it loosely with aluminum foil and store in the refrigerator for up to three days. The caramel will firm up, but a quick microwaving for 20 seconds revives the softness.
Freezer Friendly
Wrap the entire cake (still in the pan) in a double layer of plastic wrap, then a sheet of foil. Freeze for up to two months. When ready to serve, thaw in the fridge overnight, then reheat at 300°F (150°C) for 15‑20 minutes, adding a tiny splash of water to the pan to steam the caramel back to life.
Best Reheating Method
Place a slice on a microwave‑safe plate, drizzle a teaspoon of milk or cream, and heat for 30‑40 seconds. The added moisture creates steam, restoring that original fluffiness without drying out the caramel.