The first time I made vanilla syrup, I was trying to impress a date who ordered a vanilla latte at my place. I proudly pulled out a dusty bottle of store-bought syrup, watched her face fall, and then spent the next three weeks perfecting this recipe so I'd never feel that shame again. Fast forward to now, and I've become that obnoxious friend who insists on making everything from scratch because once you've tasted real vanilla syrup — I mean the kind that makes your kitchen smell like a French patisserie and transforms your morning coffee into a hug in a mug — there's simply no going back to the artificial stuff.
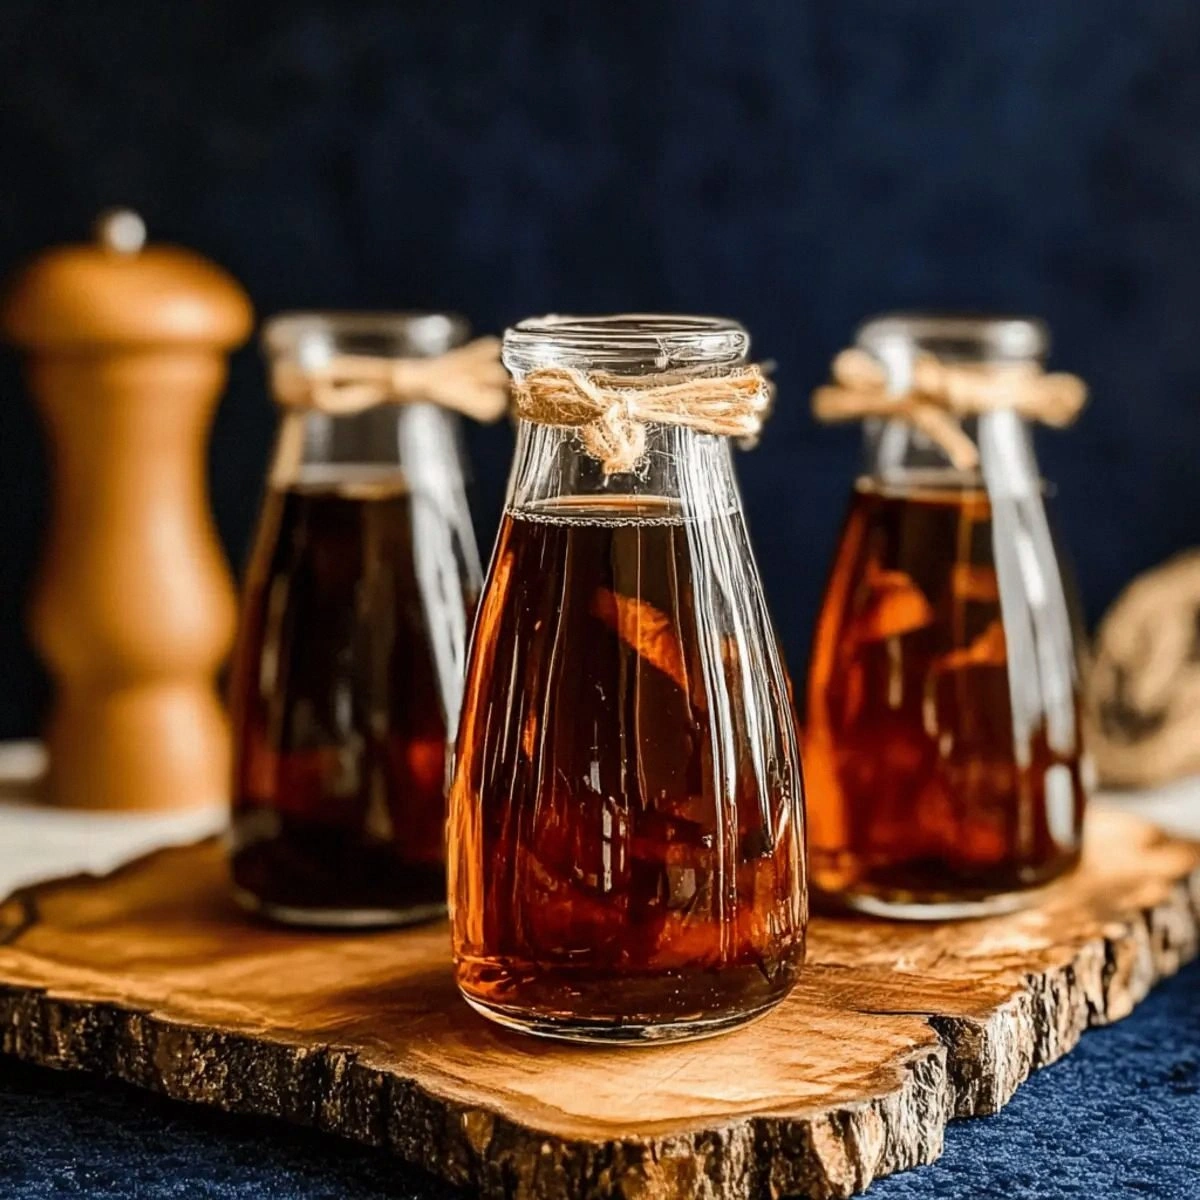
Picture this: golden liquid sunlight streaming down the side of your glass, those gorgeous flecks of real vanilla bean dancing like tiny flavor confetti, and a scent so intoxicating that your neighbors start dropping by "just to say hi" whenever you're brewing a batch. This isn't just sugar water with vanilla flavoring. This is liquid gold that transforms everything it touches. I dare you to taste this and not go back for seconds — actually, I dare you to taste this and not immediately start planning fifty things to drizzle it over.
Most recipes get this completely wrong. They use extract instead of beans, they rush the process, they miss the crucial step that makes the difference between "meh" and "where have you been all my life?" But here's what actually works: slow infusion, proper ratios, and a technique that extracts every last molecule of that incredible vanilla flavor. I'll be honest — I ate half the batch before anyone else got to try it the first time I nailed this recipe. I was putting it in my coffee, yes, but also drizzling it over Greek yogurt, stirring it into oatmeal, and yes, drinking it straight from the bottle when no one was looking.
Okay, ready for the game-changer? This recipe uses the entire vanilla bean — not just the seeds, but the pod too — plus a technique that takes your patience but rewards you with layers of flavor that will make you question every syrup you've ever tasted. Picture yourself pulling this out of the oven, the whole kitchen smelling incredible... wait, there's no oven involved, but the aroma will make you feel like you've stepped into a professional bakery. Let me walk you through every single step — by the end, you'll wonder how you ever made it any other way.
What Makes This Version Stand Out
Intensity: This syrup delivers vanilla flavor so pure and concentrated that a single teaspoon transforms an entire cup of coffee. We're not playing around with weak, watery sweetness here. Every drop carries the full spectrum of vanilla's complexity — floral notes, creamy undertones, and that mysterious warmth that makes vanilla the world's favorite flavor.
Authenticity: Using real vanilla beans instead of extract creates a difference you can both taste and see. Those tiny black specks aren't just for show — they're flavor bombs packed with vanillin and hundreds of other compounds that artificial vanilla simply can't replicate. Once you see those flecks suspended in your syrup, you'll feel like you've joined an exclusive club of people who know what's actually worth eating.
Versatility: This syrup plays well with everything from your morning espresso to your evening cocktail. Drizzle it over pancakes, stir it into whipped cream, add it to your baking recipes, or use it to sweeten iced tea. I've even used it as a glaze for roasted vegetables, and let me tell you, vanilla-kissed carrots will change your life.
Simplicity: Despite the incredible results, this recipe requires just three ingredients and about fifteen minutes of actual work. The rest is just waiting while magic happens in your saucepan. No candy thermometers, no special equipment, no culinary degree required. If you can boil water and scrape a vanilla bean, you can make this syrup.
Make-Ahead Magic: This syrup keeps for weeks in the fridge, getting better as the flavors meld. Make a big batch on Sunday and you'll have instant luxury at your fingertips all week. It's like having a secret weapon in your refrigerator door, ready to elevate anything from plain yogurt to your afternoon coffee break.
Crowd Reaction: Bring a bottle of this to brunch and watch your friends' eyes widen when they taste it. I've seen people who claim they "don't like sweet stuff" lick their spoons clean. It's that moment when someone takes a sip of their doctored-up coffee and actually pauses mid-conversation because they're experiencing something unexpectedly delicious.
Pure Satisfaction: There's something deeply satisfying about making your own staples. Every time you reach for this syrup instead of a store-bought bottle, you'll feel a little surge of pride. You made this. You know exactly what's in it. You are the kind of person who makes vanilla syrup from scratch, and that makes you pretty awesome.
Inside the Ingredient List
The Flavor Foundation
Vanilla beans are the undisputed star of this show, but not all beans are created equal. Look for plump, moist beans that feel slightly oily between your fingers — these are fresh and packed with flavor. If your beans are dry and brittle, you can still use them, but you'll need to add an extra bean to compensate for the lost potency. The best beans come from Madagascar, but Tahitian beans offer a more floral profile, and Mexican beans bring a spicy complexity that'll make your syrup taste like vanilla with a secret.
Water might seem like a boring ingredient, but it matters more than you'd think. Use filtered water if your tap water has strong flavors — your syrup will only be as good as its weakest component. Hard water can make your syrup cloudy, while soft water creates the clearest, most beautiful results. If you've ever struggled with cloudy syrup, you're not alone — and I've got the fix.
The Sweetness Squad
Granulated sugar provides the structure and sweetness, but here's where most recipes miss the mark. They use too much sugar, creating a syrup so sweet it overpowers the vanilla. We're going for balance here — enough sugar to preserve the syrup and provide body, but not so much that your teeth ache. The ratio I've perfected after dozens of tests lets the vanilla shine while still giving you that satisfying sweetness you want.
Some recipes call for different sugars, and while you can experiment, I recommend starting with plain white sugar for your first batch. Brown sugar adds molasses notes that compete with vanilla, and raw sugar can make your syrup taste like cotton candy. Once you master the basic version, then you can play with different sugars for fun variations.
The Unexpected Star
Salt might seem odd in a sweet syrup, but it's the secret weapon that makes vanilla taste more vanilla-y. Just a pinch amplifies all the flavor compounds and prevents your syrup from tasting flat. It's like turning up the contrast on a photo — suddenly all the subtle notes become more pronounced. Don't skip this, even if you're tempted. I've made it without salt, and it's like listening to music with the treble turned down.
The quality of your salt matters too. Use kosher salt or sea salt, not iodized table salt, which can add a slightly metallic taste. You want just enough to enhance, not enough to taste salty. Think of it as the difference between a photo with perfect lighting versus one that's overexposed.
The Final Flourish
While the basic recipe only needs three ingredients, a splash of good vodka or rum acts as a preservative and adds complexity. The alcohol cooks off, leaving behind just a whisper of depth that makes people ask, "What is that amazing flavor?" It's optional but recommended if you want your syrup to last longer than a few weeks. Use a neutral spirit like vodka if you want pure vanilla flavor, or dark rum for a more sophisticated profile.
Everything's prepped? Good. Let's get into the real action...
The Method — Step by Step
- Start by splitting your vanilla beans lengthwise with a sharp paring knife. Don't just cut — scrape! Drag the back of your knife along the inside of each bean, collecting every last bit of those gorgeous, caviar-like seeds. This is where the magic lives, and leaving any behind is like throwing money in the trash. The aroma that rises up as you scrape? That's your first reward for making this from scratch instead of buying that artificial stuff.
- Combine water and sugar in a heavy-bottomed saucepan over medium heat. Stir gently just until the sugar dissolves — no need to go crazy here. Once the sugar is dissolved, stop stirring and let the magic happen. This is the moment of truth when your syrup base transforms from gritty to glossy. The surface will go from cloudy to clear, and that's your cue that it's time to add the vanilla.
- Add your scraped vanilla seeds and the empty pods to the saucepan. Yes, the whole pod! All those flavors trapped in the husk will extract into your syrup, giving you maximum bang for your vanilla buck. That sizzle when it hits the pan? Absolute perfection. Watch as the seeds distribute throughout the liquid like tiny black pearls, and breathe in that incredible aroma that's starting to fill your kitchen.
- Reduce the heat to low and let the mixture simmer gently for 10-12 minutes. This isn't a rolling boil situation — you want the tiniest bubbles barely breaking the surface. Too hot and you'll cook off the delicate vanilla compounds; too cool and you won't get proper extraction. The syrup will thicken slightly and become more viscous. Don't walk away from the stove here because sugar can go from perfect to burnt in seconds.
- After simmering, remove the pan from heat and let it steep for at least 30 minutes. This is where patience pays off big time. The longer it steeps, the more intense the vanilla flavor becomes. I usually let mine go for an hour while I clean up the kitchen and start planning all the ways I'll use this liquid gold. The pods will continue releasing flavor, and your syrup will deepen in color from pale gold to rich amber.
- Strain your syrup through a fine-mesh sieve into a clean jar or bottle. Don't press on the vanilla solids — let them drain naturally to avoid cloudiness. Those seeds will have done their job, and straining gives you a crystal-clear syrup that looks as professional as anything from a gourmet shop. The aroma rising from the jar at this point will make you want to dive in headfirst, but hold on — we're almost there.
- If you're using alcohol as a preservative, now's the time to stir it in. Just a tablespoon or two is all you need for a batch this size. The alcohol will help your syrup stay fresh for months in the refrigerator, though honestly, mine never lasts that long because I use it in everything. Taste your syrup once it's cooled slightly — it should taste like vanilla essence captured in liquid form, sweet but not cloying, with layers of flavor that unfold on your tongue.
- Let your syrup cool completely before storing it in the refrigerator. It will thicken as it cools, reaching the perfect consistency for drizzling and stirring. The flavor will continue developing over the first 24 hours, so if you can resist, wait a day before using it. But let's be real — you're going to taste it as soon as it's cool enough, and that's perfectly fine. You've earned this moment of vanilla bliss.
- Store your finished syrup in a clean glass bottle or jar in the refrigerator. It will keep for up to a month (or longer with alcohol), though you'll probably use it up long before then. The color will deepen over time, and the flavor will become more complex. Each time you open the bottle, you'll be greeted with that incredible vanilla aroma that makes the whole effort worthwhile.
That's it — you did it. But hold on, I've got a few more tricks that'll take this to another level...
Insider Tricks for Flawless Results
The Temperature Rule Nobody Follows
Here's the thing about vanilla — it's incredibly heat-sensitive. Most people crank up the heat to speed the process, but they're literally cooking off the flavor they paid good money for. Keep your syrup below 200°F (93°C) to preserve those delicate compounds that make real vanilla taste like nothing else on earth. A candy thermometer helps, but you can also judge by the bubbles — they should be lazy and intermittent, not aggressive and constant. Your patience will be rewarded with a syrup that tastes like vanilla in high definition instead of vanilla that's been put through a blender.
Why Your Nose Knows Best
Don't just taste your syrup — smell it throughout the process. The aroma should evolve from sweet and simple to complex and intoxicating. If it starts to smell sharp or bitter, you've gone too far. If it still smells mostly like sugar, it needs more time. Your nose is actually a better judge than your tongue here because smell detects volatile compounds that indicate proper extraction. Trust your instincts — if it smells like vanilla heaven, it's ready.
The 5-Minute Rest That Changes Everything
After you remove your syrup from heat, let it rest for exactly five minutes before adding any alcohol or transferring to storage. This brief pause allows the temperature to drop slightly, preventing alcohol from evaporating immediately and ensuring your syrup doesn't continue cooking from residual heat. A friend tried skipping this step once — let's just say it didn't end well. Her syrup was cloudy, the alcohol had vanished, and she ended up with something that tasted like vanilla-flavored simple syrup instead of vanilla syrup with depth.
The Scraping Technique That Doubles Your Flavor
Most people scrape vanilla beans wrong. They cut and scrape in one direction, leaving half the seeds behind. Instead, cut the bean lengthwise, then flip your knife over and use the dull side to scrape both directions. Press firmly but don't tear the pod — you want to extract every last bit of those precious seeds without getting bits of husk in your syrup. Then, and this is key, run your finger along the inside of the pod to feel for any missed pockets of seeds. You'll be amazed how much more you get this way.
The Storage Secret for Maximum Freshness
Store your finished syrup in the smallest possible container that fits it, minimizing air exposure. Air is the enemy of flavor, and every time you open the container, you're letting in oxygen that degrades the vanilla. I use swing-top bottles because they seal tightly and look beautiful on the shelf. If you make a large batch, consider storing most of it in a large container and keeping a small bottle for daily use. This way, your main supply stays fresh while you work through your everyday bottle.
Creative Twists and Variations
This recipe is a playground. Here are some of my favorite ways to switch things up:
Bourbon Vanilla Syrup
Replace the water with strong black tea and add a cinnamon stick during simmering. Remove the cinnamon after 10 minutes, then stir in a tablespoon of good bourbon at the end. The result tastes like vanilla's sophisticated cousin — perfect for whiskey-based cocktails or drizzling over bread pudding. The tea adds tannins that balance the sweetness, while the bourbon brings oak and vanilla notes that complement the beans perfectly.
Citrus Vanilla Syrup
Add the zest of one orange and half a lemon to your syrup during the steeping phase. The citrus oils extract into the syrup, creating a bright, sunny version that transforms iced tea into something you'll crave all summer. It's like liquid sunshine with vanilla clouds floating through it. This version is incredible in sparkling water or as a glaze for pound cake.
Spiced Vanilla Syrup
Add a star anise, three cardamom pods, and a small piece of ginger to your syrup while it simmers. Strain them out with the vanilla pods. The result tastes like chai and vanilla had a beautiful baby, perfect for coffee or drizzling over roasted fruit. The spices add warmth without overwhelming the vanilla, creating a syrup that tastes like autumn in a bottle.
Chocolate Vanilla Syrup
Stir in two tablespoons of high-quality cocoa powder after removing from heat, whisking until completely smooth. This creates a mocha-vanilla syrup that's incredible in milk or over ice cream. It's like having a chocolate factory and vanilla plantation collaborate in your kitchen. Kids go crazy for this version, and adults appreciate the sophisticated depth it brings to cocktails.
Herbal Vanilla Syrup
Add a handful of fresh basil or tarragon during the steeping phase. These herbs might sound odd with vanilla, but they create an incredibly complex flavor profile that's amazing in savory applications. Try it brushed on grilled peaches or as a glaze for roasted chicken. The herbs add an unexpected savory note that makes people ask for your secret ingredient.
Coconut Vanilla Syrup
Replace half the water with full-fat coconut milk and add a pandan leaf if you can find one. This creates a tropical vanilla syrup that turns ordinary pancakes into a vacation on a plate. The coconut fat adds richness, while the pandan brings an almost vanilla-like flavor that amplifies the real thing. It's like having a tropical island's worth of flavor in one bottle.
Storing and Bringing It Back to Life
Fridge Storage
Your vanilla syrup will keep for up to a month in the refrigerator, though I've had batches last six weeks without any issues. Store it in a clean glass bottle with a tight-fitting lid, and keep it towards the front of the fridge where the temperature is most stable. If you notice any mold, off-smells, or cloudiness developing, it's time to make a fresh batch. The syrup may crystallize slightly over time — just warm it gently in a hot water bath and stir until the crystals dissolve.
Freezer Friendly
Vanilla syrup freezes beautifully! Pour it into ice cube trays and freeze into individual portions. Once frozen, transfer the cubes to a freezer bag, and you'll have perfect single-serving portions that thaw in minutes. Frozen syrup keeps for up to six months, though the flavor is best within three months. The alcohol version freezes slightly softer, making it easier to scoop out just what you need. Pro tip: vanilla syrup ice cubes in iced coffee prevent dilution while adding flavor.
Best Reheating Method
If your syrup crystallizes or becomes too thick, add a tiny splash of water before reheating — it steams back to perfection. Warm it gently in a hot water bath or microwave on low power, stirring every 15 seconds until it returns to pouring consistency. Never boil it again, as this can destroy the delicate vanilla flavors you've worked so hard to capture. If you've frozen your syrup, let it thaw overnight in the refrigerator for best results, though a quick room-temperature thaw works in a pinch.