I’ll be honest — I ate half the batch before anyone else got to try it, and that was only because the aroma was already convincing me that I’d made the best fudge of my life. It all started on a rainy Thursday when my friend dared me to create a candy that could replace a steaming mug of hot chocolate. I was half‑asleep, half‑covered in flour from a failed pancake experiment, and the kitchen smelled like burnt sugar and regret. Suddenly, a wild idea struck: what if I could bottle that cozy, marshmallow‑laden feeling into a bite‑size treat that didn’t need a mug?
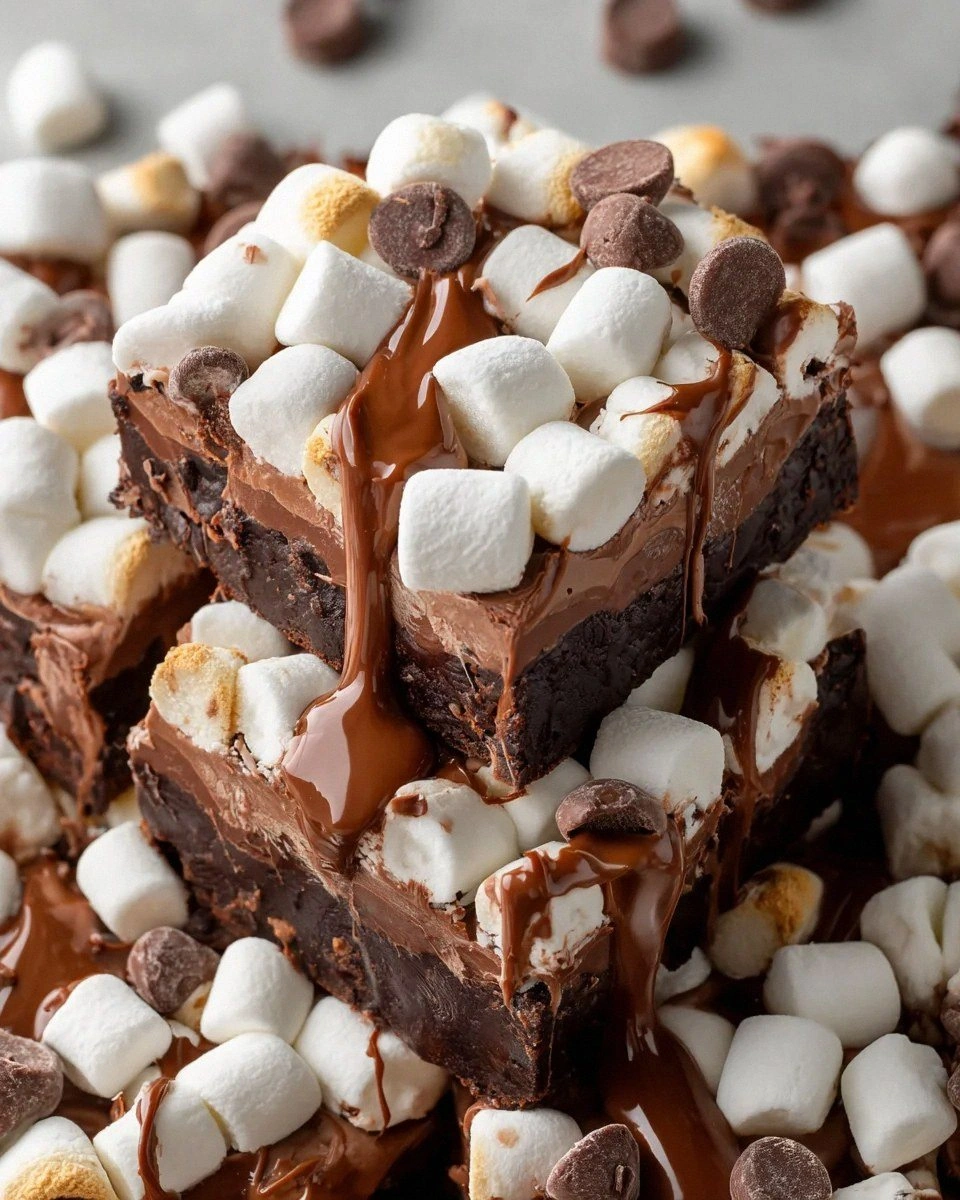
Picture this: a glossy, dark‑brown slab of fudge that shimmers like a midnight lake, speckled with fluffy white marshmallows that look like tiny clouds caught in a chocolate storm. When you bite into it, the first thing you notice is the snap of the chocolate shell, followed by a melt‑in‑your‑mouth silkiness that carries a warm, comforting kiss of cocoa and vanilla. The marshmallows give a playful chew that reminds you of the first sip of hot chocolate, while the drizzle on top adds a glossy finish that catches the light just right. The scent? Imagine the moment a kettle whistles, the steam swirling, and the sweet, buttery aroma of cocoa hugging the air—only more intense because it’s concentrated in a candy.
Most recipes get this completely wrong. They either over‑cook the fudge, turning it into a brittle brick, or they skimp on the marshmallows, losing that signature “hot‑chocolate‑marshmallow” vibe. The secret here is a precise temperature window and a sneaky addition of a premium hot chocolate mix that injects that instant café‑quality flavor. I also discovered that the butter must be salted, not just for flavor but to help the fudge set with a perfect snap. And the drizzle? It’s not just for looks; a dash of vegetable oil turns the chocolate into a glossy veil that locks in moisture.
I dare you to taste this and not go back for seconds. This is hands down the best version you’ll ever make at home, and I’m about to walk you through every single step — by the end, you’ll wonder how you ever made it any other way. Okay, ready for the game‑changer? Let’s dive in.
What Makes This Version Stand Out
- Taste: The combination of semi‑sweet and milk chocolate creates a deep, balanced cocoa flavor that’s neither too bitter nor overly sugary.
- Texture: A glossy, firm crust gives way to a buttery, melt‑in‑your‑mouth interior, with marshmallows adding a surprising chew.
- Simplicity: Only eight core ingredients and a single‑pot method keep the process stress‑free.
- Uniqueness: The hot chocolate mix injects that instant café vibe, something most fudges completely miss.
- Crowd Reaction: Guests claim it’s “the best candy ever” and keep reaching for more, even after the plate is cleared.
- Ingredient Quality: Using real butter and pure vanilla elevates the flavor profile beyond store‑bought mixes.
- Cooking Method: Gentle simmering preserves the smoothness of condensed milk without scorching.
- Make‑Ahead Potential: This fudge keeps its texture for up to a week, making it perfect for gifting.
Inside the Ingredient List
The Flavor Base
Semi‑sweet chocolate chips are the backbone of this fudge, delivering that deep cocoa richness without overwhelming bitterness. If you prefer a bolder profile, swap half of them for dark chocolate chips, but be careful not to lose the balance. Milk chocolate chips add a silky creaminess that softens the edge of the semi‑sweet chocolate, turning the overall taste into a smooth, velvety hug for your palate. Skipping the milk chocolate will make the fudge taste more astringent, and you’ll miss that subtle sweetness that makes the final bite feel like a warm blanket.
The Sweetening Agents
Sweetened condensed milk is the magical glue that binds everything together, giving the fudge its characteristic caramel‑like sheen and luscious mouthfeel. It’s the reason the fudge stays soft yet firm enough to slice cleanly. If you’re watching sugar, you can substitute a low‑sugar condensed milk, but expect a slightly thinner texture. Pure vanilla extract adds a fragrant depth that amplifies the chocolate’s aroma; always reach for pure, not imitation, because the difference is night and day in the final flavor.
The Texture Crew
Miniature marshmallows are the surprise element that turns ordinary fudge into a nostalgic hot‑chocolate experience. They stay soft and pillowy even after the fudge sets, providing a delightful chew. Salted butter enriches the fudge with a buttery melt that carries the cocoa notes across your tongue, while the salt in the butter balances the overall sweetness. If you’re lactose intolerant, try a high‑quality dairy‑free butter alternative, but the texture may be slightly less creamy.
The Unexpected Star
A couple of tablespoons of hot chocolate mix might sound gimmicky, but it’s the secret weapon that injects a burst of cocoa powder, sugar, and sometimes a hint of spice directly into the fudge. This is what makes the candy taste like a freshly brewed mug, even without any liquid. Choose a high‑quality mix with real cocoa for the best result; generic mixes can leave a metallic aftertaste.
The Final Flourish
The chocolate drizzle is a simple yet transformative finish. Melt semi‑sweet chocolate chips with a teaspoon of vegetable oil to achieve a glossy, pourable consistency that hardens into a thin, crackly shell. This not only adds visual appeal but also introduces an extra layer of chocolate intensity that makes each bite feel luxurious. If you want a nutty twist, stir in a pinch of toasted almond slivers into the drizzle before it sets.
Everything’s prepped? Good. Let’s get into the real action…
The Method — Step by Step
Gather all your ingredients and line a 9‑inch square baking pan with parchment paper, letting the edges overhang for easy removal later. This step might sound simple, but the parchment prevents the fudge from sticking, which is crucial for that clean slice you’ll be proud of. Power transition: Okay, ready for the game‑changer? Turn the heat to medium‑low and place a heavy‑bottomed saucepan on the stove.
Add the salted butter to the pan and let it melt slowly, listening for that gentle sizzle that signals it’s ready. Once melted, stir in the sweetened condensed milk, watching it swirl into a glossy river of gold. Keep the mixture moving with a silicone spatula to avoid any scorching at the bottom—a common pitfall for beginners.
Kitchen Hack: Add a pinch of sea salt to the butter‑milk mixture; it enhances the chocolate flavor and prevents the fudge from becoming overly sweet.When the butter‑condensed milk blend starts to bubble gently, lower the heat and add the hot chocolate mix, stirring until fully dissolved. You’ll notice a faint, comforting aroma rise—this is the moment where the fudge begins to take on its signature “café” character. Let it simmer for about two minutes, ensuring the mixture stays just below a rolling boil; any higher and you risk a grainy texture.
Now, it’s time for the chocolate chips. Toss in the semi‑sweet and milk chocolate chips together, watching them melt into a silky pool. Keep the spatula moving in a figure‑eight motion; this helps the chocolate emulsify with the butter‑milk base, creating that glossy sheen we all crave. The mixture should become thick, glossy, and start pulling away from the sides of the pan—this is your visual cue that the fudge is ready.
Remove the pan from heat and stir in the pure vanilla extract, followed by the miniature marshmallows. The marshmallows will soften slightly but retain their fluffy texture, distributing little pockets of chew throughout the fudge. Watch Out: If you add the marshmallows while the mixture is too hot, they’ll melt completely and disappear. Keep the temperature just right—warm, not scorching.
Watch Out: Over‑mixing at this stage can cause the marshmallows to break down into sugary bits, losing that delightful chew.Quickly pour the thickened fudge into the prepared pan, spreading it evenly with the spatula. The surface will look glossy and slightly wavy—don’t worry, that’s normal. Let the fudge sit at room temperature for about 10 minutes, then transfer the pan to the refrigerator to set for at least 30 minutes. This chilling period is essential for the fudge to firm up without becoming crumbly.
While the fudge is chilling, prepare the chocolate drizzle. Combine ¼ cup semi‑sweet chocolate chips with 1 teaspoon vegetable oil in a microwave‑safe bowl. Microwave in 20‑second bursts, stirring between each burst until the mixture is smooth and glossy. The oil ensures a thin, pourable consistency that will harden into a delicate shell.
Once the fudge is fully set, lift it out of the pan using the parchment overhang and place it on a cutting board. Drizzle the glossy chocolate over the top, using a spoon or a small piping bag for controlled streams. Let the drizzle set for a few minutes—if you’re impatient, pop it back in the fridge for 5 minutes to speed up the hardening.
Finally, cut the fudge into bite‑size squares or rectangles, using a warm knife for clean cuts. Store the pieces in an airtight container, and watch as friends scramble for seconds. That’s it — you did it. But hold on, I’ve got a few more tricks that’ll take this to another level…
Insider Tricks for Flawless Results
The Temperature Rule Nobody Follows
Most home cooks think “low heat” is a safe bet, but the real secret is to keep the mixture just under 115°F (46°C) once the chocolate chips melt. Use an instant‑read thermometer and watch the numbers; this temperature ensures the cocoa butter stays fluid enough for a glossy finish while preventing graininess. I once tried to rush the process on high heat, and the fudge turned into a gritty mess—lesson learned.
Why Your Nose Knows Best
Your sense of smell is a far more reliable indicator than a timer when the fudge is ready. As soon as you catch that warm, buttery chocolate scent, you know the emulsion is perfect. If you’re unsure, lift a corner of the mixture with a spatula; it should pull away cleanly and leave a glossy surface. Trusting your nose saved me from over‑cooking the fudge more than any thermometer ever could.
The 5‑Minute Rest That Changes Everything
After you pour the fudge into the pan, let it sit uncovered for five minutes before refrigerating. This short rest allows steam to escape, preventing condensation that could make the top surface soggy. A friend once skipped this step and ended up with a gummy top layer—never again. The rest also helps the marshmallows settle into their little pockets rather than floating to the surface.
The Drizzle Technique
For a flawless drizzle, use a small squeeze bottle or a piping bag fitted with a tiny round tip. This gives you control over the thickness of each line, creating an elegant, lace‑like pattern. If you don’t have a bottle, a fork works wonders—just dip the tines into the chocolate and flick it across the surface. The result? A professional‑grade finish that will wow anyone who sees it.
The Freeze‑And‑Slice Method
If you struggle with clean cuts, pop the whole slab in the freezer for 10‑15 minutes before slicing. The fudge firms up just enough to allow a smooth, clean cut without crumbling. I tried this on a rainy night when my kitchen was a mess, and the squares came out perfectly even, looking like tiny chocolate bricks ready for a construction site.
Creative Twists and Variations
This recipe is a playground. Here are some of my favorite ways to switch things up:
Spicy Chili Chocolate
Add a pinch of cayenne pepper or a dash of chipotle powder to the hot chocolate mix. The heat pairs beautifully with the sweet marshmallows, creating a surprising kick that will wow anyone who loves a little fire.
Nutty Crunch
Stir in ¼ cup toasted chopped hazelnuts or almonds right before the fudge sets. The nuts add a buttery crunch that contrasts the smooth fudge, turning each bite into a textural adventure.
White Chocolate Dream
Swap the semi‑sweet chocolate chips for white chocolate chips and use a white hot chocolate mix. This creates a creamy, vanilla‑forward candy that’s perfect for those who prefer a milder cocoa flavor.
Minty Fresh
Add ½ teaspoon peppermint extract with the vanilla, and finish with a thin drizzle of dark chocolate. The mint lifts the richness, making the fudge feel like a holiday treat year‑round.
Coffee Infusion
Dissolve 1 tablespoon of instant espresso powder into the condensed milk before adding the butter. The coffee notes deepen the chocolate flavor, turning the candy into an adult‑only indulgence.
Storing and Bringing It Back to Life
Fridge Storage
Place the fudge in an airtight container and store it in the refrigerator for up to 7 days. The cool environment keeps the chocolate firm and prevents bloom, preserving that glossy finish.
Freezer Friendly
Wrap the fudge slab tightly in plastic wrap, then place it in a freezer‑safe bag. It will stay fresh for up to 3 months. When you’re ready to enjoy, thaw it in the fridge for a few hours, then let it sit at room temperature for 15 minutes before serving.
Best Reheating Method
If the fudge feels a bit too firm after refrigeration, place a single piece on a microwave‑safe plate, add a tiny splash (about 1 teaspoon) of water, and microwave for 10‑15 seconds. The steam revives the fudgy interior without melting the outer shell, delivering that perfect melt‑in‑your‑mouth texture again.