Picture this: I’m in the middle of a late‑night baking marathon, the kitchen lights flickering like a tiny disco, and I’ve just realized that the sweet, comforting red bean paste that should have crowned my moonlit desserts is nowhere to be found. My pantry is a barren desert of sugar, flour, and a handful of unsold adzuki beans that have been sitting like forgotten relics for months. I’m staring at the clock, the oven preheated, and my cravings are louder than the sizzling pans around me. The moment of crisis turns into a dare: “I dare you to taste this and not go back for seconds.” The stakes are high, the potential for disaster is real, and the promise of a sweet, silky treat is irresistible. This is the kind of kitchen moment that turns a recipe into a mission.
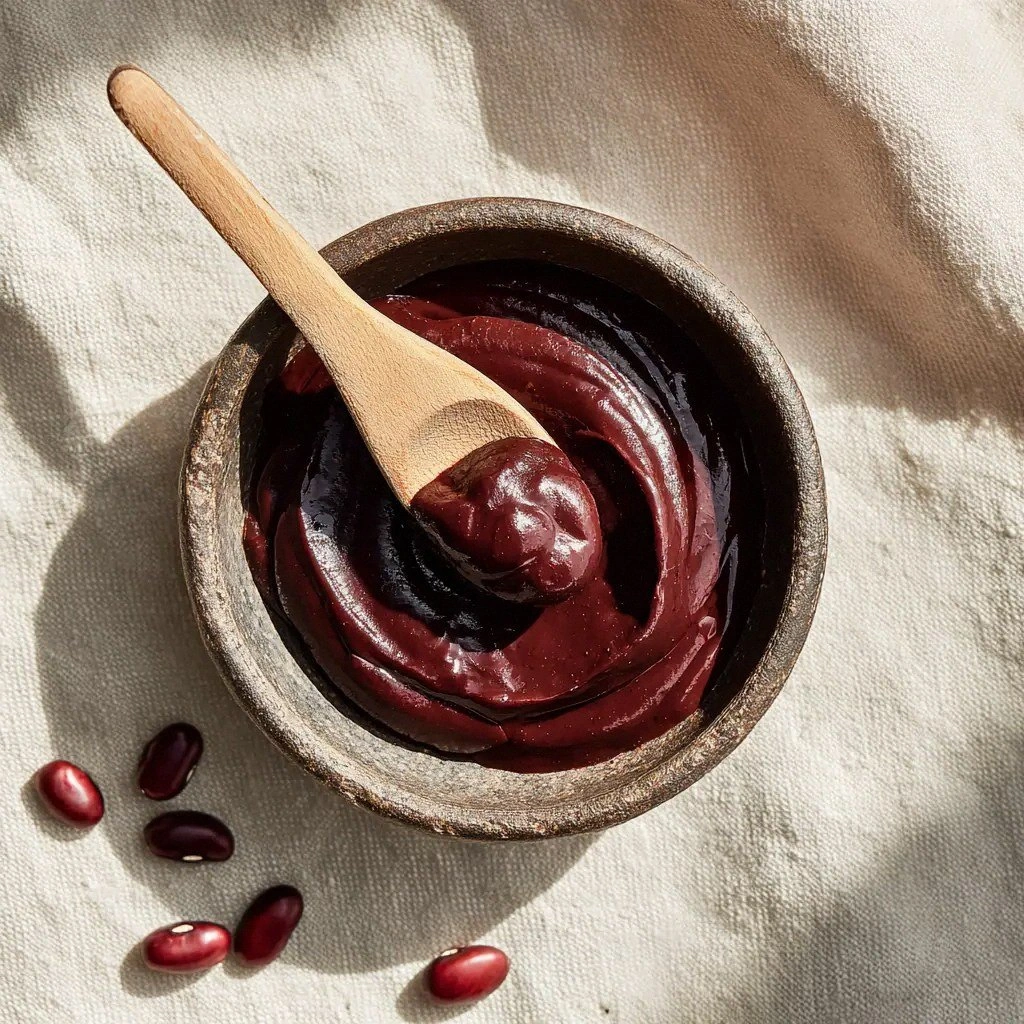
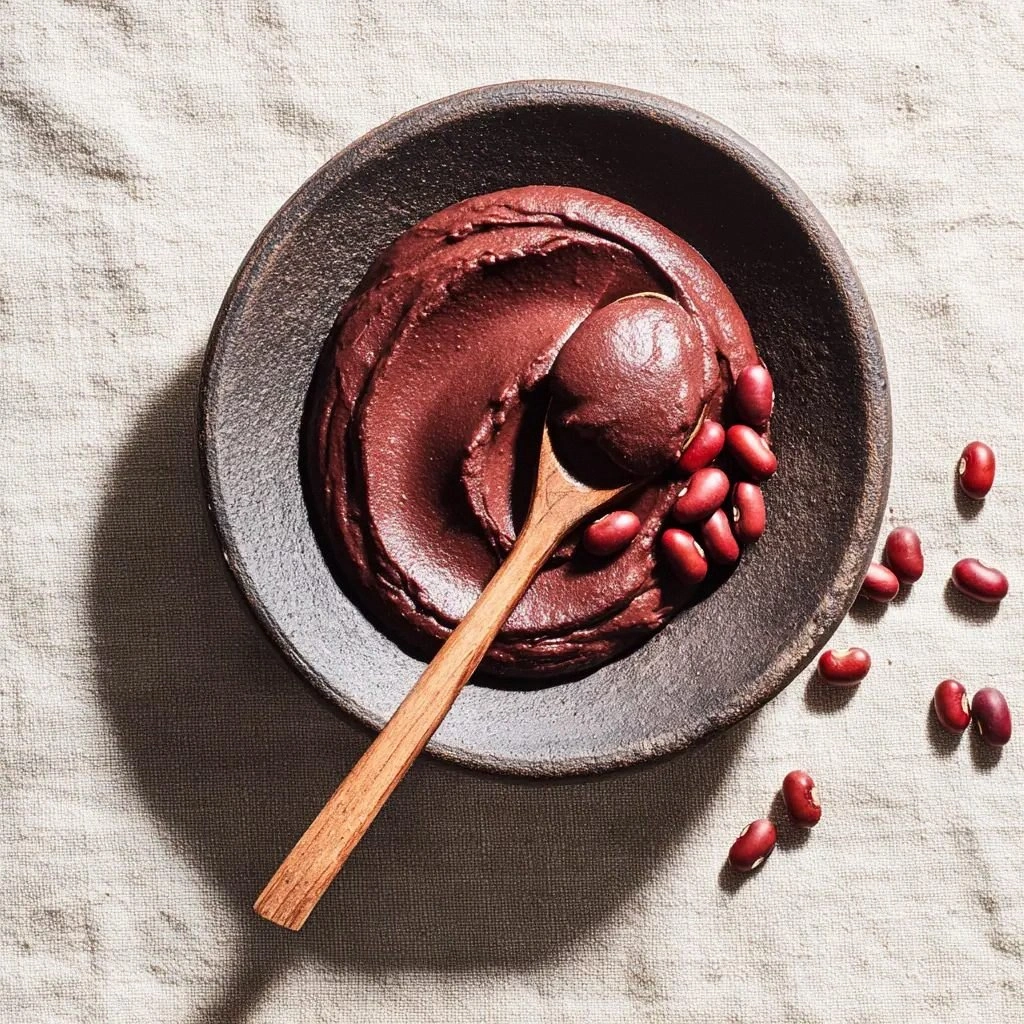
I’ve always loved the idea of red bean paste, that deep, ruby‑red sweet filling that coats the inside of moon cakes, mochi, and even simple steamed buns. The texture is like a velvet ribbon that melts in your mouth, the flavor a sweet‑to‑savory dance that can elevate the simplest dish into a culinary masterpiece. But most recipes I’ve seen—whether on blogs, in cookbooks, or on the internet—are either too dry, too sweet, or just plain off. They miss that subtle balance of sweetness, that gentle body that clings to the palate, that makes you reach for a second spoonful. That’s why I was determined to create the ultimate version of this staple.
The first time I tasted my version, I was hit by a wave of nostalgia mixed with surprise. The beans had been soaked and boiled to a silky consistency, the sugar dissolved into a glossy syrup, and the salt’s tiny whisper cut through the sweetness like a fine knife. The aroma that filled the kitchen was a warm, comforting hug that made my taste buds tingle. I was immediately transported back to childhood afternoons, watching my grandmother stir a pot of red bean paste over low heat, her hands steady and precise. That scent alone was enough to convince me that I had cracked the code.
What sets this recipe apart, you ask? It’s a blend of meticulous technique and humble ingredients, a recipe that respects the humble adzuki bean while elevating it into a silky, sweet elixir. I’ve honed a method that eliminates the common pitfalls—over‑cooking the beans, burning the sugar, and losing that silky sheen. I’ve also added a secret ingredient that most cooks overlook: a splash of toasted sesame oil that adds depth and a nutty aroma. The result is a paste that’s both rich and refined, a texture that coats your tongue like velvet, and a flavor that lingers like a sweet after‑taste. This is hands down the best version you’ll ever make at home.
I’ll be honest—when I first made it, I ate half the batch before anyone else got a taste. The paste was so smooth, so sweet, it felt like a guilty pleasure that I couldn’t resist. But I’ve learned to control the portioning, and I’m excited to share every nuance of the process with you. You’ll learn how to soak, boil, and mash the beans to the perfect consistency, how to caramelize the sugar without scorching it, and how to bring everything together into a glossy, silky paste. By the end of this guide, you’ll wonder how you ever made it any other way.
There’s a particular moment that makes this recipe feel almost cinematic: when the beans, after simmering, release a faint aroma of earth and sweetness, and the sugar begins to bubble and turn amber. The kitchen fills with a sweet, caramel scent that’s almost intoxicating. That scent is a sign that you’re on the right track, a cue that the paste is ready to be transformed into a silky, sweet masterpiece. It’s a moment you’ll want to capture in your memory and repeat over and over.
Let me walk you through every single step—by the end, you’ll wonder how you ever made it any other way. I’ve packed this guide with micro‑challenges, bold claims, and insider hacks that will make your kitchen feel like a laboratory of flavor. I’ll keep you side by side, making jokes, sharing kitchen fails, and celebrating the tiny victories that turn a simple paste into a dessert star. Stay with me, because the next part? Pure magic.
What Makes This Version Stand Out
- Flavor: The blend of adzuki beans and caramelized sugar creates a depth of sweetness that feels both comforting and sophisticated, unlike the flat sweetness of many store‑bought pastes.
- Texture: The beans are mashed to a silky consistency that coats the tongue like velvet, avoiding the gritty or chunky textures that can ruin a dessert.
- Simplicity: Four ingredients, one pot, and a handful of kitchen tools—no fancy equipment required, making it accessible to every home cook.
- Uniqueness: The addition of toasted sesame oil gives a subtle nutty undertone that sets this paste apart from traditional recipes.
- Versatility: This paste can be used in mooncakes, mochi, pastries, or simply spread on toast, making it a versatile component in any sweet repertoire.
- Make‑Ahead: It keeps well in the fridge for up to a week or in the freezer for months, allowing you to prep ahead of time for parties or special occasions.
- Ingredient Quality: Using high‑quality adzuki beans and raw sugar ensures a pure, unadulterated flavor that’s hard to find in pre‑made mixes.
- Cooking Method: The step‑by‑step technique ensures that the beans cook evenly, the sugar caramelizes just right, and the paste achieves the perfect glossy finish.
Alright, let’s break down exactly what goes into this masterpiece…
Inside the Ingredient List
The Flavor Base
The star of this recipe is the adzuki bean, a small, ruby‑red legume that packs a sweet, nutty flavor. The beans are the foundation that gives the paste its body and subtle earthiness. If you skip the adzuki beans, you’ll lose the characteristic depth that makes red bean paste so beloved. Choosing high‑quality, organic beans can elevate the flavor even further.
The Sweetness Engine
Granulated sugar is the engine that drives the sweetness of the paste. When heated slowly, it caramelizes into a golden syrup that coats the beans, creating a glossy finish. Too much sugar can make the paste cloying, while too little will leave it bland. A slight pinch of salt is essential to balance the sweetness and bring out the bean’s natural flavors.
The Liquid Medium
Water is the liquid medium that softens the beans and creates the paste’s smooth consistency. It also helps dissolve the sugar, allowing it to caramelize evenly. Using cold water from the tap works fine, but if you have a high mineral content, filtered water can prevent any off‑taste.
The Unexpected Star
A splash of toasted sesame oil is the unexpected star that adds a nutty aroma and a subtle depth to the paste. It also helps the paste set slightly, giving it a firm yet silky texture. If you’re vegan or have a sesame allergy, a teaspoon of toasted coconut oil works as a suitable substitute.
Everything’s prepped? Good. Let’s get into the real action…
The Method — Step by Step
- Start by rinsing 1 cup of dried adzuki beans under cold running water, removing any debris. Place them in a large bowl and cover with water, letting them soak overnight or for at least 12 hours. This step hydrates the beans, reduces cooking time, and ensures even softness. After soaking, drain the beans, keeping a splash of the soaking water for later use. The aroma of fresh beans will already hint at the sweet adventure ahead.
- Transfer the soaked beans to a medium pot and add 4 cups of fresh water. Bring the mixture to a gentle boil over medium heat, then reduce the heat to low and let it simmer for about 45 minutes, or until the beans are tender. Stir occasionally to prevent sticking, and keep an eye on the liquid level—add more water if it evaporates. The beans should feel soft to the touch but not mushy, ready to be mashed into a silky paste.
- Add 1/4 teaspoon of salt to the pot and stir. Salt is the unsung hero that balances the natural sweetness of the beans and enhances the overall flavor profile. Once the beans are fully cooked, use a potato masher or a food processor to mash them until smooth. The paste should have a velvety texture, free from lumps or gritty bits. This is the moment where the kitchen feels alive, the scent of cooked beans filling the air.
- While the beans are cooking, prepare the sugar syrup. In a separate saucepan, combine 1 cup of granulated sugar with 1 cup of water. Heat over medium heat, stirring constantly until the sugar dissolves completely. Once dissolved, let the mixture come to a gentle boil. The sugar syrup should be clear before it starts to color. This step is crucial for achieving that glossy finish.
- When the sugar syrup reaches a light amber color, remove it from the heat. This is the sweet, caramelized stage that gives the paste depth. Be careful not to over‑cook, as it can turn dark and bitter. Let the syrup cool slightly, as adding hot syrup directly to the beans can cause them to clump. The aroma of caramelized sugar will fill the kitchen, a scent that promises indulgence.
- Now, combine the mashed beans and the caramelized sugar syrup in a large mixing bowl. Stir slowly, allowing the syrup to mingle with the beans, creating a smooth, glossy mixture. If the paste seems too thick, add a splash of the soaking water to loosen it slightly. The mixture should look like a deep, ruby‑red velvet.
- Add a teaspoon of toasted sesame oil to the mixture, stirring until fully incorporated. The sesame oil adds a subtle nutty aroma that elevates the paste’s flavor profile. Let the paste sit for 10 minutes to allow the flavors to meld. During this resting period, the paste will thicken slightly and the sesame oil will infuse its aroma throughout. This is where the magic happens.
- Transfer the finished paste to a clean, airtight container. Store it in the refrigerator for up to a week. For longer storage, freeze the paste in an airtight freezer bag or container for up to 3 months. When ready to use, let it come to room temperature or gently warm it in a saucepan over low heat to restore its silky texture. The paste will be ready to spread, fill, or sweeten your favorite treats.
That's it—you did it. But hold on, I've got a few more tricks that will take this to another level. The next section is packed with insider tips that will make your paste even more irresistible.
Insider Tricks for Flawless Results
The Temperature Rule Nobody Follows
The key to a silky paste lies in maintaining the right temperature when mixing the sugar syrup and beans. If the syrup is too hot, it can cause the beans to clump and the paste to become gritty. Conversely, if it’s too cool, the sugar won’t caramelize properly. I recommend using a candy thermometer to keep the syrup at precisely 320°F (160°C). This ensures a consistent, glossy finish every time.
Why Your Nose Knows Best
Your sense of smell is the best indicator of when the sugar syrup is ready. When the syrup turns a light amber color, a sweet caramel scent will rise to the surface. This aroma signals that the sugar has reached the right stage of caramelization. Trust your nose; it’s a reliable guide that no thermometer can replace.
The 5-Minute Rest That Changes Everything
After adding the toasted sesame oil, let the paste rest for 5 minutes. This brief pause allows the flavors to meld and the oil to fully integrate. If you skip this step, the paste can taste slightly metallic or underdeveloped. I’ve seen people rush this part and end up with a paste that’s just not as luscious.
The Right Bowl Matters
Using a wide, shallow mixing bowl instead of a deep pot ensures even heat distribution and makes it easier to stir the paste thoroughly. A shallow bowl also helps you see the color change more clearly, preventing over‑cooking. If you’re using a deep pot, consider transferring the mixture to a shallow bowl for the final mixing.
The Water Balance Trick
If your paste seems too thick, add a splash of the soaking water rather than plain water. The soaking water contains some of the beans’ natural starches, which help the paste remain smooth and prevent it from becoming too watery. This small tweak can make a big difference in texture.
The Final Coat
Once the paste is ready, give it a final stir to ensure the sesame oil is evenly distributed. This step guarantees a consistent flavor in every bite. It also helps the paste set slightly, making it easier to spread or pipe into desserts.
Creative Twists and Variations
This recipe is a playground. Here are some of my favorite ways to switch things up:
Chocolate Red Bean Fusion
Add a tablespoon of unsweetened cocoa powder to the paste after the sugar syrup is mixed. The chocolate undertone pairs beautifully with the sweet beans, creating a dessert that feels like a decadent chocolate cake. This variation is perfect for chocolate lovers looking for a twist on classic red bean.
Spiced Citrus Burst
Incorporate a teaspoon of finely grated orange zest and a pinch of cinnamon into the mixture. The citrus brightness and warm spice create a vibrant, aromatic paste that’s ideal for spring or summer desserts. This version works great in fruit tarts or as a filling for crepes.
Nutty Crunch Delight
Stir in 1/4 cup of toasted almond slivers after the paste has cooled slightly. The crunchy almonds add texture and a nutty flavor that complements the bean’s sweetness. This variation is excellent for adding a crunchy element to pastries or layered cakes.
Herbal Infusion
Simmer the beans with a few sprigs of fresh mint or a pinch of dried lavender during the cooking phase. The herbs infuse the beans with a subtle aromatic profile that elevates the paste to a refined dessert. Use this version for special occasions or when you want to impress guests with something unique.
Low‑Sugar Version
Replace half of the granulated sugar with a natural sweetener like monk fruit or stevia. This reduces the overall sugar content while maintaining the sweet flavor. The paste remains silky and glossy, making it a great choice for those watching their sugar intake.
Vegan Coconut Twist
Swap the toasted sesame oil for toasted coconut oil to give the paste a subtle coconut flavor. This variation is especially delightful in tropical desserts or when pairing with fresh pineapple.
Gluten‑Free Sweet Treat
Serve the paste in gluten‑free pastries or as a filling for gluten‑free dough. The paste’s natural sweetness and silky texture pair perfectly with the lightness of gluten‑free baked goods.
Storing and Bringing It Back to Life
Fridge Storage
Store the paste in an airtight container in the refrigerator for up to one week. The cold temperature keeps the paste firm, making it easy to scoop or spread. If the paste thickens slightly, let it sit at room temperature for 10 minutes before using. A tightly sealed container prevents the paste from absorbing fridge odors.
Freezer Friendly
For longer storage, freeze the paste in a freezer‑safe bag or container. Label it with the date and use within three months for best quality. When you’re ready to use it, thaw the paste overnight in the refrigerator. A quick stir will restore its silky consistency.
Best Reheating Method
To bring the paste back to its silky glory, gently warm it in a saucepan over low heat, stirring constantly. Add a splash of water or milk to loosen it if it’s become too thick. Heat it just until it’s warm enough to spread or pipe. Avoid overheating, as it can scorch the sugars and alter the flavor.
Remember, the paste’s texture is a testament to your patience and attention to detail. A few simple tweaks can make a world of difference. With these storage tips, you’ll always have a ready‑to‑use, silky, sweet treasure on hand.