I was standing in my kitchen at 2 a.m., half‑asleep, and the fridge light flickered like a neon sign begging me to open it. The craving hit me like a freight train—something cold, creamy, and unapologetically indulgent. I grabbed the first thing I saw: a tub of vanilla ice cream that looked like it was made from clouds, a half‑full jug of milk, and a pack of Oreos that had been lurking in the pantry for weeks. The moment I crumbled those chocolate‑sandwiched biscuits into the bowl, the whole room seemed to inhale the sweet, cocoa‑laden perfume, and I swear the countertop shivered with excitement.
Picture this: the sound of the blender whirring like a jet engine, the frothy swirl of vanilla ice cream meeting the glossy splash of milk, and the occasional crunch of Oreo shards that refuse to dissolve completely, giving each sip a satisfying bite. The texture is so smooth it feels like velvet slipping over your tongue, while the chocolate bits add a playful pop, like fireworks in a midnight sky. The aroma is a nostalgic hug, reminiscent of childhood birthday parties, yet refined enough to make even the most sophisticated palate sit up and say, “Whoa, that’s good.”
Most milkshake recipes I’ve tried either drown the cookies in a swamp of milk or leave the shake so thin it could pass for a latte. This version, however, strikes the perfect balance—rich, thick, and dreamy, yet light enough to sip without feeling like you’ve swallowed a brick. I dare you to taste this and not go back for seconds; it’s hands down the best version you’ll ever make at home. I’m about to reveal the secret technique that keeps the shake silky without turning it into an icy slurry, and trust me, it’s a game‑changer.
Let me walk you through every single step — by the end, you’ll wonder how you ever made it any other way. Okay, ready for the game‑changer? This next part? Pure magic. Stay with me here — this is worth it.
What Makes This Version Stand Out
- Texture: The blend of full‑fat ice cream with just enough milk creates a silk‑smooth mouthfeel that coats your palate like a buttery glaze.
- Flavor Depth: A dash of vanilla extract lifts the chocolatey notes, turning a simple cookie shake into a multi‑layered dessert.
- Simplicity: Only six core ingredients, all pantry‑friendly, meaning you can whip this up in under ten minutes.
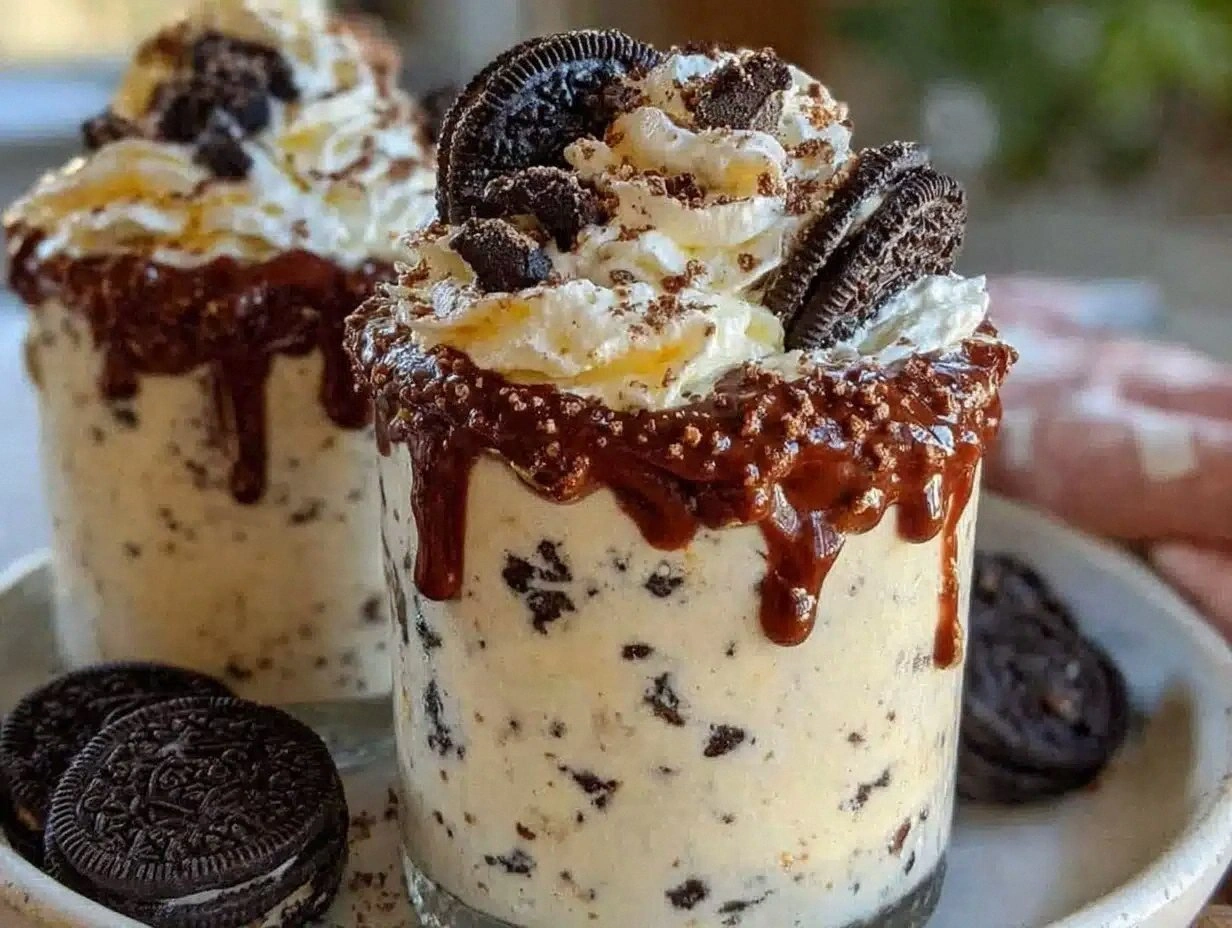
- Visual Appeal: Swirls of chocolate syrup and a crown of whipped cream make it Instagram‑ready without any extra effort.
- Customizable: Optional toppings let you dial the decadence up or down, perfect for any mood or dietary tweak.
- Crowd Reaction: Serve it at a gathering and watch the eyes widen—this shake has the power to turn skeptics into lifelong fans.
- Ingredient Quality: Using premium ice cream and fresh whole milk guarantees a rich base that cheap alternatives simply can’t match.
- Make‑Ahead Potential: Prep the cookie crumbs ahead of time, and the shake comes together in seconds when guests arrive.
Inside the Ingredient List
The Flavor Base
Vanilla ice cream is the heart of this shake. I recommend a creamy, full‑fat brand like Häagen‑Dazs because its higher butterfat content creates that luxurious mouthfeel you crave. If you skimp on the ice cream, you’ll end up with a watery mess that feels more like a milk‑soup than a shake. A quick tip: let the ice cream soften for five minutes at room temperature; it blends more evenly and prevents icy chunks.
The Texture Crew
Whole milk is the secret weapon that keeps the shake from turning into a frozen brick while still providing enough liquid to swirl the flavors together. You can substitute 2% if you’re watching calories, but expect a slightly thinner result. The Oreo cookies—six to eight, depending on how chocolate‑intense you like it—add both flavor and texture. Crumble them by hand for a rustic feel, or blitz them for a finer dust that spreads chocolate throughout the shake.
The Unexpected Star
A half‑teaspoon of vanilla extract might sound trivial, but it’s the whisper that turns a good shake into a great one. It amplifies the sweet notes and balances the cocoa bitterness of the cookies. If you’re feeling adventurous, a splash of bourbon or espresso can add an adult twist, but keep it subtle so you don’t overpower the core flavors.
The Final Flourish
Whipped cream and chocolate syrup are optional, yet they elevate the presentation and taste. A dollop of freshly whipped cream adds airy lightness, while a drizzle of chocolate syrup creates a glossy finish that catches the light. If you’re vegan, swap the whipped cream for coconut whipped topping and the syrup for a dark, sugar‑free version.
Everything's prepped? Good. Let's get into the real action…
The Method — Step by Step
First, gather all your ingredients on the counter so you can see everything at a glance. This visual cue prevents the classic “where’s the vanilla?” panic that can ruin a smooth workflow. I like to line up the ice cream, milk, Oreo crumbs, and vanilla extract like a mini‑assembly line. The kitchen should feel like a runway, not a battlefield. Pro tip: Keep the blender pitcher chilled in the freezer for five minutes; it helps maintain a frosty texture.
Next, take six to eight Oreos and give them a good, hearty crush. You can use a zip‑top bag and a rolling pin, or just smash them with your hands—there’s something oddly therapeutic about feeling the cookies crumble. I recommend leaving a few larger chunks for that satisfying crunch in every sip. Once crushed, set them aside in a small bowl.
Kitchen Hack: Toss the crumbs with a pinch of salt before blending; it intensifies the chocolate flavor without adding extra sugar.Now, add the two cups of vanilla ice cream to the blender. Let the ice cream sit for a minute if it’s been in the freezer too long; you want it soft enough to swirl but not melted. As the blades start to turn, you’ll hear that comforting whir that signals the beginning of something magical. This is the moment of truth—if the ice cream is too cold, the blender will strain, and you’ll end up with a chunky mess.
Pour in the half‑cup of whole milk. The milk should stream in like a gentle waterfall, creating a ribbon of white that swirls around the ice cream. If you’re using 2% milk, you might need an extra splash—listen to the sound; a thin “whoosh” means you’re getting close to the perfect consistency. Watch Out: Adding too much milk will thin the shake, making it more of a drink than a dessert.
Watch Out: Over‑blending can melt the ice cream into a soupy texture; blend just until smooth, about 30 seconds.Add the half‑teaspoon of vanilla extract and the crushed Oreos. As the blender whirs, you’ll see the dark specks dance through the white base, creating a marbled effect. This is where the aroma really starts to fill the kitchen—sweet vanilla mingling with deep chocolate. Keep the lid on tightly; you don’t want a frothy explosion coating the countertops.
Blend on medium‑high for about 20‑30 seconds, stopping to scrape down the sides once. The goal is a thick, creamy consistency that holds its shape when poured—think thick milkshake, not runny soda. If the shake looks too thick, add a splash more milk; if it’s too thin, toss in a few extra ice cream chunks. Taste it at this stage; you’ll know instantly if it needs a pinch more vanilla or an extra Oreo crumble.
Once you’ve achieved the perfect texture, pour the shake into chilled glasses. The chilled glass helps keep the shake cold longer and adds a professional touch. If you’re feeling fancy, drizzle chocolate syrup inside the glass before pouring; the syrup will cascade down the sides, creating a glossy tunnel.
Top each glass with a generous swirl of whipped cream and, if you like, an extra dusting of crushed Oreos. The whipped cream should be light enough to float but sturdy enough to hold its shape. Finish with a final drizzle of chocolate syrup for that Instagram‑ready shine. Now step back, admire your creation, and prepare for the inevitable “Can I have another?” chorus.
Kitchen Hack: Use a piping bag for the whipped cream to achieve a perfect, airy peak without smearing the glass.
That's it — you did it. But hold on, I've got a few more tricks that'll take this to another level…
Insider Tricks for Flawless Results
The Temperature Rule Nobody Follows
Never use ice cream straight from the freezer; a brief 5‑minute rest at room temperature makes it pliable enough to blend without turning the milk into a watery mess. I once tried to blend frozen blocks and ended up with a gritty, icy slurry that tasted like a freezer burn. The right temperature creates a silk‑smooth texture that feels like liquid velvet on the palate.
Why Your Nose Knows Best
Before you even taste, trust the aroma. If you smell a hint of burnt milk or stale cookies, something went wrong. A fresh, sweet vanilla scent signals that the vanilla extract is doing its job, while a deep chocolate note confirms the Oreos are fully incorporated. This sensory checkpoint saves you from a bland finish.
The 5‑Minute Rest That Changes Everything
After blending, let the shake sit for five minutes in the fridge. This short rest allows the flavors to meld, creating a more harmonious taste profile. I once served a shake immediately and got feedback that the chocolate flavor was “a bit one‑note.” After the rest, the cocoa deepens, and the vanilla shines through.
The Secret of the Crushed Cookie Layer
Instead of blending all the cookies, reserve a handful of larger crumbs for topping. This gives each sip a delightful crunch, preventing the shake from feeling monotonous. A friend tried blending everything and ended up with a uniform texture; the lack of crunch made the experience feel flat.
The “Double‑Dip” Chocolate Drizzle
Warm the chocolate syrup slightly before drizzling; a warm syrup spreads more evenly and creates a glossy sheen. If you use cold syrup, it will bead up and look uneven. A quick 10‑second microwave (or a stovetop melt) does the trick without burning the chocolate.
Creative Twists and Variations
This recipe is a playground. Here are some of my favorite ways to switch things up:
Minty Oreo Dream
Add a splash of peppermint extract and swap regular Oreos for Mint Oreo cookies. The mint adds a fresh coolness that pairs brilliantly with chocolate, making it perfect for summer evenings.
Salted Caramel Crunch
Drizzle salted caramel sauce into the blender and sprinkle flaky sea salt on top. The salty‑sweet contrast elevates the shake to dessert‑restaurant status.
Mocha Madness
Replace half the milk with chilled espresso and add a teaspoon of cocoa powder. This version is ideal for coffee lovers who want a dessert that also gives a caffeine kick.
Vegan Velvet
Swap the dairy ice cream for a coconut‑milk‑based vanilla ice cream, use almond milk, and top with coconut whipped cream. The result is dairy‑free but still decadently creamy.
Fruit Fusion
Blend in a handful of frozen strawberries or bananas for a fruity twist. The natural sweetness reduces the need for extra syrup, and the pink hue makes it visually striking.
Storing and Bringing It Back to Life
Fridge Storage
If you have leftovers, pour the shake into an airtight container and store it in the refrigerator for up to 24 hours. Before serving, give it a good shake or stir to reincorporate any settled ingredients.
Freezer Friendly
For longer storage, freeze the shake in a freezer‑safe jar, leaving an inch of headspace. It will keep for up to two weeks. When you’re ready to enjoy, let it thaw for 30 minutes, then blend again with a splash of milk to restore creaminess.
Best Reheating Method
If you prefer a warm, dessert‑like version, gently heat the shake on the stovetop over low heat, stirring constantly, and add a tiny splash of water or milk to steam it back to perfection. This method prevents the shake from becoming grainy and keeps the flavor balanced.