Picture this: I’m standing in my kitchen, a half‑finished batch of plain cinnamon rolls cooling on the counter, when my roommate bursts in, waving a half‑eaten Oreo and demanding, “What if we mash those into the dough?” I laughed, rolled my eyes, and then—like a mad scientist with a sweet tooth—I tossed the cookies into the mix. The result? A swirl of chocolate‑crunchy goodness that turned an ordinary morning into an unforgettable feast. I dare you to taste this and not go back for seconds; it’s practically a culinary dare‑devil challenge that will have your taste buds filing a police report.
The moment the dough hits the warm milk, you hear that soft sigh of fermentation, like a gentle whisper promising something big. The kitchen fills with a scent that’s part cinnamon‑spice market, part chocolate‑chip cookie factory, and part fresh‑baked heaven. You can almost feel the buttery melt on your fingertips as you knead, and the faint crunch of crushed Oreos under your palm adds a playful texture that makes you grin before the first roll even hits the pan. This isn’t just a recipe; it’s an experience that engages sight, sound, smell, taste, and even that satisfying “click” of the dough snapping back when you stretch it.
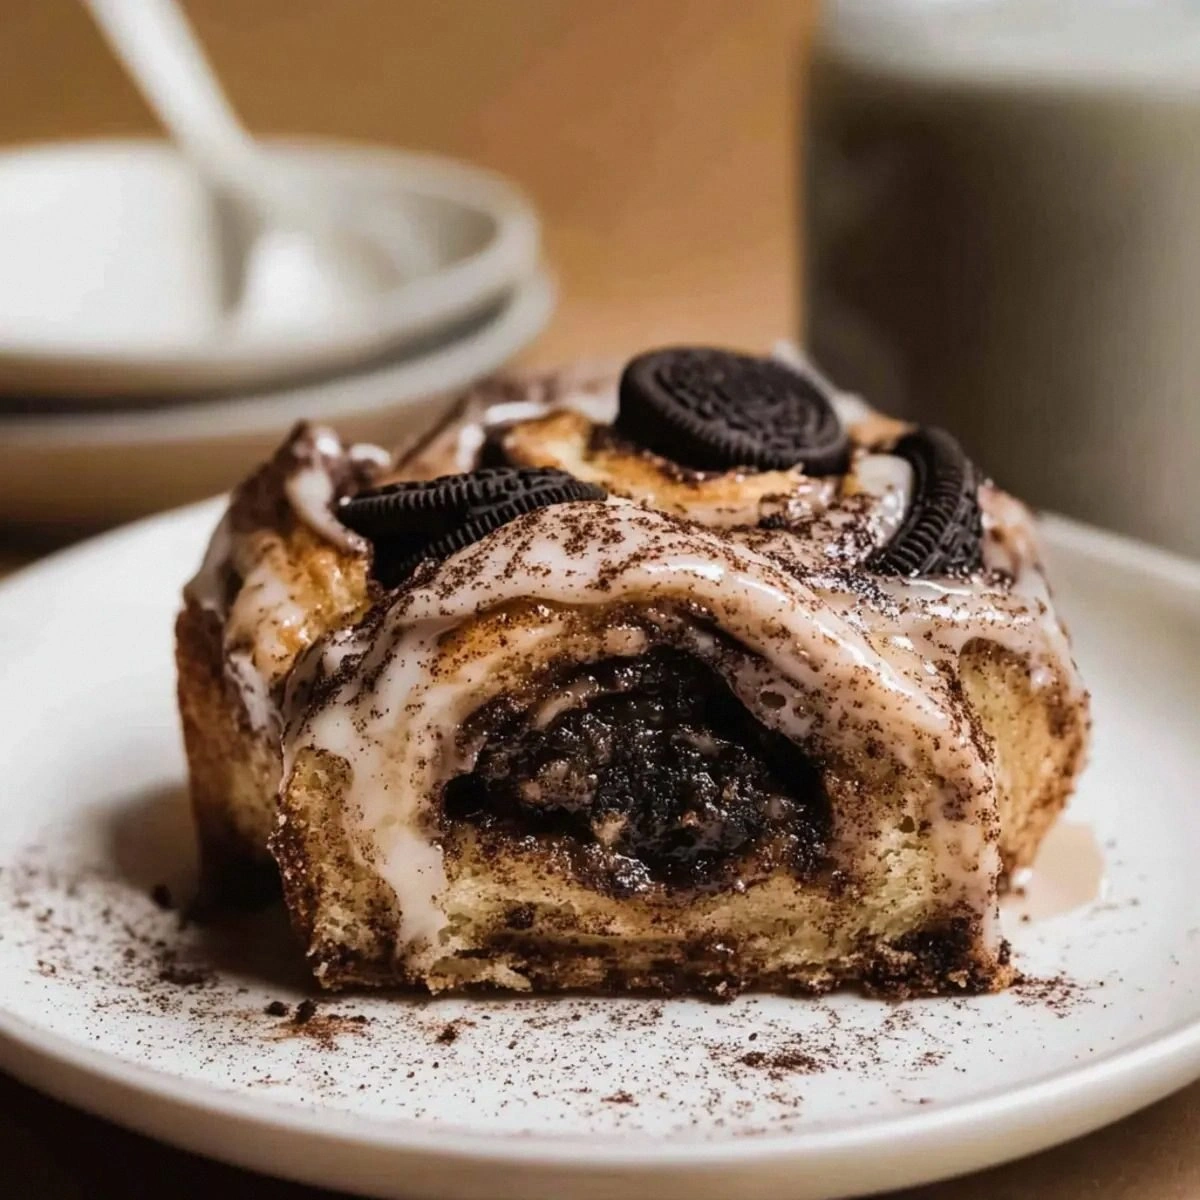
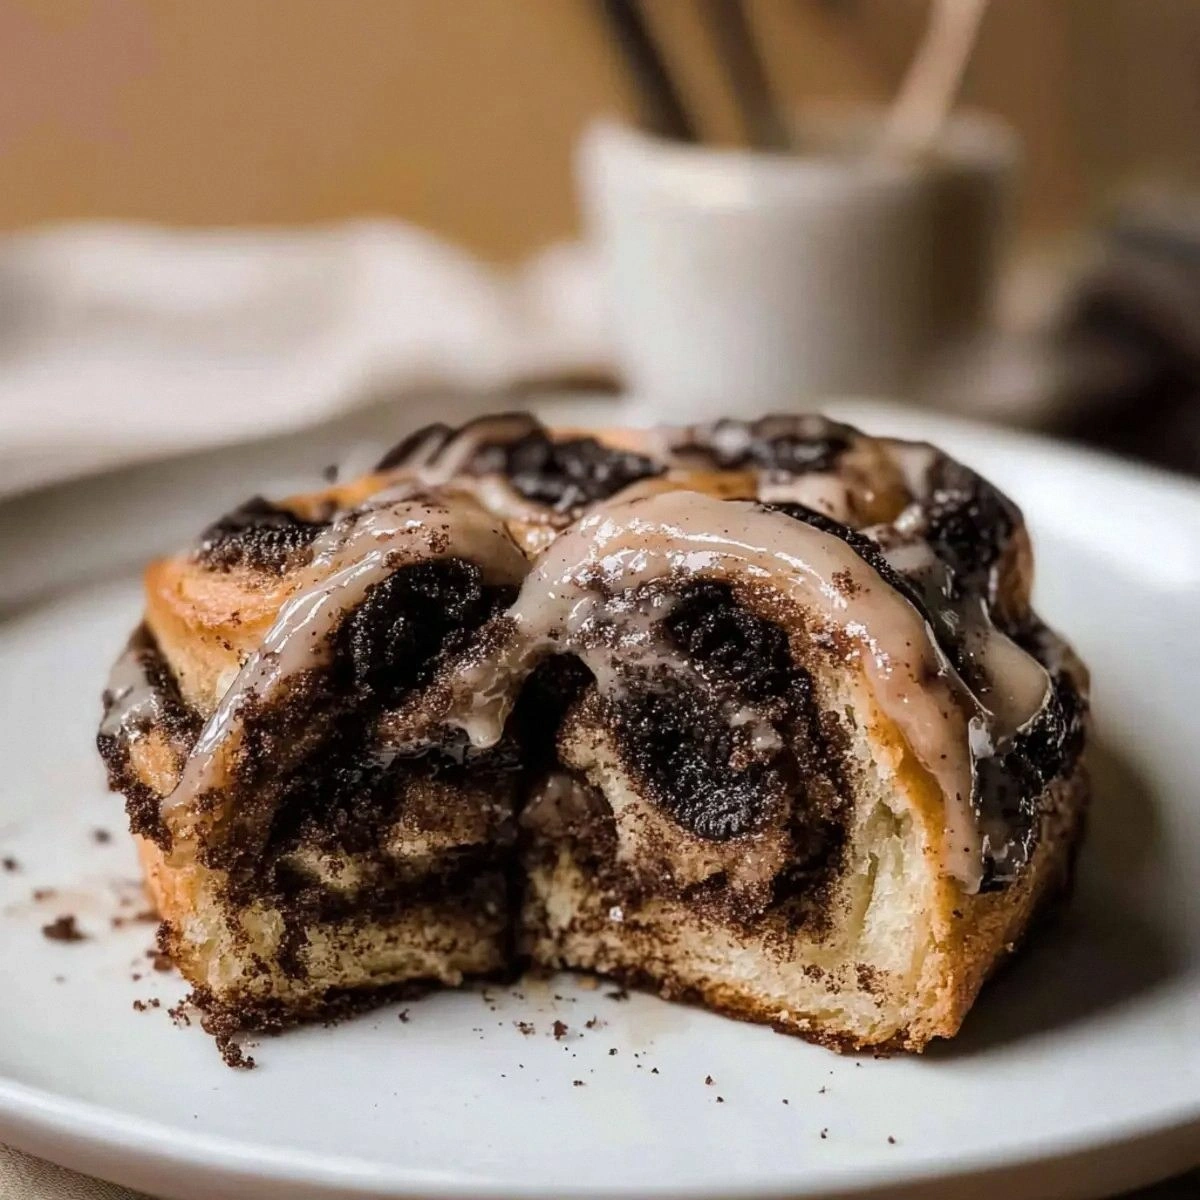
Most cinnamon roll recipes get the sweet‑spice balance right but completely miss the opportunity for a surprise element—like a hidden treasure in a pirate chest. Most of them also skimp on the richness of the frosting, leaving you with a glaze that’s more water than wonder. My version, however, layers a silky cream cheese frosting infused with a hint of vanilla, and the dough itself is studded with dark brown sugar, cocoa, and a whole cup of crushed Oreos that melt into pockets of chocolatey crunch. The result is a roll that’s soft, fluffy, and decadently dense all at once—hands down the best version you’ll ever make at home.
And here’s the kicker: the secret weapon is a splash of Dutch‑process cocoa powder that deepens the flavor without turning the rolls bitter, plus a quick‑cooling step that locks in the moisture, making every bite melt in your mouth like butter on a hot pancake. I’ll be honest—I ate half the batch before anyone else got a chance to try it, but that’s what happens when you create something this addictive. Okay, ready for the game‑changer? Let me walk you through every single step—by the end, you’ll wonder how you ever made it any other way.
What Makes This Version Stand Out
- Flavor Explosion: The combination of cinnamon, cocoa, and crushed Oreos creates a layered taste that’s sweet, slightly bitter, and irresistibly crunchy.
- Texture Harmony: A soft, pillowy crumb meets pockets of crunchy Oreo bits, delivering a contrast that feels like a surprise party in your mouth.
- Simplicity Meets Sophistication: Despite the impressive flavor profile, the method uses everyday pantry staples and a straightforward mixing process.
- Unique Ingredient Twist: Dutch‑process cocoa adds depth without overpowering the classic cinnamon aroma.
- Crowd‑Pleaser Factor: Even the most skeptical eaters admit these rolls are addictive; they’ll be the star of brunch, birthday parties, or lazy Sunday mornings.
- Ingredient Quality: Using real butter, whole milk, and premium cream cheese ensures a rich, buttery mouthfeel.
- Cooking Method: A gentle rise followed by a high‑heat bake creates a golden crust while keeping the interior ultra‑soft.
- Make‑Ahead Potential: These rolls freeze beautifully and reheat like fresh‑baked wonders, perfect for busy weeks.
Inside the Ingredient List
The Flavor Base
Whole milk (1 cup) is the liquid backbone, providing moisture and a subtle creaminess that helps the dough stay tender. If you swap it for almond milk, you’ll lose some of that buttery richness, though it’s a decent dairy‑free alternative. Choose a cold‑fresh milk straight from the fridge; it reacts better with the yeast, ensuring a steady rise.
The Texture Crew
Active dry yeast (2 tablespoons) is the magical micro‑organism that makes the dough rise. Fresh yeast can be used, but you’ll need about half the amount and a longer proofing time. Unsalted butter (1/4 cup) melts into the dough, creating layers of flakiness; using salted butter will throw off the balance, making the rolls unexpectedly salty.
The Unexpected Star
Crushed Oreos (1 cup) are the surprise element that turns a classic roll into a decadent treat. The cookie bits melt slightly during baking, creating caramelized pockets. If you’re allergic to wheat, try gluten‑free Oreo crumbs and a gluten‑free flour blend, but expect a slightly denser texture.
The Final Flourish
The cream cheese frosting (8 oz cream cheese, 1 cup powdered sugar, 1 tsp vanilla extract, ½ cup heavy whipping cream) adds a tangy, silky finish that balances the sweet roll. If you prefer a lighter topping, substitute half the cream cheese with Greek yogurt, but the signature richness will be slightly muted. Always let the frosting sit at room temperature for a few minutes before spreading; this prevents tearing the warm rolls.
Everything's prepped? Good. Let’s get into the real action…
The Method — Step by Step
Start by warming the whole milk in a saucepan until it reaches about 110°F (just warm to the touch). Sprinkle the active dry yeast over the milk, add the white granulated sugar, and give it a gentle stir. Let this mixture sit for 5‑7 minutes until it becomes foamy, like a cloud of tiny bubbles racing to the surface. This is the moment of truth—if it doesn’t foam, your yeast might be dead, and you’ll need fresh yeast for a proper rise.
Meanwhile, melt the unsalted butter in a separate bowl, then let it cool slightly. In a large mixing bowl, whisk together the flour, kosher salt, dark brown sugar, ground cinnamon, and Dutch‑process cocoa powder. The cocoa not only deepens the color but also adds a subtle bitterness that balances the sweetness of the sugar and Oreos.
Make a well in the dry ingredients and pour in the yeast mixture, the melted butter, and the two large eggs. Using a wooden spoon or a stand mixer with a dough hook, combine everything until a shaggy dough forms. At this point, the dough should feel slightly sticky but manageable—if it’s too dry, add a splash of milk; if too wet, sprinkle a bit more flour.
Turn the dough onto a lightly floured surface and knead for about 5‑7 minutes, or until it’s elastic and smooth. While kneading, fold in the crushed Oreos, distributing them evenly so each bite gets a surprise crunch. This step is pure magic—the Oreo bits will melt slightly, creating pockets of caramelized chocolate.
Place the dough in a lightly greased bowl, cover it with a clean kitchen towel, and let it rise in a warm spot for 1‑1½ hours, or until it has doubled in size. The kitchen should feel warm, like a gentle summer afternoon; if it’s too cool, pop the bowl in an oven that’s been preheated to 200°F for a few minutes, then turned off.
After the dough has risen, punch it down gently to release excess air, then roll it into a rectangle about ½‑inch thick. Spread a generous layer of softened butter, then sprinkle the dark brown sugar, cinnamon, and a second handful of crushed Oreos over the surface. Roll the dough tightly, like a jelly roll, and slice it into 12 even pieces using a sharp serrated knife.
Arrange the rolls in a greased 9×13‑inch baking dish, leaving a little space between each. Cover the dish with foil and let the rolls proof for another 30 minutes; they should puff up noticeably. While they’re proofing, preheat your oven to 375°F (190°C). This second rise is crucial for that airy interior.
Place the rolls in the oven and bake for 20‑25 minutes, or until the tops are a deep golden brown and the edges start pulling away from the pan. You’ll know they’re done when the aroma of cinnamon, cocoa, and toasted Oreo fills the kitchen, making your neighbors wonder what’s cooking.
While the rolls bake, whip the cream cheese, powdered sugar, vanilla extract, and heavy whipping cream together until smooth and fluffy. This frosting should be thick enough to hold its shape but soft enough to spread. Once the rolls are out of the oven, let them cool for 5 minutes, then slather the frosting generously over each roll. The heat from the rolls will melt the frosting slightly, creating a glossy, indulgent glaze.
That’s it — you did it. But hold on, I’ve got a few more tricks that’ll take this to another level…
Insider Tricks for Flawless Results
The Temperature Rule Nobody Follows
Never let cold ingredients touch the yeast mixture; even a few degrees can slow the rise dramatically. Keep your butter, eggs, and milk at room temperature for at least 30 minutes before you start. I once tried to rush the process with chilled butter, and the dough turned dense, like a stale biscuit. Trust me, a little patience at the start pays off in a cloud‑like crumb.
Why Your Nose Knows Best
During the second proof, rely on your sense of smell rather than the clock. When the dough starts emitting a sweet, yeasty aroma, it’s ready to bake. If you bake too early, the rolls will be dense; too late, and they’ll over‑proof, collapsing into a soggy mess. Your nose is the ultimate timer.
The 5‑Minute Rest That Changes Everything
After pulling the rolls from the oven, let them rest uncovered for exactly five minutes before frosting. This short pause lets the interior set, preventing the frosting from soaking in and making the rolls soggy. I’ve seen beginners slather frosting immediately, and the result is a soggy, gummy top—avoid that fate.
Oreo Crumble Rescue
If you find the Oreo crumbs sticking together during mixing, sprinkle a tiny pinch of cornstarch over them before folding into the dough. This keeps the crumbs separate, ensuring each bite gets a distinct crunch. A friend tried this once and swore by the texture boost.
Steam‑Boost Finish
Place a shallow pan of water on the lower rack of the oven while the rolls bake. The steam creates a slightly crisp exterior while keeping the inside ultra‑soft. This technique is borrowed from artisan bread baking and works wonders for sweet rolls.
Creative Twists and Variations
This recipe is a playground. Here are some of my favorite ways to switch things up:
White Chocolate Oreo Delight
Swap the dark brown sugar for an equal amount of white sugar and add ½ cup white chocolate chips to the filling. The result is a lighter, sweeter roll that still boasts the iconic Oreo crunch.
Mocha Madness
Replace half of the Dutch‑process cocoa with finely ground espresso powder and add a splash of coffee‑flavored liqueur to the dough. This gives the rolls a sophisticated mocha note that pairs perfectly with the cream cheese frosting.
Nutty Crunch
Fold in ¼ cup toasted chopped hazelnuts or pecans with the Oreo crumbs. The nuts add a buttery depth and an extra layer of texture that makes each bite feel like a surprise.
Seasonal Berry Burst
Mix in ½ cup freeze‑dried raspberry powder into the dough and drizzle a raspberry glaze over the frosting. The tartness cuts through the sweetness, creating a balanced flavor profile ideal for spring brunches.
Vegan Friendly
Replace the butter with coconut oil, use plant‑based milk, and swap cream cheese for a vegan cream cheese alternative. The rolls remain fluffy, and the Oreo crumbs still deliver that beloved crunch.
Gluten‑Free Version
Use a 1‑to‑1 gluten‑free flour blend and add 1 tablespoon xanthan gum to mimic gluten elasticity. The texture will be slightly denser, but the Oreo pockets still provide delightful bites.
Storing and Bringing It Back to Life
Fridge Storage
Place the cooled rolls in an airtight container and store them in the refrigerator for up to 4 days. The frosting will firm up slightly, but a quick microwave zap (10‑15 seconds) will bring them back to a soft, melt‑in‑your‑mouth state.
Freezer Friendly
Wrap each roll individually in plastic wrap, then place them in a freezer‑safe zip‑lock bag. They’ll keep for up to 2 months. When you’re ready to enjoy, thaw overnight in the fridge, then warm in a preheated 350°F oven for 5‑7 minutes. The heat revives the crumb and melts the frosting beautifully.
Best Reheating Method
Before reheating, add a tiny splash (about a teaspoon) of water to the bottom of the container and cover loosely with foil. The steam generated restores moisture, ensuring the rolls are as soft as the day they were baked. This trick works for both fridge‑stored and frozen rolls.