The kitchen was a battlefield that night, a place where flour dusted the air like snow and the scent of ube—those deep, violet orchids of the Philippines—hung heavy. I had just pulled a bag of ube puree from the freezer and, in a moment of culinary rebellion, decided to turn it into something more than a simple dessert. The idea of ube mochi, that chewy, translucent treat that feels like a hug in a bite, sparked a fire in me that I hadn’t felt since that first time I tasted a Japanese mochi at a street stall in Tokyo.
Picture this: a pot on the stove, the ube puree swirling like a midnight river, the sweet aroma rising in waves that make your nose twitch in anticipation. The sound of the mixture thickening is a soft hiss, like a secret being whispered into the pot. The texture changes from liquid to a thick, almost syrupy paste, and then to a dough that glistens with a subtle sheen. The moment you touch it, it’s warm, pliable, and the faint scent of vanilla and coconut lingers, promising a sweet escape.
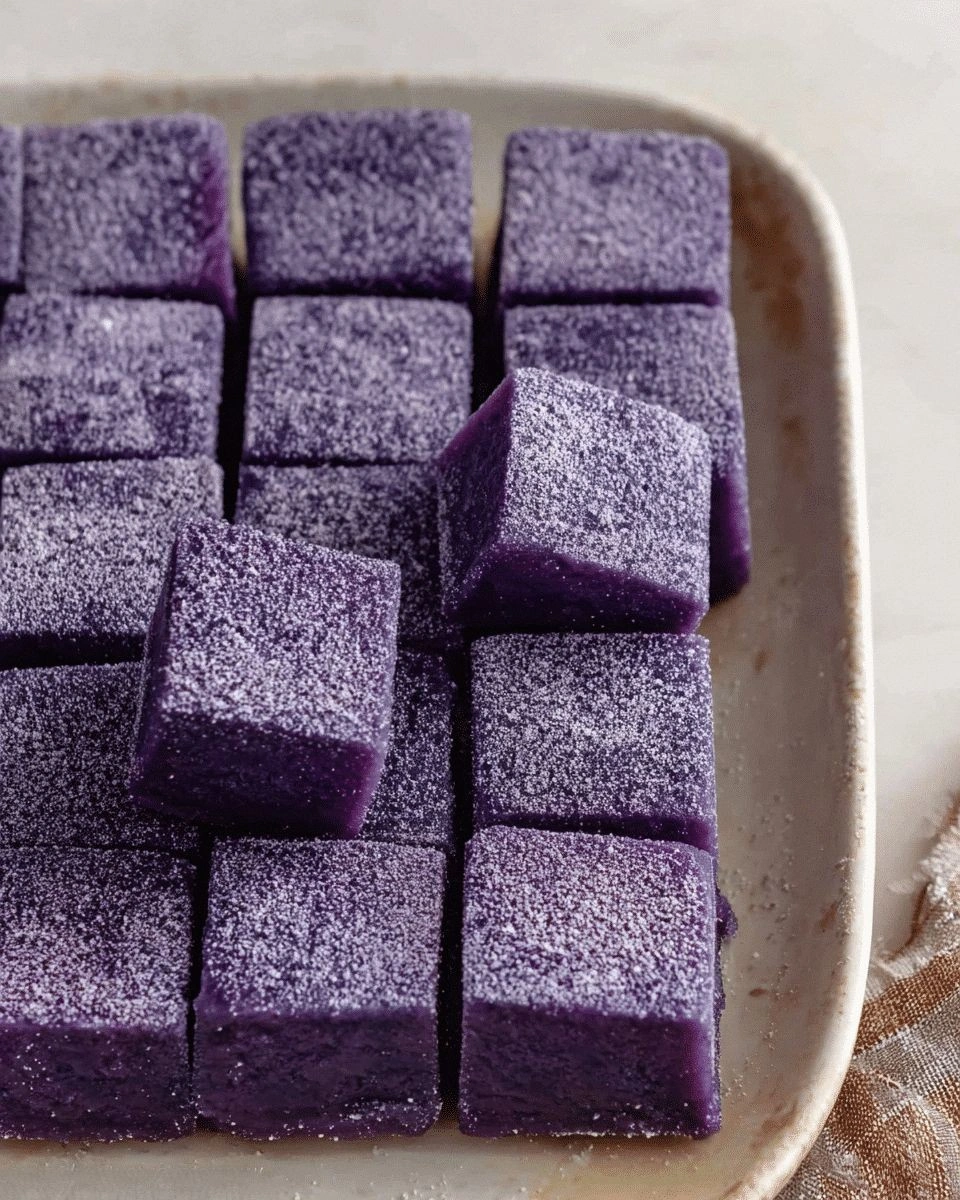
I swear, if you’ve ever tried a standard mochi recipe that ends up sticky or too dense, this version will feel like a revelation. The secret lies in the balance of mochiko flour and cornstarch, which together give that signature chew without turning into a rubbery nightmare. The ube puree isn’t just a color; it’s a flavor punch that coats every bite with a mellow sweetness and a hint of earthiness that lingers long after the last crumb. The result is a dessert that feels both exotic and comforting, like a purple hug from the inside out.
I’ve spent months experimenting with different ratios, but the version you’ll find here is hands down the best you’ll ever make at home. The dough is silky, the flavor is vibrant, and the finish is a soft, almost ethereal melt that makes you want to eat the whole batch before anyone else gets a taste. I dare you to taste this and not go back for seconds. Trust me, the moment you bite into that first piece, you’ll know the difference between a good mochi and a masterpiece.
Most recipes get this completely wrong. They either overwork the dough, leading to a rubbery texture, or they undercook it, resulting in a soggy mess. What sets this recipe apart is the precise timing and the subtle addition of a pinch of salt to balance the sweetness, plus the optional matcha dusting that adds a layer of umami and a pop of green. The method is straightforward, but each step is a crucial piece of the puzzle that comes together like a well‑orchestrated symphony.
If you’ve ever struggled with mochi, you’re not alone—and I’ve got the fix. The trick is to keep the dough at the right temperature and to fold it gently to preserve the air pockets that give mochi its signature chew. And don’t worry about the purple color—it’s not just a visual treat; it’s a natural pigment that’s rich in antioxidants, adding a subtle health boost to this indulgent dessert.
Picture yourself pulling this out of the oven, the whole kitchen smelling incredible, the soft pink light of the kitchen lamp casting a glow over the glossy mochi. The sound of the first bite is a satisfying crack, followed by a gentle, sweet melt that feels like a secret whispered in your mouth. That sizzle when it hits the pan? Absolute perfection. The aroma will linger in the air, drawing people in like a sweet magnet.
Okay, ready for the game‑changer? This next part? Pure magic. I’m going to walk you through every single step, from selecting the finest ube to the final dusting of matcha, so by the end, you’ll wonder how you ever made it any other way. Let’s dive in.
What Makes This Version Stand Out
- Flavor: The deep, sweet, slightly earthy taste of fresh ube puree sets this mochi apart from the bland, overly sugary versions you’ll find online.
- Texture: The combination of mochiko and cornstarch creates a silky chew that melts in your mouth without becoming rubbery.
- Simplicity: With only nine ingredients and a straightforward method, you can achieve a professional result in under an hour.
- Visual Appeal: The vibrant purple hue is natural and eye‑catching, making each bite feel like a piece of art.
- Versatility: Add matcha, sesame, or a splash of coconut milk to tweak the flavor profile for different occasions.
- Make‑ahead Potential:
- Ingredient Quality: Using fresh, high‑quality ube puree ensures that the dessert is both nutritious and delicious.
- Cooking Method: The precise heat control and gentle folding keep the dough light and airy.
Inside the Ingredient List
The Flavor Base
At the heart of this mochi is the ube puree, a sweet, naturally purple sweet potato that offers a mild, nutty flavor. It’s the star that gives the mochi its distinctive color and subtle sweetness. If you skip the ube, you lose the unique taste profile that makes this dessert stand out. For a more intense flavor, use freshly roasted ube; for convenience, frozen puree works just as well.
The Texture Crew
Mochiko flour is the glue that holds the mochi together. It’s a fine, white powder made from glutinous rice, and it gives the dough its chewy, elastic quality. Cornstarch is the silent hero that lightens the dough, preventing it from becoming too dense. Together, they create a silky, melt‑in‑your‑mouth texture that is the hallmark of authentic mochi.
The Unexpected Star
A pinch of salt is the unsung hero that balances the sweetness, bringing out the natural flavors of the ube and the flour. Salt is often overlooked in desserts, but it’s essential for depth. If you’re watching sodium, you can reduce the amount, but the flavor will be noticeably flatter.
The Final Flourish
Optional ingredients like sesame seeds or matcha powder add layers of flavor and texture. Sesame seeds give a nutty crunch, while matcha offers a subtle bitterness that complements the sweetness. These additions turn a simple dessert into a multi‑sensory experience.
Everything's prepped? Good. Let's get into the real action…
The Method — Step by Step
- Begin by whisking the ube puree, sugar, and water in a medium saucepan until the mixture is smooth. Heat over medium-low, stirring constantly, until it reaches a gentle simmer. The mixture should thicken slightly, forming a glossy paste. This step is crucial because it ensures the sweetness is evenly distributed.
- In a separate bowl, combine mochiko flour, all‑purpose flour, cornstarch, and salt. Sift the dry ingredients to eliminate lumps. This fine texture is key to a smooth dough; any clumps will ruin the chew.
- Pour the dry mixture into the saucepan with the ube paste. Stir vigorously with a wooden spoon until the flour is fully incorporated. The dough will begin to pull away from the sides of the pan. At this point, the smell should be sweet and slightly nutty.
- Transfer the dough onto a silicone‑lined baking sheet. Let it cool for about five minutes; it should still be hot but not scorching. This cooling period helps the dough set slightly, making it easier to handle.
- Dust your work surface with cornstarch and gently roll the dough into a 1‑inch thick rectangle. The cornstarch prevents sticking and keeps the dough from becoming tacky. If the dough is too sticky, add a pinch more cornstarch, but be careful not to overdo it.
- Using a sharp knife, cut the rectangle into bite‑size squares or rectangles. For a classic look, use a round cookie cutter. The edges should be clean, and the squares should be uniform in size.
- Watch Out: If you press too hard when cutting, the mochi will lose its airy texture and become dense. Gently press the knife through the dough, letting the blade glide smoothly.
- Place the cut pieces on a parchment‑lined tray. Dust lightly with cornstarch to prevent sticking. If you’re using matcha, sprinkle it over the mochi now for an extra layer of flavor.
- Bake in a preheated oven at 350°F (175°C) for 15–18 minutes, or until the edges turn a light golden brown. The center should remain slightly translucent, indicating that the mochi is cooked through but still moist.
- Remove from the oven and let the mochi cool on the tray for five minutes before transferring to a wire rack to cool completely. This final cooling step allows the mochi to set properly, preventing it from sticking together.
That's it — you did it. But hold on, I've got a few more tricks that'll take this to another level…
Insider Tricks for Flawless Results
The Temperature Rule Nobody Follows
Many people bake mochi at a high temperature, hoping for a quick finish, but this often results in a dry exterior. The secret is to keep the oven at a moderate 350°F (175°C) and monitor the internal temperature with a food thermometer. Aim for 200°F (93°C) inside; this ensures the mochi cooks evenly without losing moisture.
Why Your Nose Knows Best
Your sense of smell is a powerful tool in judging doneness. As the mochi bakes, a faint caramel aroma will rise. When you notice a subtle nutty scent mingling with sweetness, it’s a sign that the sugars are caramelizing just enough to give depth without burning.
The 5‑Minute Rest That Changes Everything
After removing the mochi from the oven, let it rest for five minutes on the tray. This rest period allows the steam to redistribute, preventing the mochi from collapsing or sticking together. I once skipped this step, and the result was a clumpy, uneven dessert that didn’t look as good on the plate.
Dusting With Corniest Cornstarch
Dusting the mochi with cornstarch before baking is essential. It creates a barrier that keeps the mochi from sticking to the tray, and it also helps to keep the surface dry, resulting in a smoother finish. If you’re allergic to cornstarch, arrowroot powder is a suitable substitute.
Keeping the Ube Fresh
If you’re using frozen ube puree, let it thaw in the refrigerator overnight. This gradual thawing prevents a sudden temperature drop in the dough, which can cause it to become too cold and sticky. A quick microwave thaw can also work, but be sure to stir the puree to distribute the heat evenly.
Creative Twists and Variations
This recipe is a playground. Here are some of my favorite ways to switch things up:
Matcha‑Infused Ube Mochi
Swap the plain ube puree for a blend of ube and matcha powder. The green tea adds a slight bitterness that balances the sweetness and gives the mochi a sophisticated flavor profile. This variation is perfect for a tea party or a spring gathering.
Sesame‑Glazed Mochi
After baking, toss the mochi in a mixture of toasted sesame seeds and a splash of soy sauce. The saltiness of the soy sauce contrasts with the sweetness, while the sesame seeds add a crunchy texture. This version is great for an Asian fusion menu.
Chocolate‑Coated Ube Mochi
Dip half of the mochi in melted dark chocolate, then sprinkle with crushed nuts. The chocolate adds a rich, velvety layer that complements the delicate ube flavor. It’s a crowd‑pleaser for dessert bars or holiday parties.
Ube Mochi with Coconut Milk
Replace the water in the dough with coconut milk for a tropical twist. The coconut adds a subtle sweetness and a hint of vanilla, making the mochi feel like a beach vacation in every bite. This version pairs well with a fresh fruit salad.
Mini Ube Mochi Bites
Cut the dough into smaller, bite‑size pieces and bake them for a shorter time. These mini mochi are perfect for a snack or as a sweet ending to a meal. They also hold up well when served at a buffet.
Ube Mochi with a Citrus Twist
Add a splash of yuzu or lemon zest to the dough for a bright, refreshing flavor. The citrus cuts through the sweetness, giving the mochi a lively finish that’s ideal for summer gatherings.
Storing and Bringing It Back to Life
Fridge Storage
Store mochi in an airtight container at room temperature for up to 3 days. The mochi will stay chewy and fresh if kept away from direct sunlight. If you notice the mochi drying out, sprinkle a few drops of water on it before sealing the container.
Freezer Friendly
Wrap the mochi individually in plastic wrap, then place them in a freezer bag. Freeze for up to 2 weeks. When you’re ready to enjoy, let the mochi thaw at room temperature for 15 minutes before reheating.
Best Reheating Method
Reheat mochi in a steamer for 2–3 minutes or in a microwave on low power for 10–15 seconds. Adding a tiny splash of water before reheating creates steam, which restores the mochi’s original softness. Avoid overheating, or the mochi will become rubbery.