Introduction
Picture this: I was halfway through a week of bland, over‑cooked chicken, and a friend dared me to turn a plain breast into something that would make even the most skeptical taste buds run for the hills. I grabbed a packet of taco seasoning, a splash of olive oil, and a handful of chipotle ranch dressing, and I promised myself that this would be the most unforgettable burrito anyone had ever tasted. The kitchen smelled like a smoky fiesta, the sizzle on the grill was music, and the aroma of fresh avocado hit me like a summer breeze. I swear, that first bite was so bold it sent my taste buds into overdrive, and I could hear my friends’ jaws dropping in unison. If you’ve ever stared at a plain chicken breast and felt the urge to do something daring, stick with me—by the end, you’ll wonder how you ever made it any other way.
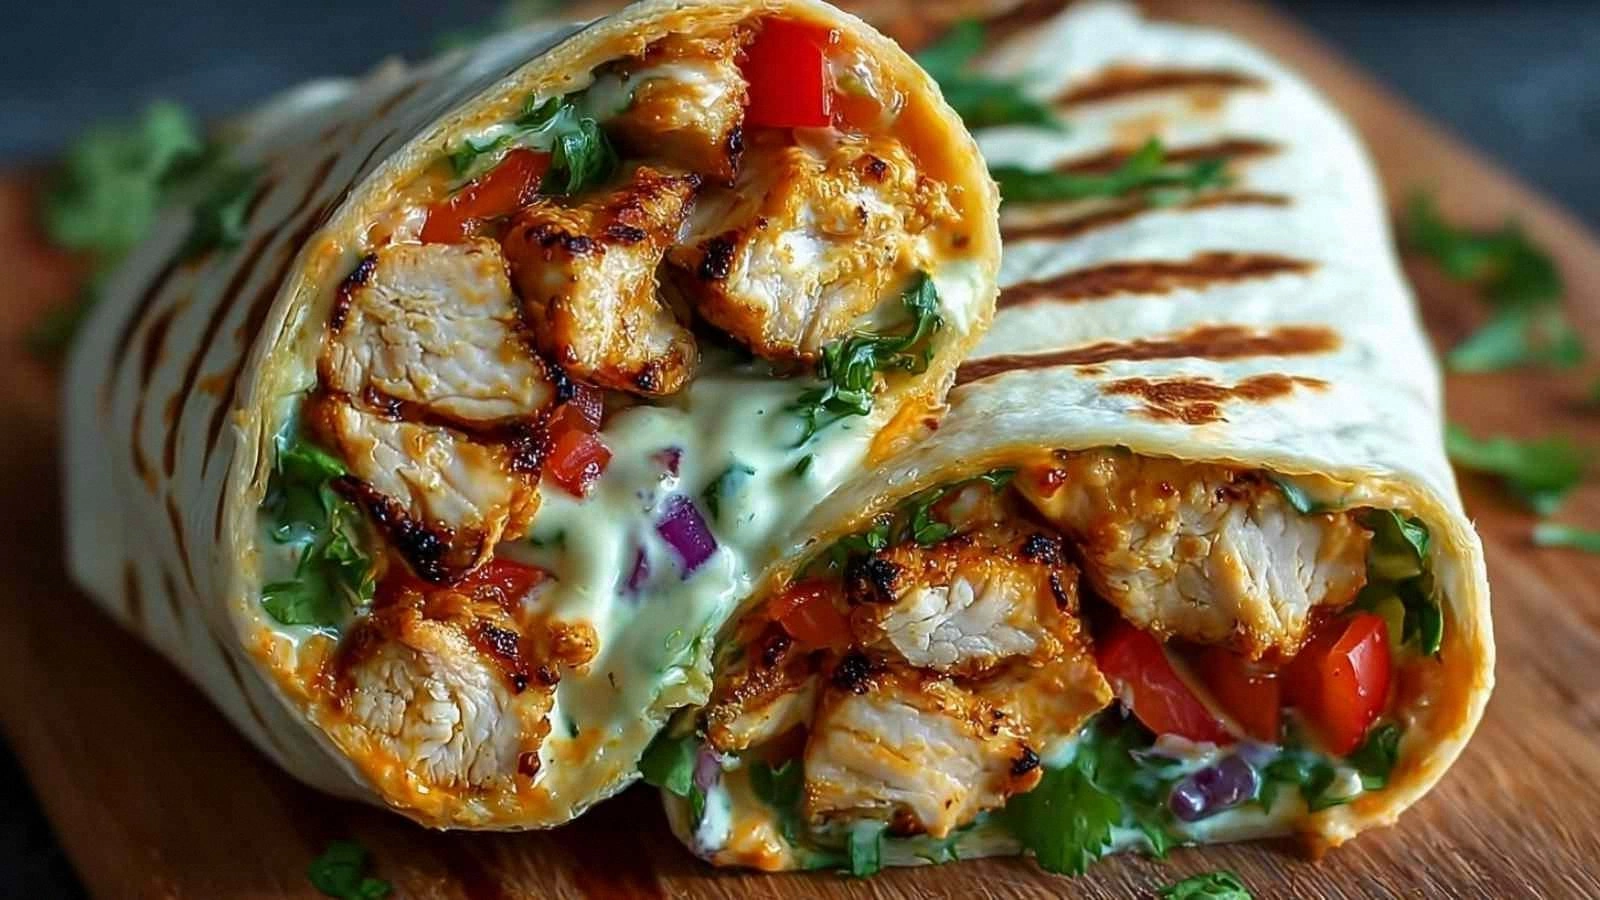
I’m not just talking about a new recipe; I’m talking about a culinary revelation that turns the ordinary into the extraordinary. The secret lies in the marriage of smoky chipotle flavor with the cool, creamy whisper of ranch, all wrapped in a warm, slightly charred tortilla that holds everything together like a well‑tuned orchestra. Every bite is a harmony of textures: the crunch of lettuce, the juiciness of diced tomatoes, and the melt of cheese that swirls into the chipotle ranch, creating a sauce that coats the chicken like velvet. The moment you take a bite, the heat of the chipotle fades into a lingering, savory finish that makes you crave more. I dare you to taste this and not go back for seconds.
What makes this version stand out is that it’s not just a burrito; it’s a showcase of flavor layering, technique, and the art of balancing heat with creaminess. The chicken is marinated briefly, ensuring it stays moist and flavorful without sacrificing that smoky char. The tortillas are lightly toasted, adding a subtle crunch that contrasts beautifully with the soft interior. The chipotle ranch dressing is homemade, giving it a depth that store‑bought versions can’t match. And let’s not forget the final touch: a slice of ripe avocado that adds a buttery finish and a pop of green that looks as good as it tastes.
Most recipes get this completely wrong. Here’s what actually works: the seasoning, the grilling technique, and the order in which you assemble the burrito. The result is a dish that’s hands down the best version you’ll ever make at home, with a flavor profile that’s both bold and comforting. Picture yourself pulling this out of the oven, the whole kitchen smelling incredible, and the aroma of chipotle and ranch mingling with fresh herbs. And now, let’s walk through every single step—by the end, you’ll wonder how you ever made it any other way.
What Makes This Version Stand Out
- Flavor Depth: The chipotle ranch dressing is homemade, blending smoky chipotle with creamy ranch for a complex taste that lingers on the palate.
- Texture Contrast: Lightly toasted tortillas provide a subtle crunch, while the fresh lettuce and tomatoes add a crisp bite that balances the creamy filling.
- Ingredient Quality: Using fresh, high‑quality chicken breast ensures a juicy center that doesn’t dry out during grilling.
- Ease of Assembly: The recipe requires no advanced techniques—just a few simple steps that anyone can master.
- Crowd‑Pleaser: Whether you’re feeding a family or a group of friends, this burrito delivers a satisfying meal that everyone will rave about.
- Make‑Ahead Friendly: The components can be prepared a day ahead, making it a perfect option for busy weeknights.
- Health‑Conscious: With a balanced mix of protein, healthy fats, and vegetables, it’s a meal that feels indulgent yet nourishing.
- Visual Appeal: The vibrant colors of avocado, tomatoes, and lettuce make this dish Instagram‑worthy and mouth‑watering.
Alright, let's break down exactly what goes into this masterpiece. And before we dive deeper, here’s a quick kitchen hack that will elevate your grilling game.
Inside the Ingredient List
The Flavor Base
The foundation of any great burrito is the flavor base, and in this recipe it’s a simple yet powerful combination of olive oil and taco seasoning. The olive oil coats the chicken, helping the seasoning adhere and preventing the meat from drying out during grilling. The taco seasoning adds a savory, slightly smoky kick that complements the chipotle in the dressing. If you skip the seasoning, you’ll end up with bland, lifeless chicken that won’t inspire the rest of the ingredients. Swap the packet for homemade taco seasoning for an extra punch of flavor, but be sure to keep the salt level moderate.
The Texture Crew
Texture is everything in a burrito. The large flour tortillas provide a soft, pliable base that can hold the filling without tearing. Toasting them lightly on the grill adds a subtle crunch and a charred aroma that elevates the overall experience. The shredded lettuce offers a crisp, fresh bite that contrasts the creamy dressing, while the diced tomatoes add juiciness and a burst of acidity. Skipping any of these textures would leave the burrito feeling flat and unbalanced. If you’re looking for a gluten‑free option, substitute with corn tortillas, but be careful not to overcook them.
The Unexpected Star
The chipotle ranch dressing is the unexpected star that sets this burrito apart from the rest. It blends smoky chipotle peppers with creamy ranch, creating a sauce that coats the chicken and tortillas like velvet. The dressing’s heat is tempered by the cool ranch, making it approachable for all taste levels. If you’re a heat‑lover, add a splash of hot sauce for extra kick. If you prefer a milder version, reduce the chipotle or use a milder pepper. This dressing can also double as a dip for tortilla chips, making it a versatile addition to your kitchen.
The Final Flourish
The final flourish is the slice of ripe avocado, which adds a buttery texture and a subtle, nutty flavor that balances the heat of the chipotle. Avocado also contributes healthy fats, making the burrito more satiating. If you’re not a fan of avocado, substitute with a splash of lime juice for acidity, or a drizzle of olive oil for richness. The cheese, though only half a cup, melts into the hot filling, creating a gooey layer that ties everything together. This combination of fresh produce and creamy elements makes the burrito a sensory delight.
Everything's prepped? Good. Let's get into the real action.
The Method — Step by Step
- Start by marinating the chicken breast in olive oil, taco seasoning, and a pinch of salt for 10 minutes. This brief soak allows the seasoning to penetrate the meat, ensuring each bite is flavorful. While the chicken marinates, preheat a medium‑high grill or skillet to medium‑high heat. The grill should be hot enough to give a good sear but not so hot that it burns the exterior before the interior cooks through.
- Place the chicken on the grill and cook for 5 minutes on each side, or until the internal temperature reaches 165°F (74°C). Flip only once to preserve the charred edges that add texture. Keep an eye on the grill; if the heat is too high, the outside will burn before the inside is done.
- While the chicken rests, lightly toast the flour tortillas on the grill for 30 seconds on each side. This step gives them a slightly crisp exterior and a warm, pliable interior that makes folding easier. If you’re using a skillet, simply place them on a hot pan for a few seconds each side.
- Slice the rested chicken into thin strips. The thinness ensures even distribution of flavor and prevents a dense, heavy bite. If you prefer a chunkier texture, you can leave the strips a bit thicker.
- Spread a generous layer of chipotle ranch dressing over the inside of each tortilla. The dressing should coat the tortilla evenly, creating a flavorful base that holds the fillings together. If you like a milder heat, reduce the amount of dressing or use a milder pepper.
- Layer the sliced chicken, shredded lettuce, diced tomatoes, shredded cheese, and sliced avocado on top of the dressing. The order is important: start with the chicken, then add the vegetables, and finish with the cheese and avocado to keep everything in place.
- Fold the sides of the tortilla inward, then roll tightly from the bottom up. The goal is to create a compact, handheld burrito that’s easy to eat on the go. If you’re worried about the filling spilling out, use a toothpick to secure the roll.
- Optional: Wrap the finished burrito in parchment paper and grill for an additional 1–2 minutes to seal the edges. This step gives the burrito a crisp, golden finish and locks in the juices.
- Let the burrito rest for 2 minutes before slicing. This allows the filling to set, preventing the ingredients from sliding out when you cut it.
- Serve immediately with a side of lime wedges or a sprinkle of fresh cilantro for a burst of freshness.
That's it—you did it. But hold on, I've got a few more tricks that'll take this to another level.
Insider Tricks for Flawless Results
The Temperature Rule Nobody Follows
Many cooks think that a higher grill temperature is always better, but the truth is that a medium‑high heat (around 375°F) gives the chicken a perfect sear without overcooking it. This temperature allows the seasoning to caramelize, creating a deeper flavor profile. If you grill at too high a temperature, the outside will burn before the inside reaches 165°F, resulting in dry, unevenly cooked chicken.
Why Your Nose Knows Best
Your sense of smell can guide you through the cooking process. When the chicken hits the grill, you’ll hear a pleasant sizzle that signals the Maillard reaction is underway. If the aroma turns sharp or burnt, it’s time to reduce the heat or move the chicken to a cooler spot. Trusting your nose ensures the dish stays juicy and flavorful.
The 5-Minute Rest That Changes Everything
Letting the chicken rest for five minutes after grilling allows the juices to redistribute, ensuring every bite is moist. Skipping this step can result in a dry, uneven texture that ruins the burrito’s overall experience. Even a brief pause makes a noticeable difference in mouthfeel.
Keep the Tortilla Warm
Warm tortillas are easier to fold and less likely to tear. If you’re not grilling, wrap them in a damp towel and microwave for 10 seconds. This simple trick keeps the tortilla pliable and prevents the filling from slipping out during assembly.
Use a Food Processor for the Dressing
If you’re making the chipotle ranch dressing from scratch, pulse the ingredients in a food processor for a silky texture. This ensures the oil and peppers blend smoothly, preventing clumps and giving the dressing a consistent mouthfeel.
Creative Twists and Variations
This recipe is a playground. Here are some of my favorite ways to switch things up:
Southwest Power Burrito
Swap the flour tortillas for corn tortillas, and add black beans and corn kernels for a heartier, Southwest-inspired flavor. The beans add protein and fiber, while the corn gives a sweet crunch that pairs well with the chipotle ranch.
Veggie‑Rich Burrito
Omit the chicken and replace it with sautéed mushrooms, spinach, and zucchini. This vegetarian version keeps the same flavor profile while adding a boost of nutrients and a satisfying umami depth.
Spicy Kick Burrito
Add a handful of fresh sliced jalapeños to the filling for an extra punch of heat. Pair it with a drizzle of lime crema to balance the spiciness with a creamy, citrusy finish.
Greek Twist Burrito
Use feta cheese and a drizzle of tzatziki instead of chipotle ranch. The cool, cucumber‑y sauce replaces the smoky heat, creating a Mediterranean-inspired burrito that’s both refreshing and comforting.
Breakfast Burrito
Replace the chicken with scrambled eggs, add diced bell peppers, and top with a sprinkle of cheddar. This version turns the recipe into a hearty breakfast that’s perfect for a weekend brunch.
Low‑Carb Burrito
Swap the flour tortillas for lettuce wraps and use a low‑sugar taco seasoning. The result is a lighter, low‑carb version that still delivers all the flavor and texture you love.
Storing and Bringing It Back to Life
Fridge Storage
Store the assembled burritos in airtight containers for up to 3 days. Keep the chipotle ranch dressing separate until you’re ready to eat to prevent the tortillas from becoming soggy. When ready, microwave on high for 1 minute or until heated through.
Freezer Friendly
Wrap burritos tightly in foil and place in freezer bags. They’ll stay fresh for up to 2 months. To reheat, remove the foil, wrap in a damp paper towel, and microwave for 2–3 minutes. The paper towel keeps the tortilla from drying out.
Best Reheating Method
For the best flavor, reheat on a hot skillet for 2 minutes on each side, or use a grill if you have one. This method restores the tortilla’s crispness and melts the cheese again. Add a tiny splash of water before reheating to steam the burrito back to perfection.