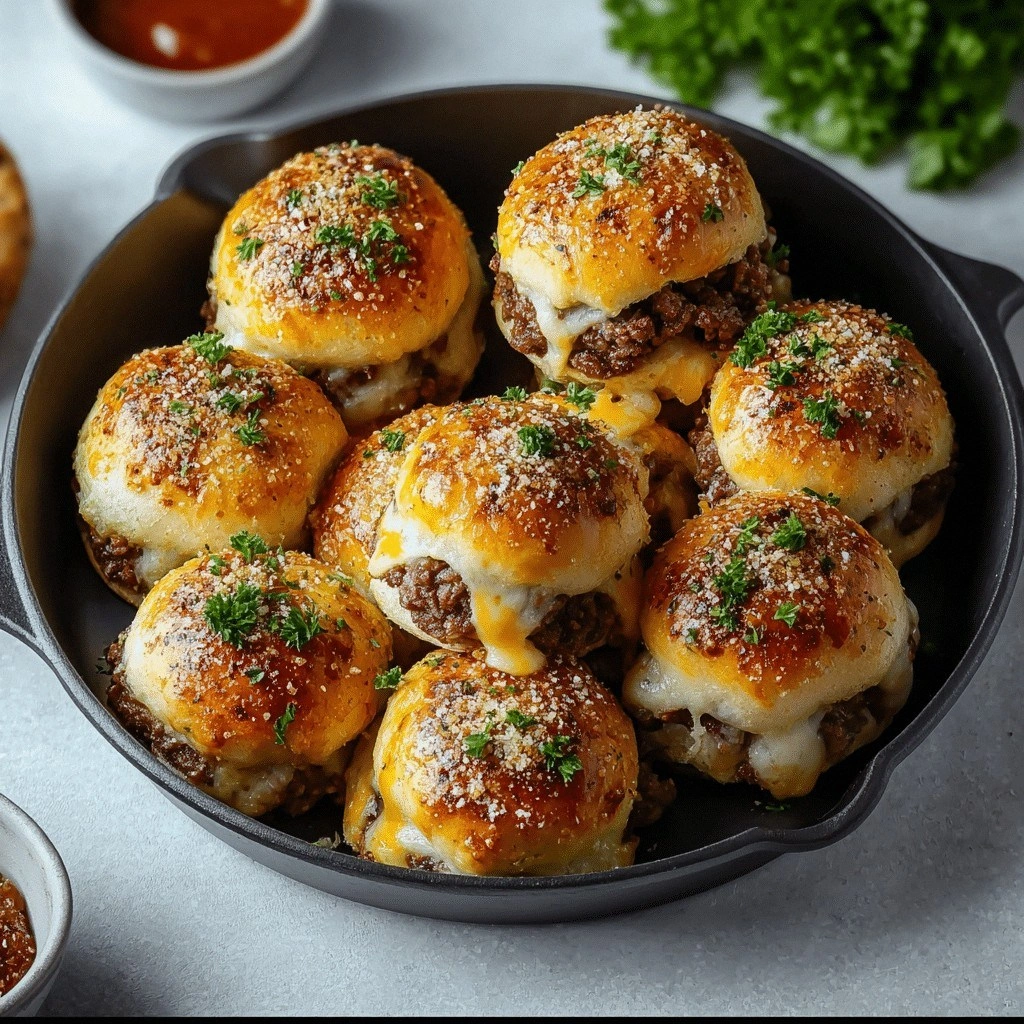
I remember the night I was supposed to impress my friends with a simple burger, only to have the grill sputter like a dying firecracker. The meat was dry, the bun was a sad, soggy cloud, and my garlic‑parmesan sauce tasted like it had been left to sit in a forgotten cupboard. That disaster sparked a mission: to create a burger that would make the kitchen smell like a summer barbecue and taste like a hug wrapped in cheese. I spent hours researching, tweaking ratios, and finally settled on a recipe that balances savory, creamy, and a hint of smoky char. The result? A Juicy Garlic Parmesan Cheesebu that’s so good, it will make you question every other burger you’ve ever made.
Imagine walking into your kitchen, the air thick with the scent of sizzling garlic and melted cheese. The sound of the pan popping is a promise of crunch, while the sight of golden patties forming a glossy sheen makes your stomach growl. The first bite is a burst of umami, the garlic sharp, the parmesan rich, and the cheese so molten it drips like warm honey. The bun, toasted just enough to hold the moisture, gives a satisfying snap before it yields to the savory interior. You close your eyes, savor the moment, and realize this is the burger that will forever live in your memory.
What sets this version apart is that it’s not just a recipe; it’s a culinary revelation. The blend of garlic and parmesan isn’t just seasoning—it’s the soul of the burger, a flavor profile that coats the meat like velvet. The use of fresh ground beef, not pre‑seasoned, allows the garlic to shine without being drowned out. The cheese isn’t just a topping; it’s an integral part of the patty’s structure, giving that irresistible melt‑in‑your‑mouth texture. And the secret sauce—ketchup, mustard, and a splash of olive oil—creates a tangy glaze that locks in juices. Together, these elements create a burger that feels both indulgent and comforting, a true crowd‑pleaser.
I dare you to taste this and not go back for seconds. Most recipes get this completely wrong, but here’s what actually works: keep the garlic minced finely, use a mix of cheddar and parmesan, and never skip the resting period. Picture yourself pulling this out of the oven, the whole kitchen smelling incredible, the steam curling like a savory cloud. I’ll be honest—I ate half the batch before anyone else got to try it. This is hands down the best version you'll ever make at home. Let me walk you through every single step—by the end, you'll wonder how you ever made it any other way.
What Makes This Version Stand Out
- Flavor: The garlic‑parmesan fusion creates a depth that ordinary burgers lack, turning each bite into a savory revelation.
- Texture: The cheese embedded in the patty melts uniformly, giving a silky, gooey center that contrasts with a crisp crust.
- Ease: With a single pan and a few pantry staples, you can achieve gourmet results without a culinary degree.
- Uniqueness: The secret glaze of ketchup, mustard, and olive oil adds a tangy glaze that caramelizes on the grill.
- Crowd‑pleaser: Whether for a family dinner or a backyard gathering, this burger delivers wow factor every time.
- Quality: Fresh, high‑grade ingredients ensure that the flavors shine rather than mask each other.
- Cooking Method: Grilling to medium‑rare keeps the meat juicy while the cheese melts just right.
- Make‑Ahead: You can assemble the patties ahead of time and keep them refrigerated; they’ll still taste fresh when grilled.
Inside the Ingredient List
The Flavor Base
Garlic is the star of this burger, providing a punch of aroma that lingers long after you finish eating. Mince it finely so it distributes evenly; a coarse chop will create uneven bursts of flavor. If you’re a garlic purist, double the cloves—just be sure to let the mixture rest so the sharpness mellows. A pinch of salt here is crucial; it enhances the natural sweetness of the meat and balances the richness of the cheese.
The Texture Crew
The cheese, both cheddar and parmesan, does more than melt; it binds the patty together, preventing it from falling apart on the grill. The breadcrumbs act as a subtle filler, absorbing excess juices and giving the patty a light, airy bite. An egg is essential for cohesion, especially if you’re planning to make the patties ahead of time. Remember, the egg also adds a touch of richness that complements the garlic’s bite.
The Unexpected Star
Olive oil is the unsung hero that keeps the patty from drying out. It also helps the ketchup‑mustard glaze caramelize into a glossy finish. If you’re on a low‑fat diet, a splash of beef broth can replace the oil, but you’ll lose some of that buttery sheen. Keep the oil at room temperature; cold oil can cause the patty to cook unevenly.
The Final Flourish
The buns are more than a vessel—they’re a textural counterpoint. Toast them lightly to protect them from becoming soggy when the juices run off the patty. A quick smear of butter or a drizzle of olive oil before toasting adds a subtle flavor that complements the garlic. If you prefer a crunchier bite, consider adding a layer of crisp lettuce or a slice of tomato for freshness.
Everything's prepped? Good. Let's get into the real action—because the moment the grill heats up, the kitchen transforms into a flavor laboratory.
The Method — Step by Step
- Heat a cast‑iron skillet over medium heat and add a tablespoon of olive oil. Let the oil shimmer but not smoke—this ensures a clean sear. Once hot, add the minced garlic and sauté for 30 seconds until fragrant, being careful not to burn it. This quick burst releases the garlic’s essential oils, forming the foundation of the sauce that will coat the patty. Keep the rest of the ingredients in a bowl, ready to combine.
- In a large mixing bowl, combine the ground beef, grated parmesan, shredded cheddar, breadcrumbs, egg, salt, pepper, and a tablespoon of ketchup. Gently fold the mixture together, using your hands to keep the patty moist but not overworked. Over‑mixing can lead to a dense, rubbery texture. Shape the mixture into four equal patties, about 1½ inches thick, and press a small indentation in the center of each to prevent puffing.
- Place the patties on the skillet and sear for 3 minutes on one side, then flip. Add a tablespoon of mustard and a drizzle of olive oil around the edges to create a glaze. This step is the moment of truth—watch the edges curl and the cheese begin to melt. The glaze caramelizes, forming a golden crust that locks in juices. Keep the heat at medium to avoid burning the exterior while the interior remains juicy.
- During the final minute of cooking, add a handful of grated parmesan on top of each patty. The heat will melt the cheese into a silky layer that adds an extra dimension of flavor. If you prefer a stronger cheese presence, sprinkle a bit more cheddar as well. This step also gives the burger a glossy, appetizing appearance. The cheese should be bubbling but not browned—aim for a golden sheen.
- Watch Out: Be careful not to let the skillet become too crowded; if necessary, cook in batches. Overcrowding reduces the heat around each patty, leading to uneven cooking. This is where many home cooks falter, ending up with a soggy burger rather than a crisp, juicy masterpiece. Keep the heat steady and give each patty the space it needs to sear properly.
- Toast the buns on the skillet for 30 seconds until they’re golden brown and fragrant. The toasting adds a subtle crunch that contrasts beautifully with the soft interior. If you like a buttery flavor, spread a thin layer of butter on the cut side before toasting. This step also creates a barrier that keeps the bun from absorbing too much moisture.
- Assemble the burger: spread a thin layer of mustard on the bottom bun, add the patty, then top with a slice of tomato and a leaf of lettuce. Drizzle a splash of ketchup over the tomato for an extra burst of sweetness. Place the top bun on, and if you’re feeling fancy, add a sprinkle of grated parmesan on top of the bun for an extra cheesy finish.
- Serve immediately while the patty is still steaming and the cheese is molten. Pair with a side of crispy fries or a fresh salad for a balanced meal. The aroma alone will draw guests in, and the first bite will leave them craving more. Remember, the key to success is the balance of flavors and textures—don’t rush the process, and enjoy every moment.
That's it—you did it. But hold on, I've got a few more tricks that'll take this to another level. Keep reading for insider tips that will elevate even the most seasoned chef.
Insider Tricks for Flawless Results
The Temperature Rule Nobody Follows
Many home cooks skimp on the skillet temperature, but a consistent medium‑high heat is essential for a perfect crust. If the skillet is too hot, the outside will burn before the inside cooks; too cool, and the burger will steam instead of sear. Use a thermometer if you’re serious—aim for 375°F. The right heat ensures that the cheese melts just right, creating that coveted gooey center.
Why Your Nose Knows Best
Your nose is a powerful ally in the kitchen. When the garlic releases its aroma, it signals that the flavor base is ready. A strong, sweet garlic scent means the garlic has released its oils and won’t taste raw. Trust that cue; it will save you from over‑cooking or under‑seasoning.
The 5-Minute Rest That Changes Everything
After cooking, let the patties rest on a wire rack for five minutes. This step is often overlooked, yet it redistributes the juices, preventing them from spilling onto the pan and drying out the meat. I’ve seen burgers that were juicy at first, then dry by the second bite—this rest solves that problem.
The Perfect Glaze Timing
Adding the mustard and ketchup glaze at the right moment is key. If you add them too early, they’ll burn; too late, they won’t caramelize. The ideal window is right after flipping the patty—when the heat is still high but the meat is already forming a crust. This timing locks in flavor and gives the burger that glossy, appetizing look.
Choosing the Right Meat
A 80/20 ground beef ratio gives the best balance of flavor and moisture. If you’re a leaner eater, consider 85/15, but add a tablespoon of butter to the mix to compensate for the reduced fat. The fat content is what keeps the burger juicy; without it, the patty will dry out quickly.
Creative Twists and Variations
This recipe is a playground. Here are some of my favorite ways to switch things up:
Spicy Sriracha Surprise
Swap the ketchup for a mixture of sriracha and honey, giving the burger a sweet‑heat kick that pairs beautifully with the parmesan. The glaze caramelizes into a spicy glaze that melts into the patty. Perfect for those who like a little fire in their bite.
Mushroom & Swiss Edition
Add sautéed mushrooms to the patty mixture and replace cheddar with Swiss cheese. The earthy mushroom flavor complements the nutty parmesan, creating a gourmet twist. This version is great for mushroom lovers and adds a savory depth.
Vegan Version
Use a plant‑based ground beef substitute, almond milk instead of egg, and nutritional yeast in place of parmesan. The result is a vegan burger that still delivers a rich, cheesy flavor. Serve with a vegan mayo‑mustard glaze for extra zing.
Breakfast Burger
Add a fried egg on top of the patty before serving and replace the bun with a toasted English muffin. The runny yolk adds a creamy element that pairs wonderfully with the garlic parmesan. This breakfast twist is a hit for brunch gatherings.
Mediterranean Flair
Incorporate chopped olives, sun‑dried tomatoes, and a splash of feta into the patty mix. The Mediterranean herbs bring a bright, tangy flavor that contrasts the rich cheese. Finish with a drizzle of olive oil and a sprinkle of oregano.
Storing and Bringing It Back to Life
Fridge Storage
Cool the cooked burgers to room temperature, then wrap tightly in foil or place in an airtight container. Store in the refrigerator for up to 3 days. The cheese will firm slightly, but the flavor remains intact.
Freezer Friendly
Wrap each patty individually in plastic wrap, then place in a freezer bag. Freeze for up to 2 months. Reheat by baking at 350°F for 15 minutes or microwaving on medium power for 2 minutes, then finish on the skillet for a crisp crust.
Best Reheating Method
Add a tiny splash of water to the skillet before reheating; this steams the patty and restores moisture. Cover for 2 minutes, then remove the lid to allow the cheese to melt again. Serve immediately for the best texture.