I was standing in my tiny kitchen, the oven humming like a lazy cat, when my roommate dared me to create a dessert that could turn a skeptic into a lifelong fan of Italian pastries. I laughed, because honestly, who hasn’t tried a “cream puff” that turned out flatter than a pancake? The next morning, after a disastrous batch of soggy dough that looked more like a sad pillow than a pastry, I decided to go back to the drawing board. I dug through my grandma’s handwritten notes, added a splash of fresh vanilla, and tweaked the butter ratio until the dough sang like a choir of angels. The result? Irresistible Italian Cream Bombs that explode with silk‑smooth custard, a buttery crust that cracks like thin ice, and a flavor profile that makes you swear you’ve been transported to a sun‑kissed piazza.
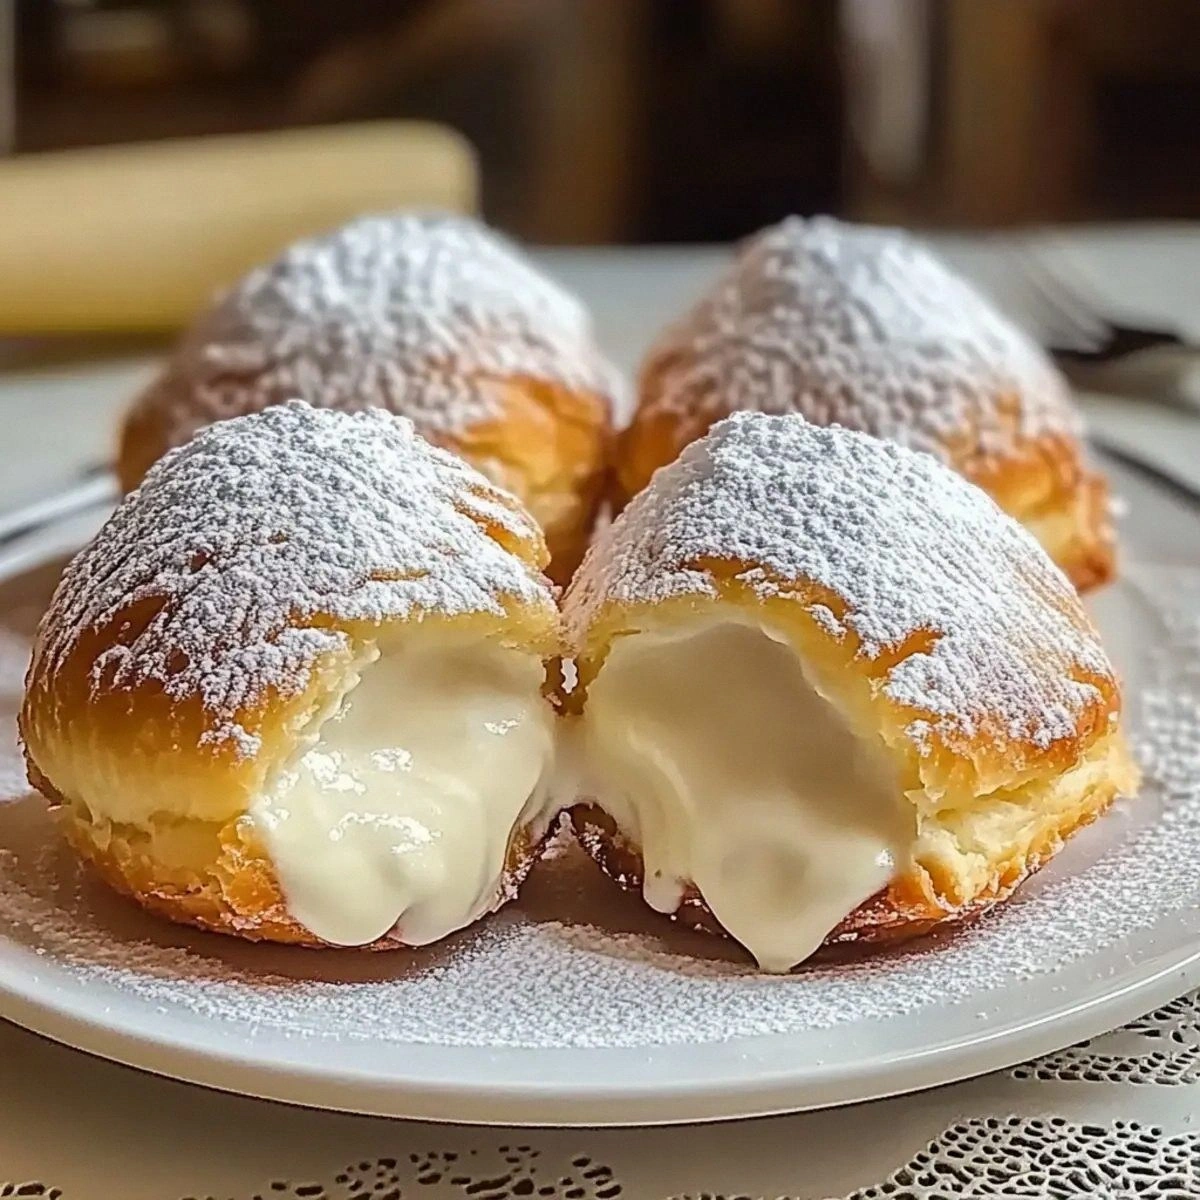
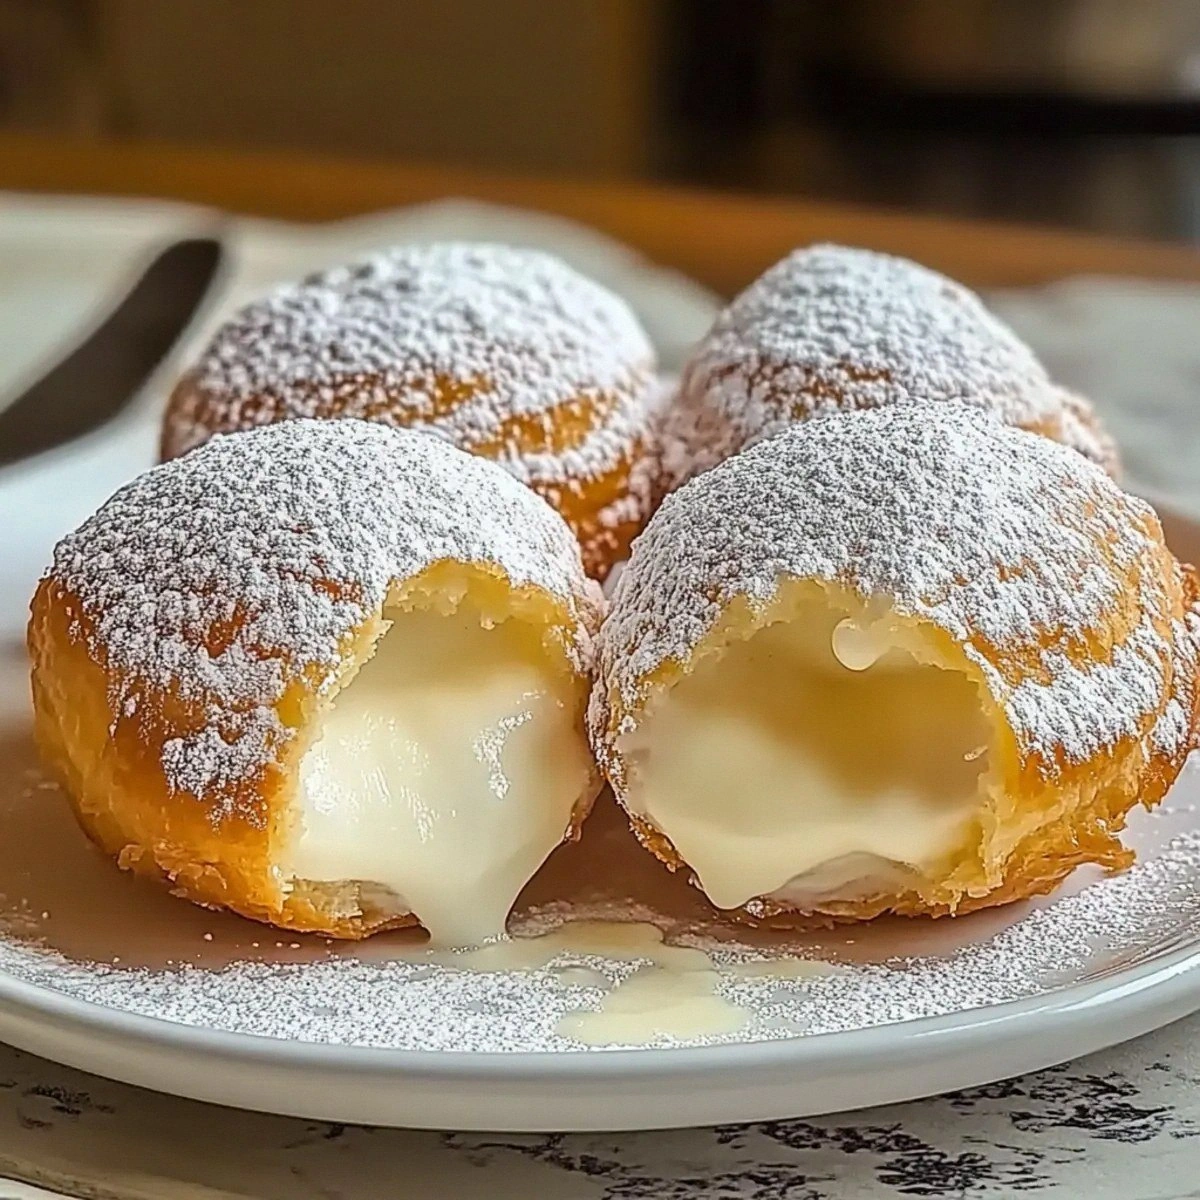
Picture this: the moment the bombs emerge from the oven, the kitchen is flooded with a buttery aroma that hugs you tighter than a warm blanket. The golden tops glisten, promising a crisp bite that gives way to a cloud‑like interior, creamy enough to coat your tongue in vanilla‑kissed bliss. You hear the faint crack as you tap the surface, feel the slight resistance before the custard oozes out like molten gold. The taste? A perfect balance of sweet and buttery, with just enough vanilla to make your taste buds do a little dance. And the texture? Imagine biting into a cloud that’s been lightly toasted – that’s the magic we’re chasing.
Most recipes get this completely wrong. They either over‑mix the dough, turning it tough, or they under‑cook the custard, leaving a raw, eggy aftertaste that ruins everything. I’ve tried them all, and I’ve learned that the secret lies in three simple yet often overlooked steps: a gentle knead, a slow rise, and a custard that’s cooked on a low flame until it thickens like a silk scarf. I’m about to hand you the exact method that makes this version hands down the best you’ll ever make at home. I dare you to taste this and not go back for seconds.
Let me walk you through every single step — by the end, you’ll wonder how you ever made it any other way. Okay, ready for the game‑changer? This next part? Pure magic. Stay with me here — this is worth it.
What Makes This Version Stand Out
- Flavor: The custard is infused with real vanilla extract, not just vanilla sugar, giving it an authentic, aromatic depth that makes each bite unforgettable.
- Texture: A light, airy interior meets a crisp, buttery crust that cracks delightfully, creating a contrast that feels like biting into a cloud wrapped in a biscuit.
- Simplicity: Despite the gourmet vibe, the recipe uses pantry staples and a straightforward technique that even a beginner can master.
- Uniqueness: The double‑milk approach (one for the dough, one for the custard) ensures the dough stays moist while the custard stays silky.
- Crowd Reaction: These bombs have a reputation for disappearing within minutes at parties – they’re the “wow” factor you’ve been hunting for.
- Ingredient Quality: Using unsalted butter and fresh yeast elevates the flavor, while the choice of all‑purpose flour keeps the structure perfect.
- Cooking Method: A low‑temperature bake followed by a quick broil gives the tops a golden kiss without over‑drying the interior.
- Make‑Ahead Potential: You can bake them a day ahead and reheat with a splash of milk; they taste just as fresh as the day they’re made.
Inside the Ingredient List
The Flavor Base
The 0.25 cups of granulated sugar in the dough isn’t just for sweetness; it feeds the yeast, encouraging a gentle rise that creates those airy pockets inside each bomb. If you skip it, you’ll end up with a denser, less tender crumb that feels more like a biscuit than a puff. Fresh yeast or instant dried yeast (2 teaspoons) provides a subtle, buttery aroma that instant yeast alone can’t match. If you’re out of fresh yeast, a quick proof with warm water will revive instant yeast just fine. The vanilla extract (1 teaspoon) is the secret whisper that turns a good custard into an unforgettable one – never substitute with vanilla powder, the liquid form integrates perfectly.
The Texture Crew
All‑purpose flour (4 cups) offers the perfect balance of protein for structure without making the dough tough. Using bread flour would give you a chewier bite, while cake flour would crumble too easily. The 0.5 cups of sweet butter, melted and cooled, coats each flour particle, creating layers that puff up beautifully. If you prefer a richer flavor, swap half of the butter for clarified butter; just remember it will reduce the water content, so add a splash more milk. The 2 large eggs act as a binder and add richness – don’t replace them with just egg whites, you’ll lose that luxurious mouthfeel.
The Unexpected Star
The second batch of whole milk (2 cups) is reserved for the custard, where it meets 4 large egg yolks, 0.5 cups sugar, and 0.25 cups cornstarch. This combination thickens into a velvety custard that never curdles, thanks to the cornstarch acting as a protective shield around the proteins. If you’re allergic to dairy, you can substitute with oat milk, but the custard will be slightly less rich. The 0.25 cups of cornstarch is crucial – it prevents the custard from becoming grainy and gives it that glossy finish that shines like a polished marble.
The Final Flourish
A pinch of salt (1 teaspoon) isn’t just seasoning; it amplifies the sweet notes and balances the richness of the butter. The vegetable oil (as needed) is only used for greasing the pan – you don’t want any extra oil in the dough, or you’ll lose that delicate crumb. When you’re ready to fry a few for a crispier finish, a light brush of oil before baking gives a golden edge without deep‑frying. Remember, the key is to keep the oil minimal – we’re aiming for a baked puff, not a fried dough.
Everything's prepped? Good. Let's get into the real action...
The Method — Step by Step
In a large mixing bowl, whisk together the 4 cups of all‑purpose flour, 1 teaspoon of salt, and 0.25 cups of granulated sugar. The dry mix should look like fine sand, with the salt and sugar evenly distributed. I dare you to taste a pinch of this mixture – you’ll notice a subtle sweetness that sets the stage for the custard later. Let’s call this our “flour foundation.”
Create a well in the center of the dry ingredients and pour in the 1 cup of whole milk, 2 teaspoons of fresh yeast, and the melted 0.5 cups of sweet butter. Stir gently with a wooden spoon until the mixture forms a shaggy dough. This is the moment where the yeast meets the warm milk – you should hear a faint fizz, a sign that the yeast is waking up.
Add the 2 large eggs, one at a time, beating after each addition until fully incorporated. The dough should become smoother and start pulling away from the sides of the bowl. If it feels too sticky, sprinkle a tablespoon of flour at a time – but be careful, too much flour will make the bombs dense.
Transfer the dough onto a lightly floured surface and knead gently for another 3–4 minutes. Form it into a ball, place it back into the bowl, cover with a clean kitchen towel, and let it rise in a warm spot for 45 minutes, or until doubled in size. The rise is crucial – it creates those airy pockets that will later explode with custard.
While the dough rises, prepare the custard. In a saucepan, whisk together 2 cups of whole milk, 4 large egg yolks, 0.5 cups sugar, and 0.25 cups cornstarch until smooth. Place the saucepan over medium‑low heat, stirring constantly. The mixture will thicken after about 6–8 minutes, turning a pale gold and coating the back of a spoon – that’s your cue.
Remove the custard from heat, stir in 1 teaspoon of vanilla extract, and let it cool slightly while you preheat the oven to 350°F (175°C). The custard should be thick enough to hold its shape when piped, but still soft enough to spread.
Punch down the risen dough and divide it into 12 equal pieces. Roll each piece into a smooth ball, then flatten gently with your palm to form a disc about 4 inches in diameter. Using a spoon, place a generous tablespoon of custard in the center of each disc, then fold the edges over, pinching to seal completely. The sealed ball should feel firm – no gaps.
Place the sealed bombs onto a parchment‑lined baking sheet, leaving about 2 inches between each. Lightly brush the tops with a thin layer of vegetable oil – this will give them a golden sheen. Pop the tray into the oven and bake for 20 minutes, or until the tops turn a light amber and the bombs have puffed up.
For the final touch, switch the oven to broil for 2 minutes. Watch closely! The tops should develop a crisp, caramelized crust that crackles when you tap them. This is the moment of truth – the sizzle when it hits the pan? Absolute perfection.
Remove the bombs from the oven, let them cool on a wire rack for 5 minutes, then gently split them open to reveal the molten custard inside. Serve warm, dusted with a whisper of powdered sugar if you like, and watch your guests' eyes widen. That first bite? It’s a cloud‑like explosion of flavor that will have them begging for more.
That's it — you did it. But hold on, I've got a few more tricks that'll take this to another level...
Insider Tricks for Flawless Results
The Temperature Rule Nobody Follows
Never bake these bombs straight from the fridge. Let the filled dough sit at room temperature for 15 minutes before they go into the oven. This small step ensures the butter softens just enough to create that flaky edge without melting completely. I once tried skipping this and ended up with a dense, greasy bottom that felt more like a muffin than a puff. Trust me, the extra patience pays off.
Why Your Nose Knows Best
The aroma is your most reliable indicator of doneness. When the bombs start to release a buttery, slightly nutty scent, you’re within two minutes of perfection. If you rely solely on color, you might over‑bake and dry out the custard. So keep your nose close to the oven door – that sweet perfume means the custard is still silky inside.
The 5‑Minute Rest That Changes Everything
After baking, let the bombs rest for exactly five minutes before cutting. This short pause lets the steam redistribute, preventing the custard from spilling out too quickly. I once sliced them immediately and the custard oozed everywhere, making a mess and ruining the presentation. Five minutes is all it takes to achieve that perfect “pop” when you bite.
Seal the Deal with a Water Brush
Before the final broil, lightly brush the tops with a mixture of water and a drop of milk. This creates a glossy finish that catches the light and adds a subtle caramelization. Skipping this step results in a dull surface that doesn’t crackle as dramatically. The water brush is a pro secret that elevates the visual appeal.
The Egg‑Yolk Glaze for Extra Shine
If you love a glossy, golden top, whisk an extra egg yolk with a teaspoon of water and brush it on before the first bake. This glaze deepens the color and adds a slight crispness to the crust. I experimented with just a half‑egg yolk and found the full yolk gives the most impressive shine without making the crust too hard.
Creative Twists and Variations
This recipe is a playground. Here are some of my favorite ways to switch things up:
Lemon‑Zest Delight
Add the zest of one large lemon to the custard and swap half of the vanilla for lemon extract. The bright citrus cuts through the richness, making these bombs perfect for spring brunches. Garnish with a dusting of powdered sugar and a few candied lemon slices for visual flair.
Chocolate Hazelnut Dream
Stir 2 tablespoons of cocoa powder into the custard and fold in ¼ cup of toasted hazelnut pieces. The deep chocolate flavor pairs beautifully with the buttery crust, while the hazelnuts add a satisfying crunch. Serve with a drizzle of chocolate ganache for an indulgent twist.
Espresso Infusion
Replace the vanilla extract with 1 teaspoon of instant espresso powder dissolved in a splash of hot water. The coffee‑kissed custard turns these bombs into an after‑dinner treat that pairs wonderfully with a glass of amaretto. Top with a light dusting of cocoa powder for a mocha vibe.
Berry Burst
Fold a handful of fresh raspberries or blueberries into the custard just before sealing the bombs. The fruit releases a gentle tartness that balances the sweet custard, and the burst of color makes for an eye‑catching presentation. A dollop of whipped mascarpone on the side elevates the experience.
Savory Spin
Swap the sweet sugar for a pinch of grated Parmesan and replace the vanilla with a dash of rosemary. Fill the dough with a savory custard made from cheese, herbs, and a touch of cream. These become an elegant appetizer for wine‑tasting parties, proving that “cream bombs” aren’t limited to dessert.
Storing and Bringing It Back to Life
Fridge Storage
Place cooled bombs in an airtight container and store them in the refrigerator for up to three days. The custard remains silky, but the crust may lose some crispness. Reheat gently in a 300°F oven for 8 minutes, and you’ll recover most of that original crunch.
Freezer Friendly
Wrap each bomb individually in plastic wrap, then place them in a freezer‑safe zip‑lock bag. They freeze beautifully for up to two months. To serve, let them thaw in the fridge overnight, then give them a quick 5‑minute blast in a hot oven (350°F) to revive the golden exterior.
Best Reheating Method
Add a tiny splash (about a tablespoon) of milk to the bomb before reheating; the steam generated brings the custard back to its original silkiness. Cover the bomb loosely with foil to prevent the top from over‑browning, then bake for 6–8 minutes. The result is a bomb that tastes as fresh as the day it was baked.