Picture this: I’m standing in my tiny kitchen, the rain drumming against the windows, and a friend just dared me to bake something that screams “vacation” while we’re stuck in a sweater‑weather slump. I laughed, grabbed the nearest carrot, a can of pineapple, and thought, “What if I could bottle a Hawaiian luau in a single slice?” The result? A cake so moist it practically slides off the plate, with caramel‑kissed carrots and pineapple that burst like fireworks on the tongue. I’ll be honest — I ate half the batch before anyone else got a chance, and that’s because this cake is a straight‑up party in a pan.
The moment the batter hits the bowl, you get a fragrant wave that feels like a warm hug from a tropical breeze. The scent of cinnamon and ginger dances with the sweet tang of pineapple, while the shredded carrots whisper promises of hidden sweetness. When it finally slides into the oven, the kitchen fills with a buttery, nutty perfume that makes you want to hug the oven door. The sound? A gentle fizz as the oil and sugars meld, a subtle crackle that tells you the cake is rising like a sunrise over Waikiki.
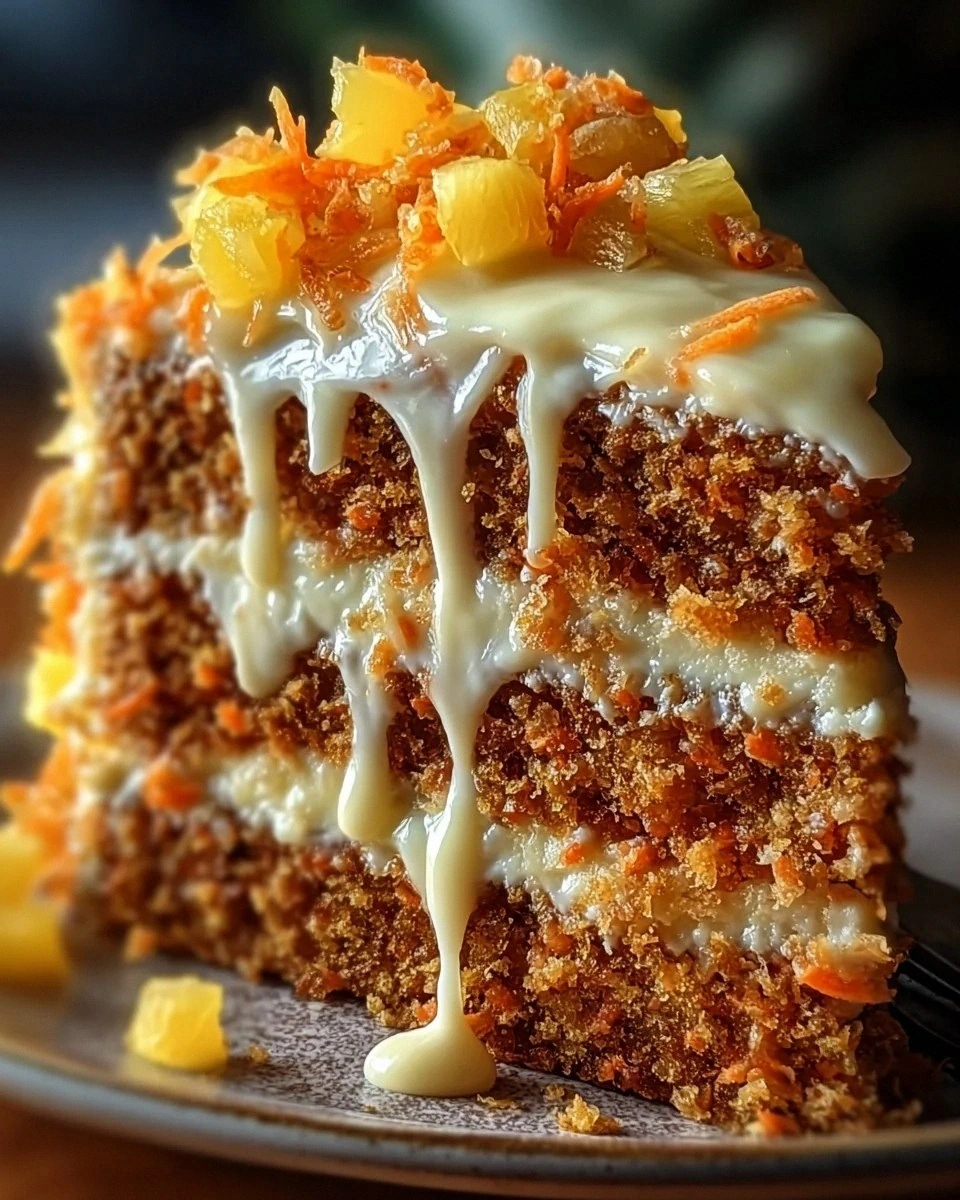
Most carrot‑pineapple cakes out there either miss the tropical punch or end up dense and dry, like a soggy beach towel. This version, however, balances the earthiness of carrots with the bright, juicy pop of pineapple, all wrapped in a tender crumb that melts in your mouth. The secret? A splash of vegetable oil that keeps everything moist, and a precise blend of spices that give depth without overpowering the fruit. I’m daring you to taste this and not go back for seconds — because once you’ve experienced this island‑kissed delight, ordinary desserts just won’t cut it.
Let me walk you through every single step — by the end, you’ll wonder how you ever made a carrot cake any other way. Okay, ready for the game‑changer? This next part? Pure magic.
What Makes This Version Stand Out
- Taste: The marriage of sweet pineapple and earthy carrots creates a flavor duet that feels like a tropical sunset on a plate.
- Texture: A buttery crumb that stays moist for days, thanks to the oil‑rich batter and pineapple’s natural juices.
- Simplicity: No fancy equipment required — just a bowl, a whisk, and a willingness to get a little messy.
- Uniqueness: The addition of shredded coconut adds that authentic Hawaiian vibe you won’t find in a typical carrot cake.
- Crowd Reaction: Expect gasps, “What’s in this?” questions, and a line forming for seconds — it’s that good.
- Ingredient Quality: Using fresh, grated carrots and real crushed pineapple (not juice) makes all the difference.
- Cooking Method: Baking at a moderate temperature ensures a gentle rise, avoiding the dreaded dry top.
- Make‑Ahead Potential: This cake stores beautifully, so you can prep it ahead of a party and still wow your guests.
Inside the Ingredient List
The Flavor Base
All‑purpose flour: This forms the cake’s backbone, providing structure and that comforting bite. If you swap it for cake flour, you’ll get a softer crumb, but you might lose a bit of the classic “carrot cake” heft. Look for a flour that feels powdery, not gritty, and give it a quick whisk before measuring to avoid lumps.
Baking soda: The leavening hero that makes the batter rise like a tropical wave. Too much and you get a metallic aftertaste; too little and the cake stays flat. If you’re out of soda, a teaspoon of baking powder can work, but expect a slightly denser texture.
Salt: Just a pinch enhances all the flavors, making each bite pop. Skipping it is like going to the beach without sunscreen — you’ll miss the essential protection that balances sweetness.
The Spice Crew
Cinnamon: This warm spice adds depth and a cozy aroma that fills your kitchen, reminding you of holiday mornings. A good quality Ceylon cinnamon will give a sweeter, less pungent flavor than the common Cassia.
Nutmeg: Just a hint will bring out the sweetness of the other ingredients, adding a subtle nutty undertone. Grating fresh nutmeg right before mixing makes a world of difference compared to pre‑ground.
Ginger: This spice adds a subtle warmth, complementing the tropical notes perfectly. If you love a bit of zing, increase it by a half‑teaspoon, but beware — too much can overpower the pineapple.
The Moisture Makers
Vegetable oil: It keeps the cake moist and tender, ensuring a delightful texture that stays soft even after cooling. Unlike butter, oil stays liquid at room temperature, so the crumb never hardens.
Sugar & brown sugar: Regular granulated sugar sweetens the cake, while brown sugar adds richness and depth with its molasses notes. The combination creates a caramel‑like undertone that pairs beautifully with the pineapple.
Eggs: These help bind everything together and provide richness. For a fluffier crumb, beat the eggs until they’re light and airy before folding them in.
The Final Flourish
Vanilla extract: A splash brings a lovely fragrance that pairs perfectly with the other flavors. Use pure vanilla for the best aroma; imitation can taste flat.
Grated carrots: They add natural sweetness and moisture while boosting the nutritional value. The finer you grate, the more evenly they distribute, preventing big orange specks.
Crushed pineapple: This tropical addition gives the cake a moist texture and a burst of flavor. Drain it well; excess juice can make the batter too runny.
Nuts (walnuts or pecans): Optional, but they add a delightful crunch and depth. Toast them lightly for extra flavor, and chop them coarsely to keep the bite interesting.
Shredded coconut: Another optional treat that enhances the Hawaiian essence of the cake. Toasted coconut adds a toasty, nutty aroma that elevates the overall profile.
Everything's prepped? Good. Let's get into the real action...
The Method — Step by Step
-
Preheat your oven to 350°F (175°C) and grease a 9‑inch round cake pan with a thin layer of oil, then line the bottom with parchment. The heat should be steady, not blasting, to ensure the cake rises evenly. While the oven warms, give the parchment a quick pat to remove excess moisture — this prevents the cake from sticking later. Picture yourself pulling this out of the oven, the whole kitchen smelling incredible, and you’ll know you’re on the right track.
-
In a large bowl, whisk together the flour, baking soda, salt, cinnamon, nutmeg, and ginger until the mixture looks like a uniform golden cloud. This is where the magic begins; the spices should perfume the air, hinting at the tropical flavors to come. Power transition: Okay, ready for the game‑changer? This dry blend is the foundation that will keep the cake light.
Kitchen Hack: After whisking, let the dry mix rest for five minutes. This allows the baking soda to fully hydrate, guaranteeing a better rise. -
In a separate bowl, combine the vegetable oil, granulated sugar, and brown sugar. Beat with a hand mixer on medium speed until the mixture turns a light caramel color and the sugars begin to dissolve. This step creates a glossy base that will coat the carrots and pineapple, sealing in moisture. When you lift the whisk, the batter should form soft ribbons that fall back slowly.
-
Add the eggs one at a time, beating well after each addition, then stir in the vanilla extract. The eggs act like tiny bridges, linking the dry and wet worlds together. If you over‑mix at this stage, the gluten can develop too much, leading to a tougher crumb, so stop as soon as everything is just combined.
-
Fold in the grated carrots, crushed pineapple (well‑drained), toasted nuts, and shredded coconut using a rubber spatula. The batter should look thick, speckled with orange and gold, and it will spread slowly when poured. This next part? Pure magic. The pineapple’s moisture will mingle with the oil, guaranteeing a super‑moist crumb.
Kitchen Hack: If you prefer a smoother texture, give the carrot‑pineapple mixture a quick blitz in a food processor before folding it in. -
Gradually add the dry ingredient mixture to the wet batter, stirring gently until just combined. The batter will be thick but pourable; resist the urge to over‑mix. You’ll notice the edges start to pull away from the sides of the bowl — that’s your cue that the gluten is settled and the cake will have a tender crumb.
-
Pour the batter into the prepared pan, smoothing the top with an offset spatula. Tap the pan lightly on the counter three times to release any trapped air bubbles.
The oven door should close with a soft thump, sealing in the heat that will coax the batter into a golden dome.Watch Out: Do not over‑fill the pan; leave about a half‑inch of space to allow the cake to rise without spilling over. -
Bake for 30‑35 minutes, or until a toothpick inserted into the center emerges clean with just a few moist crumbs. The top should be a deep amber, and the edges will start to pull away from the pan, signaling that the cake is done. Resist the temptation to open the oven early; every peek drops the temperature and can cause a collapse.
-
Allow the cake to cool in the pan for 10 minutes, then invert onto a wire rack to finish cooling completely. This step prevents the bottom from becoming soggy. While it cools, the flavors continue to meld, creating that signature “taste of paradise” you’ll soon experience with each bite.
That's it — you did it. But hold on, I've got a few more tricks that'll take this to another level...
Insider Tricks for Flawless Results
The Temperature Rule Nobody Follows
Always preheat your oven fully before the cake goes in. A common mistake is sliding the batter in while the oven is still warming, which leads to uneven rise and a gummy center. I once tried to “save time” and lost the perfect crumb; the cake was dense and flat. Use an oven thermometer to verify the exact temperature, and trust that extra five minutes of preheating makes a world of difference.
Why Your Nose Knows Best
Instead of relying solely on a timer, listen for the subtle aroma cues. When the cake reaches a toasty, caramel‑sweet scent and the edges start to turn a rich amber, you’re close to done. I’ve found that the “golden‑brown” look is a visual hint, but the nose is the ultimate detector. If the smell turns slightly burnt, pull the cake out immediately — it’s better to be a little undercooked than overcooked.
The 5‑Minute Rest That Changes Everything
After the cake has cooled on the rack, let it sit for an additional five minutes before slicing. This short rest lets the interior fibers settle, preventing crumbly slices. One friend tried to cut straight away and ended up with a mess of crumbs; the extra five minutes saved the presentation and the taste.
Grating Carrots Like a Pro
Use the fine side of a box grater for carrots to ensure they blend seamlessly into the batter. Larger shreds create pockets of texture that can feel uneven. If you prefer a bit of bite, reserve a handful of coarser shreds and fold them in at the end — this gives a pleasant surprise in each forkful.
Storing Secrets for Maximum Moisture
Wrap the cooled cake tightly in a double layer of plastic wrap, then store it in an airtight container. The moisture from the pineapple and carrots will keep the crumb soft for up to five days. For longer storage, freeze slices individually wrapped; they’ll taste fresh after a quick microwave reheat.
Creative Twists and Variations
This recipe is a playground. Here are some of my favorite ways to switch things up:
Tropical Coconut Cream Frosting
Swap the traditional cream cheese frosting for a light coconut cream whipped with a dash of lime zest. The frosting adds a tangy, airy contrast that amplifies the Hawaiian vibe. Perfect for those who love a dairy‑free finish.
Spiced Rum Soak
Brush each cooled slice with a mixture of dark rum and pineapple juice. The alcohol deepens the flavor and adds a subtle warmth, turning the cake into a dessert fit for a luau night. Just a tablespoon per slice is enough to avoid sogginess.
Chocolate Chip Surprise
Fold in a half‑cup of dark chocolate chips with the nuts for a bittersweet twist. The chocolate melts into pockets of gooey richness that complement the pineapple’s acidity. Kids love the surprise melty bites.
Gluten‑Free Version
Replace the all‑purpose flour with a 1:1 gluten‑free flour blend, and add a tablespoon of xanthan gum to mimic the elasticity of gluten. The texture remains tender, and the flavor stays true to the original.
Vegan Adaptation
Swap the eggs for flax “egg” (2 tbsp ground flaxseed + 6 tbsp water) and use coconut oil instead of vegetable oil. Use coconut sugar for sweetness. The result is a plant‑based cake that still delivers that moist, tropical punch.
Caramelized Pineapple Topping
Quickly sauté extra pineapple chunks with brown sugar until they caramelize, then spoon them over the top before serving. The caramelized fruit adds a glossy, buttery finish that looks as good as it tastes.
Storing and Bringing It Back to Life
Fridge Storage
Place the fully cooled cake in an airtight container or a cake dome and store it in the refrigerator for up to five days. The cold environment keeps the crumb from drying out, and the flavors continue to meld, becoming even more harmonious.
Freezer Friendly
Slice the cake into 1‑inch thick wedges, wrap each piece tightly in plastic wrap, then place them in a freezer‑safe bag. Freeze for up to three months. When you’re ready to enjoy, let a slice thaw at room temperature for 30 minutes, then give it a quick microwave zap (10‑15 seconds) to revive the softness.
Best Reheating Method
Before reheating, add a tiny splash (about a teaspoon) of water or pineapple juice to the slice, then cover it loosely with foil and warm it in a 300°F oven for 8‑10 minutes. The added moisture steams the cake back to its original moist glory, and the aroma of pineapple will fill your kitchen anew.