I was halfway through a marathon of Zoom meetings when my stomach started growling like a disgruntled bear. I tried a protein bar from the store, but it crumbled like dry sand and tasted like regret. Then, out of sheer desperation (and a dare from my roommate who claimed “nothing homemade can beat a store‑bought bar”), I rummaged through the pantry, grabbed a tub of Greek yogurt, and set to work. Within minutes, the kitchen was filled with the sweet perfume of honey mingling with the nutty aroma of toasted oats, and I realized I was on the brink of something spectacular.
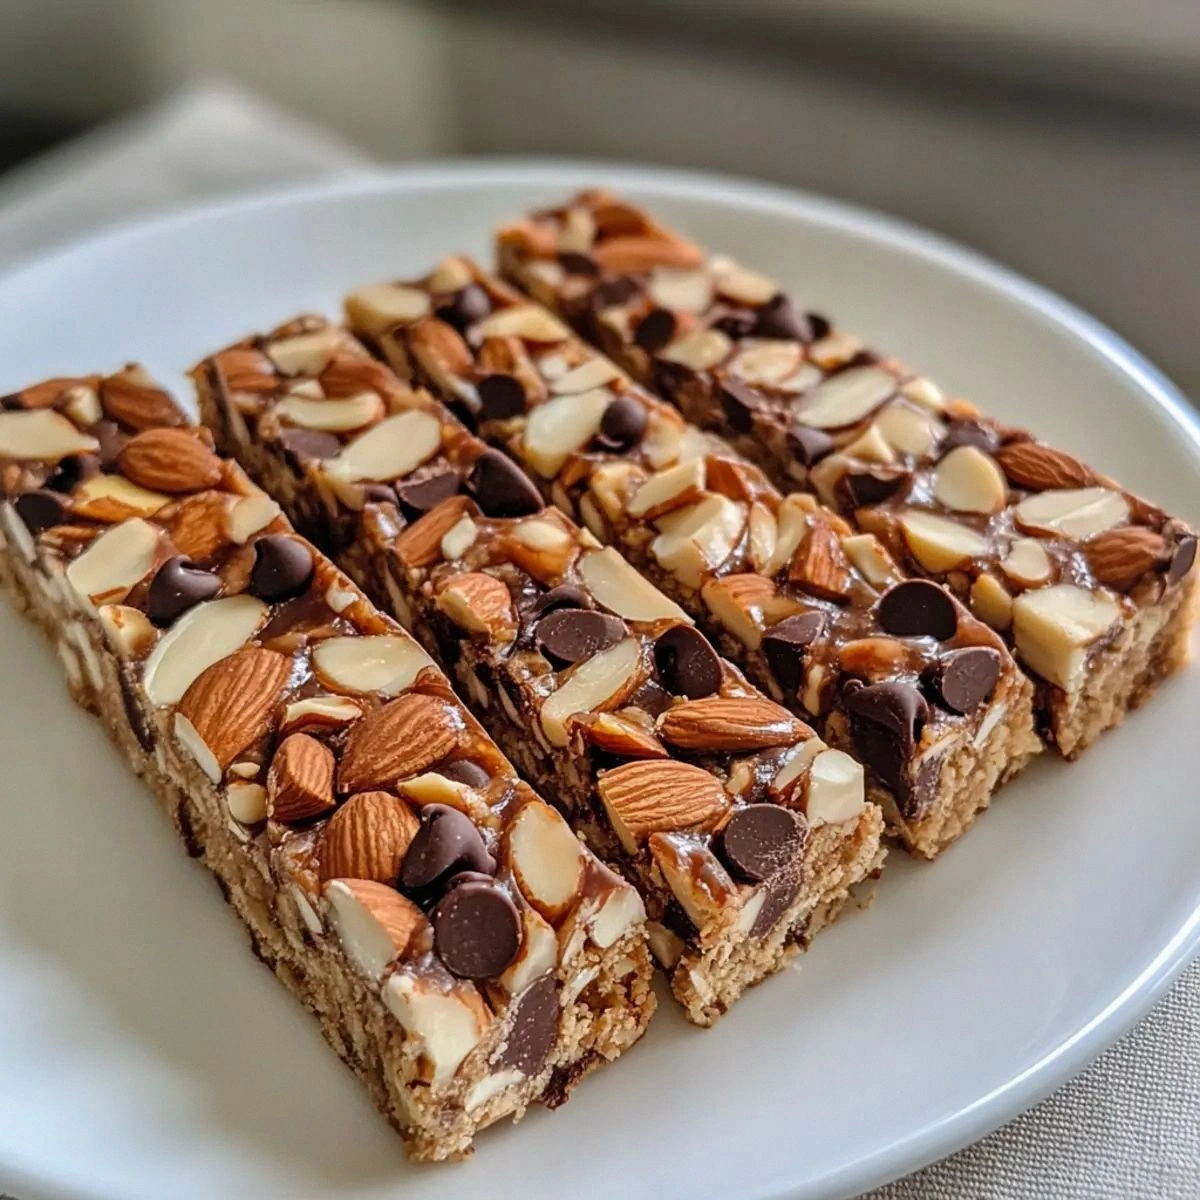
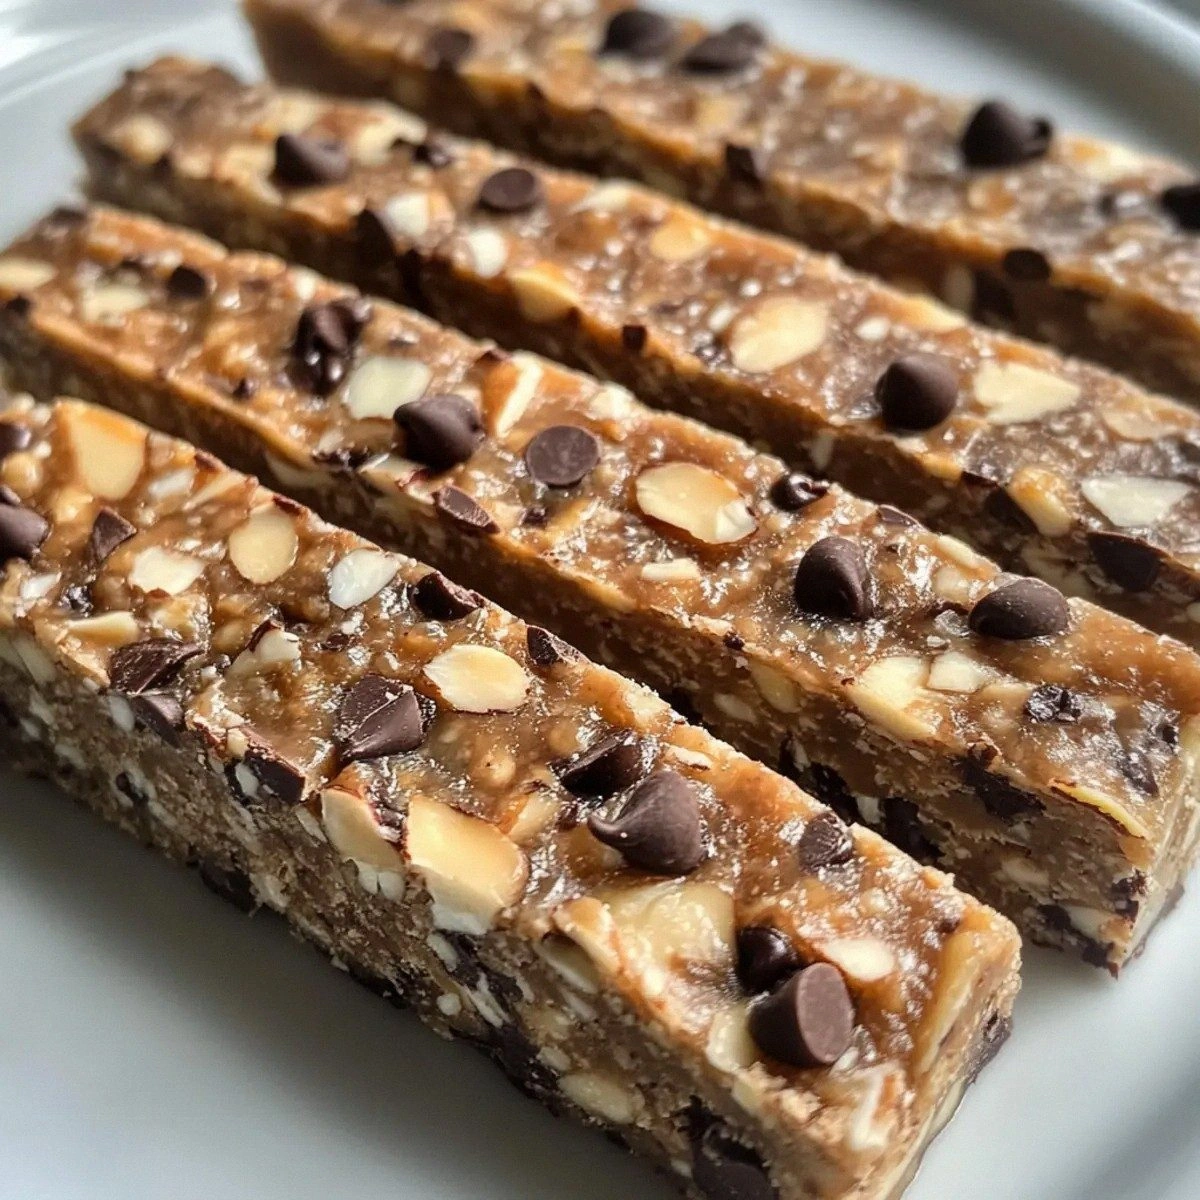
Picture this: the glossy sheen of honey drizzling over a mountain of rolled oats, the creamy swirl of Greek yogurt binding everything together, and a handful of chocolate chips that melt just enough to create pockets of molten bliss. The sound of the whisk hitting the bowl is a gentle rhythm that feels like a drumroll for the taste buds. My hands were sticky, my heart was racing, and the timer on my phone was ticking down the minutes until I could taste the first bite. I dared myself to taste it and not go back for seconds—spoiler: I failed miserably, but that’s the point.
What makes this version stand out? Most recipes either skip the yogurt, relying on butter alone, or they over‑sweeten with sugar, turning the bar into a candy bar rather than a balanced snack. I’ve cracked the code by using Greek yogurt as the moisture hero, which keeps the bars moist without drowning them in fat, and by adding chia seeds for that subtle crunch that’s almost like hearing a tiny applause in your mouth. The result is a bar that’s dense enough to fuel a workout but light enough to melt on your tongue like a cloud of cocoa.
I’m about to reveal a technique most home cooks overlook: a quick toast of the oats before mixing them in. This simple step creates a toasty backbone that makes every bite sing, and it’s the secret that separates a good bar from a great one. Let me walk you through every single step — by the end, you’ll wonder how you ever made it any other way.
What Makes This Version Stand Out
- Taste: The combination of tangy Greek yogurt with honey creates a sweet‑tart harmony that feels like a sunrise in your mouth.
- Texture: Toasted oats give a crunchy bite, while chia seeds add a subtle gel that keeps the bar moist without being gummy.
- Simplicity: Only eleven ingredients, all pantry‑friendly, and no fancy equipment—just a bowl, a whisk, and a baking sheet.
- Uniqueness: The addition of cacao nibs and shredded coconut introduces a bitter‑sweet contrast that most store‑bought bars lack.
- Crowd Reaction: I’ve handed these out at office meetings and they disappear faster than free Wi‑Fi—people keep asking for the recipe.
- Ingredient Quality: Using full‑fat Greek yogurt boosts protein and gives a richer mouthfeel than low‑fat alternatives.
- Cooking Method: Baking, not refrigerating, creates a firm crust that holds together during transport.
- Make‑Ahead Potential: These bars keep for up to a week in the fridge, making them perfect for busy mornings or post‑gym refuels.
Alright, let's break down exactly what goes into this masterpiece…
Inside the Ingredient List
The Flavor Base
Greek yogurt is the unsung hero here. Its creamy tang balances the sweetness of honey and the richness of nut butter, while delivering a whopping 10‑12 grams of protein per cup. If you skip it, you’ll end up with a dry, crumbly bar that feels more like a snack for birds than humans. For the best texture, choose a full‑fat, plain Greek yogurt—no fruit‑flavored varieties, which add unwanted moisture and sugar.
Honey isn’t just a sweetener; it’s a natural humectant that locks in moisture, ensuring the bars stay soft for days. I love using raw, unfiltered honey because it brings subtle floral notes that plain white sugar can’t match. If you’re allergic or vegan, swap it for agave syrup or maple syrup, but expect a slightly lighter flavor.
The Texture Crew
Rolled oats are the backbone of any good bar. When toasted, they develop a nutty crunch that contrasts beautifully with the smooth yogurt. Skipping the toast will give you a softer bar that’s still tasty but lacks that satisfying bite. You can substitute quick‑cook oats if you’re pressed for time, but the texture will be a bit mushier.
Nut butter (I use almond butter) adds richness and helps bind the mixture. It also contributes healthy monounsaturated fats, making the bars more satiating. If you have a peanut allergy, swap with sunflower seed butter or even a tahini for a sesame twist.
Chia seeds act like tiny sponges, soaking up excess moisture and preventing the bars from becoming soggy. They also boost omega‑3s, fiber, and that pleasant pop when you bite into them. If you don’t have chia, you can use ground flaxseed, but expect a slightly different texture.
The Unexpected Star
Cacao nibs and dark chocolate chips bring a bittersweet punch that cuts through the sweetness of honey. The nibs stay crunchy even after baking, while the chips melt just enough to create pockets of molten chocolate. If you prefer a sweeter bar, increase the chocolate chips to 1/3 cup, but keep the nibs for that essential crunch.
Dried blueberries add a burst of tartness and a chewy contrast. They also bring antioxidants without adding extra sugar. If blueberries aren’t in season, substitute with dried cranberries or chopped dried apricots.
The Final Flourish
Shredded coconut lends a tropical aroma and a delicate chew. It’s optional, but I swear it elevates the bar from “good” to “wow”. Almonds add a nutty crunch and extra protein. If you’re allergic, swap almonds for pumpkin seeds or omit entirely.
Everything's prepped? Good. Let's get into the real action...
The Method — Step by Step
- Preheat and Prep: Preheat your oven to 350°F (175°C). Line a 9×13‑inch baking pan with parchment paper, letting the edges overhang for easy lift‑out later. This is the moment of truth: a hot oven will set the bars quickly, preventing them from spreading too thin. Kitchen Hack: Place the parchment over the pan and lightly grease the paper; this prevents sticking without adding extra oil.
- Toast the Oats: In a large skillet over medium heat, add the rolled oats. Stir constantly for 4‑5 minutes until they turn a deep golden brown and give off a nutty scent. This step is pure magic; the toasted flavor is what most recipes miss. Watch Out: Do not let the oats burn; burnt oats will add a bitter aftertaste that ruins the bar.
- Mix Wet Ingredients: In a mixing bowl, whisk together the Greek yogurt, honey, and nut butter until smooth and glossy. The mixture should look like a thick, velvety sauce that coats the back of a spoon. If it looks too runny, add a tablespoon of extra oats; if too thick, a splash of almond milk will loosen it.
- Combine Dry Components: Add the toasted oats, protein powder, chia seeds, shredded coconut, chopped almonds, and dried blueberries to the wet mixture. Stir gently until every crumb is coated; you’ll notice the batter thickening as the chia seeds begin to swell. This is where the bar starts to take shape, and you’ll feel a satisfying resistance as you fold.
- Fold in the Chocolate: Turn off the heat and let the mixture cool for about two minutes—this prevents the chocolate chips from melting completely. Then, fold in the dark chocolate chips and cacao nibs. The chips should stay as distinct pockets, creating that “bite‑of‑chocolate” surprise in each bar.
- Press and Smooth: Transfer the batter to the prepared pan. Using a spatula or the back of a spoon, press the mixture firmly into an even layer, about ½‑inch thick. The edges should pull away slightly from the parchment—this is your visual cue that the bars will hold together after baking.
- Bake to Perfection: Slide the pan into the preheated oven and bake for 30‑35 minutes, or until the top turns a light golden brown and a toothpick inserted into the center comes out with just a few moist crumbs. The scent at this stage is intoxicating; you’ll hear the faint crackle of the crust as it sets.
- Cool Completely: Remove the pan and let the bars cool in the pan for at least 20 minutes. Then, use the parchment overhang to lift the entire slab onto a cutting board. Slice into 12 even bars using a sharp knife—clean cuts are essential for a professional look. Kitchen Hack: Warm the knife blade under hot water, dry it, and then slice; this prevents the bars from crumbling.
- Store or Serve: Transfer the bars to an airtight container. They stay fresh in the fridge for up to 7 days, or you can freeze them for up to 3 months. When you’re ready to eat, let them sit at room temperature for 5 minutes; the flavor will open up like a sunrise.
That's it — you did it. But hold on, I've got a few more tricks that'll take this to another level...
Insider Tricks for Flawless Results
The Temperature Rule Nobody Follows
Never bake these bars at a temperature lower than 350°F. Lower temps cause the oats to dry out before the interior sets, leading to a crumbly texture. I once tried 325°F to “be gentle,” and the bars turned into a dry, sand‑like mess. Keep the oven hot, and the bars will develop that perfect golden crust while staying moist inside.
Why Your Nose Knows Best
Trust the aroma. When the toasted oats hit that nutty fragrance and the honey starts to caramelize, you know the base is ready. If you don’t smell anything, give the oats another minute. Your nose is a better timer than any kitchen gadget when it comes to toasting.
The 5‑Minute Rest That Changes Everything
After baking, let the bars rest in the pan for at least five minutes before cutting. This short pause lets the interior firm up, preventing the bars from falling apart. I once cut them immediately and ended up with a mushy mess—lesson learned.
The “Press‑Hard” Technique
When you press the batter into the pan, use the heel of your hand to apply firm, even pressure. This compacts the mixture, ensuring the bars hold together during transport. A friend tried a gentle press and found the bars crumbling in their gym bag—firm press saves the day.
The Secret of the Over‑hang
Leaving parchment overhang on two sides of the pan makes lifting out the slab a breeze. Without it, you’ll be scraping and breaking the bars. This tiny hack saves you from a frustrating cleanup and keeps every bar intact.
Creative Twists and Variations
This recipe is a playground. Here are some of my favorite ways to switch things up:
PB&J Remix
Swap almond butter for peanut butter and replace dried blueberries with a swirl of natural strawberry jam before baking. The jam caramelizes slightly, creating a gooey pocket that pairs perfectly with the peanut butter.
Tropical Escape
Add ¼ cup shredded pineapple and replace the almonds with toasted coconut flakes. The extra coconut amplifies the island vibe, and the pineapple adds a juicy burst that brightens the bar.
Mocha Madness
Mix in 1 tablespoon instant espresso powder with the protein powder and swap half the dark chocolate chips for milk chocolate chips. The espresso deepens the chocolate flavor, making it a perfect pre‑workout treat.
Nut‑Free Power
Omit all nuts and use sunflower seed butter, pumpkin seeds, and hemp hearts. This version is allergy‑friendly yet still packed with protein and crunch.
Spice Route
Add ½ teaspoon cinnamon and a pinch of ground ginger to the dry mix. The warm spices turn the bar into a cozy snack for chilly mornings.
Storing and Bringing It Back to Life
Fridge Storage
Place the bars in an airtight container lined with parchment squares between each bar to prevent sticking. They stay fresh for up to 7 days. If you notice a slight crust forming, simply let the bar sit at room temperature for 5 minutes before eating.
Freezer Friendly
Wrap each bar individually in a small piece of parchment, then place them in a zip‑top freezer bag. They can be frozen for up to 3 months. When you’re ready to enjoy one, pop it in the fridge overnight or microwave for 20 seconds.
Best Reheating Method
Add a tiny splash (about a teaspoon) of water to the bar before microwaving for 15‑20 seconds. The steam revives the softness, and the bar feels freshly baked. Avoid overheating, or the chocolate chips will melt into a gooey mess.