I still remember the night I tried to impress my friends with a batch of vanilla cookies that looked like they’d come straight from a high‑end patisserie. I had the right ingredients, the right oven, and an earnest “let’s do this” attitude. Yet the result was a sad, flat dough that tasted like a memory of something better. It wasn’t until I stumbled across a recipe that called for a whole vanilla bean and a splash of gel food coloring that I realized the secret to turning bland into unforgettable. The moment the dough hit the tray, the air was filled with a scent that made my stomach do a happy little dance—sweet, buttery, and unmistakably vanilla.
Picture this: a golden‑brown cookie, crisp on the edges yet soft in the center, the kind that melts in your mouth like a velvet ribbon. The first bite is an explosion of pure vanilla, the second a whisper of caramelized sugar, and the third, a lingering hint of toasted almond from the butter. The texture is a delicate balance—neither too cakey nor too crumbly—and the finish is dusted with a rainbow of sprinkles that give it a playful, almost mischievous flair. That sizzle when the dough hits the pan? Absolute perfection.
Most recipes get this completely wrong, either by over‑baking or under‑seasoning, but this version is hands down the best you’ll ever make at home. The key is in the technique: using a whole vanilla bean to infuse the butter, letting the dough rest, and finishing with a glossy glaze that has a touch of gel coloring for that eye‑catching pop. I dare you to taste this and not go back for seconds. I’ll be honest — I ate half the batch before anyone else got to try it — and the rest? I’m still dreaming about the buttery aroma that lingers in my kitchen.
If you’ve ever struggled with vanilla cookies that taste flat or look like they’ve been on the shelf for a month, you’re not alone. And I’ve got the fix. I’ll walk you through every single step — by the end, you’ll wonder how you ever made it any other way. Let’s dive in.
What Makes This Version Stand Out
- Flavor: The use of a whole vanilla bean, split between dough and glaze, creates a depth of flavor that vanilla powder can never match. It’s like the difference between a cup of brewed coffee and a latte made from beans freshly ground at home.
- Texture: The dough’s resting period allows the gluten to relax, resulting in cookies that are crisp around the edges but still chewy in the center, a texture that’s impossible to replicate with instant vanilla.
- Simplicity: Despite the luxurious taste, the recipe requires only a handful of pantry staples and a few extra touches. You don’t need exotic ingredients or fancy equipment.
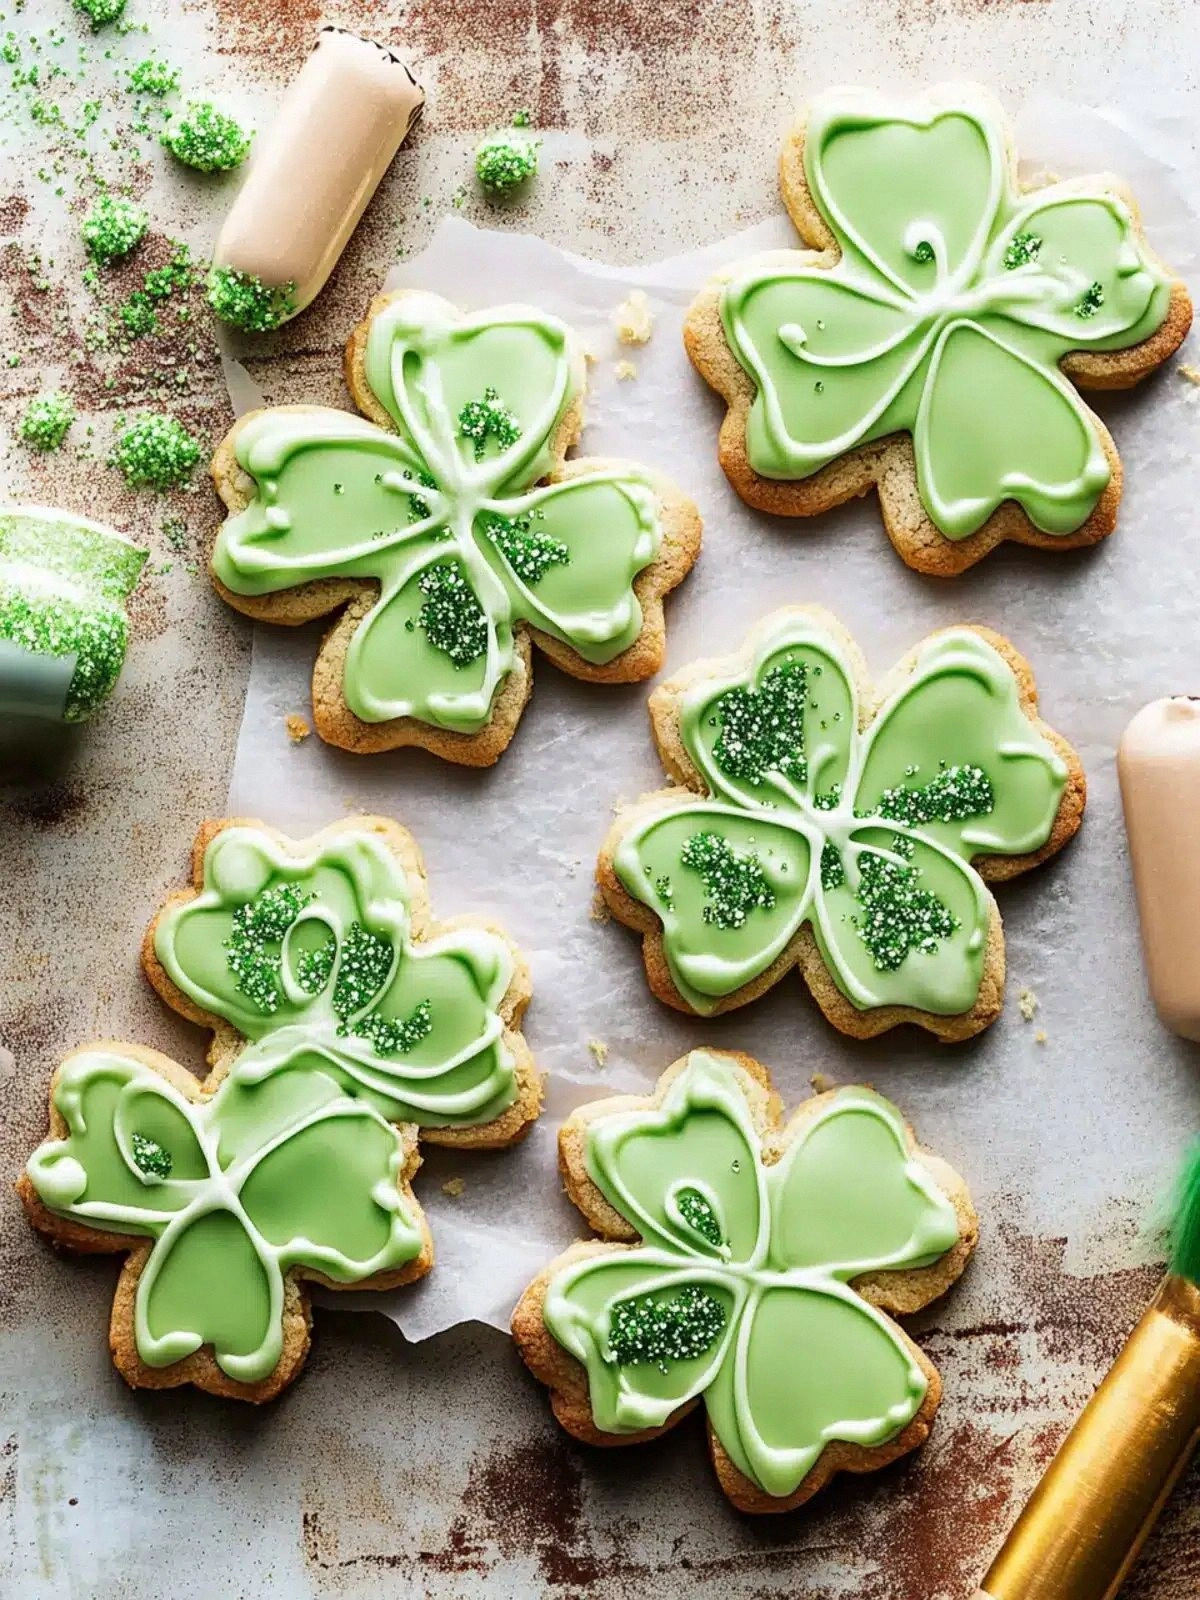
- Visual Appeal: The glaze’s gel food coloring turns a plain vanilla cookie into a rainbow of color, making it perfect for St. Patrick’s Day, birthdays, or any celebration that needs a pop of joy.
- Crowd Reaction: Friends and family rave about the “wow” factor when they see the glazed cookies. The moment they bite into the first one, the room fills with a chorus of “mmm” and “where did you get this?”
- Ingredient Quality: Using high‑quality unsalted butter and real vanilla beans elevates the dish from ordinary to extraordinary. The butter’s richness and the vanilla’s aromatic oils are the backbone of this recipe.
- Make‑Ahead Potential: The cookies can be baked ahead and stored, and the glaze can be made in advance, allowing you to assemble them on the fly for last‑minute celebrations.
- Versatility: The glaze can be tweaked with different colors or flavors, turning the same cookie base into a variety of themed treats.
Alright, let’s break down exactly what goes into this masterpiece…
Inside the Ingredient List
The Flavor Base
The foundation of these cookies is the simple yet powerful combination of all‑purpose flour, baking powder, and salt. The flour provides structure, while the baking powder ensures a light lift, and the salt balances the sweetness. If you skip the salt, the cookies will taste flat and overly sweet, like a sugar‑candy bar. The key to a golden crust is the right ratio of flour to butter; too much flour and the cookies become dry, too little and they spread too much.
Tip: Use a fine‑sifted flour to avoid clumps and ensure even mixing. A fine texture also gives the dough a silky feel, which is essential for that buttery mouthfeel.
The Texture Crew
Unsalted butter is the star of the show, providing both flavor and moisture. At room temperature, the butter should be soft enough to press into a finger without breaking. The granulated sugar creates a crisp exterior by caramelizing in the oven, while the vanilla bean seeds release their fragrant oils, turning the dough into a fragrant masterpiece. If you use salted butter, the cookies will taste salty, which can be a pleasant surprise, but it’s best to stick with unsalted for full control.
The egg acts as a binder, keeping everything together. It also adds richness and helps the cookies rise slightly. When whisking the egg, make sure it’s at room temperature; otherwise, the dough can separate or become greasy.
The Unexpected Star
Pure vanilla extract adds a clean, sweet aroma that complements the vanilla bean’s depth. While the bean provides the body of the flavor, the extract gives it a bright, immediate kick. The second half of the recipe’s vanilla bean is reserved for the glaze, which will carry that same aromatic punch to the finish. Skipping the extract will leave a flat finish, as if you’re missing the final flourish on a painting.
If you’re allergic to vanilla or prefer a different flavor, you can substitute the extract with almond or hazelnut extract, but be aware that the overall profile will shift significantly.
The Final Flourish
The glaze is the finishing touch that turns plain cookies into showstoppers. Confectioners’ sugar gives the glaze its smooth, glossy look, while heavy cream provides the right consistency. The second vanilla bean and the extra vanilla extract infuse the glaze with the same aromatic intensity as the dough. Gel food coloring is optional but recommended for a festive, eye‑catching effect. Sprinkles add texture and a burst of color, making the cookies perfect for celebrations.
If you skip the glaze, the cookies will still be delicious, but they will lack that glossy, celebratory look. The glaze also adds a subtle sweetness that balances the butter’s richness.
Everything's prepped? Good. Let's get into the real action.
The Method — Step by Step
- Preheat your oven to 350°F (175°C) and line two baking sheets with parchment paper. This temperature ensures a gentle bake that brings out the vanilla’s aroma without burning the sugar. The parchment prevents sticking and makes cleanup a breeze.
- In a medium bowl, whisk together 2.25 cups all‑purpose flour, 0.5 teaspoon baking powder, and 0.25 teaspoon salt. The dry mix must be evenly distributed; a small clump can cause uneven rising. This step is crucial for the cookie’s structure.
- In a separate large bowl, beat 0.75 cups unsalted butter and 0.75 cups granulated sugar until light and fluffy, about 2 minutes. The butter should be at room temperature; if it’s too soft, the sugar won’t incorporate properly. A fluffy base ensures a tender crumb.
- Scrape the seeds from 1 whole vanilla bean and add them to the butter mixture, along with 2 teaspoons pure vanilla extract. Whisk until fully combined. The seeds add a subtle depth that powder can’t match. Watch the mixture turn a pale, almost translucent color.
- Add 1 large egg to the butter mixture and beat until fully incorporated. The egg binds the dough and adds moisture. If you notice any lumps, pulse the mixer briefly to smooth them out.
- Gradually add the dry flour mixture to the wet ingredients, stirring until just combined. Over‑mixing can develop gluten, resulting in tough cookies. The dough should feel soft yet hold its shape when pressed.
- Cover the dough with plastic wrap and refrigerate for at least 30 minutes. Resting relaxes the gluten and allows the flavors to meld. This step is often skipped but is a game‑changer for texture.
- Take the dough out of the fridge and roll it into 1¼‑inch balls. Place them 2 inches apart on the prepared baking sheets. The spacing prevents spreading, ensuring a neat, uniform cookie.
- Bake for 12–14 minutes, or until the edges are golden brown and the centers have set. The cookies should look slightly pale in the center; they’ll firm up as they cool. This is the moment of truth—don’t rush it.
- Let the cookies cool on the sheet for 5 minutes, then transfer them to a wire rack to cool completely. The cookies will firm up further, creating that perfect bite‑size texture.
- While the cookies are cooling, prepare the glaze. In a small saucepan, combine 3 cups confectioners’ sugar, 3 tablespoons heavy cream, 1.5 teaspoons pure vanilla extract, and 0.5 whole vanilla bean. Warm over low heat, stirring constantly, until the mixture is smooth and glossy. The vanilla bean seeds should dissolve, releasing their fragrance.
- Add a few drops of gel food coloring to the glaze to achieve your desired hue. A light green for St. Patrick’s Day or a vibrant rainbow for a birthday. Stir until the color is even. If the glaze is too thick, add a splash of cream; if too thin, add more powdered sugar.
- Dip the cooled cookies into the glaze, allowing any excess to drip off. Place them on parchment paper to set. Sprinkle with your favorite sprinkles while the glaze is still wet for a festive finish.
- Let the glaze set for at least 10 minutes before serving. The cookies should feel firm to the touch, and the glaze should be glossy and slightly tacky. Enjoy immediately or store in an airtight container.
That's it — you did it. But hold on, I've got a few more tricks that'll take this to another level.
Insider Tricks for Flawless Results
The Temperature Rule Nobody Follows
Many bakers think the oven temperature is a fixed number, but the reality is that oven calibration varies. Use an oven thermometer to confirm the actual temperature; a 5‑degree difference can mean the difference between a chewy center and a dry cookie. If your oven runs hot, reduce the temperature by 10°F and add a few extra minutes to the bake time.
Why Your Nose Knows Best
The aroma of vanilla is a subtle indicator of how far along the baking process is. As the cookies bake, the scent will intensify and then start to fade. When you smell a faint vanilla perfume, the cookies are almost done. This sensory checkpoint saves you from over‑baking.
The 5‑Minute Rest That Changes Everything
After baking, let the cookies rest on the sheet for 5 minutes before transferring them to a wire rack. This short pause allows the structure to set, preventing the cookies from crumbling as they cool. Skipping this step often results in a soft, uneven crumb.
Use a Silicone Mat for Even Baking
Silicone baking mats provide a non‑stick surface and distribute heat evenly. This eliminates the need for parchment paper and reduces waste. The result is a consistent rise and an even golden crust on all cookies.
Keep Your Butter Cool But Not Frozen
Butter that’s too soft can cause the dough to spread too much, while butter that’s too cold can result in uneven mixing. Aim for a temperature where the butter is just soft enough to be pressed between your fingers but still holds its shape. This balance is key to a perfect cookie.
Creative Twists and Variations
This recipe is a playground. Here are some of my favorite ways to switch things up:
Chocolate‑Covered Vanilla
Dip the cooled cookies in melted dark chocolate before the glaze sets. The chocolate adds a rich, bittersweet contrast to the sweet vanilla. Finish with a dusting of sea salt for a caramel‑like crunch.
Minty Green Delight
Add a splash of peppermint extract to the glaze for a fresh, minty twist. The green hue and cool flavor make these cookies a perfect St. Patrick’s Day treat. Top with green sprinkles for extra flair.
Almond‑Infused Elegance
Replace half the butter with almond butter and add 1 teaspoon almond extract to the dough. The nutty undertone pairs beautifully with vanilla, creating a sophisticated flavor profile that’s great for brunch.
Caramel‑Swirled Surprise
Fold a swirl of caramel sauce into the dough before baking. The caramel adds a sweet, buttery depth that caramelizes beautifully on the cookie edges. The result is a gooey, decadent treat.
Red‑Wine Glaze Variation
Swap the heavy cream in the glaze for a splash of red wine. The wine adds a subtle fruitiness that complements the vanilla. This version is ideal for a cozy evening with friends.
Gluten‑Free Version
Use a 1:1 gluten‑free flour blend and increase the baking powder to 0.75 teaspoon. The cookies will be slightly denser but still deliciously soft. The gluten‑free dough will still hold its shape and bake evenly.
Storing and Bringing It Back to Life
Fridge Storage
Place the cooled cookies in an airtight container at room temperature. They will stay fresh for up to 5 days. If you want them extra crisp, add a slice of apple to the container; the apple will absorb excess moisture.
Freezer Friendly
Layer the cookies on a parchment paper‑lined tray and freeze for up to 3 months. Once frozen, transfer them to a freezer‑safe bag. When ready to eat, let them thaw at room temperature for 30 minutes. The cookies will retain their texture and flavor.
Best Reheating Method
To revive the cookies, preheat your oven to 300°F (150°C). Place the cookies on a baking sheet and warm them for 5–7 minutes. Add a tiny splash of water before reheating; it steams the cookies back to perfection, restoring that soft, chewy center.