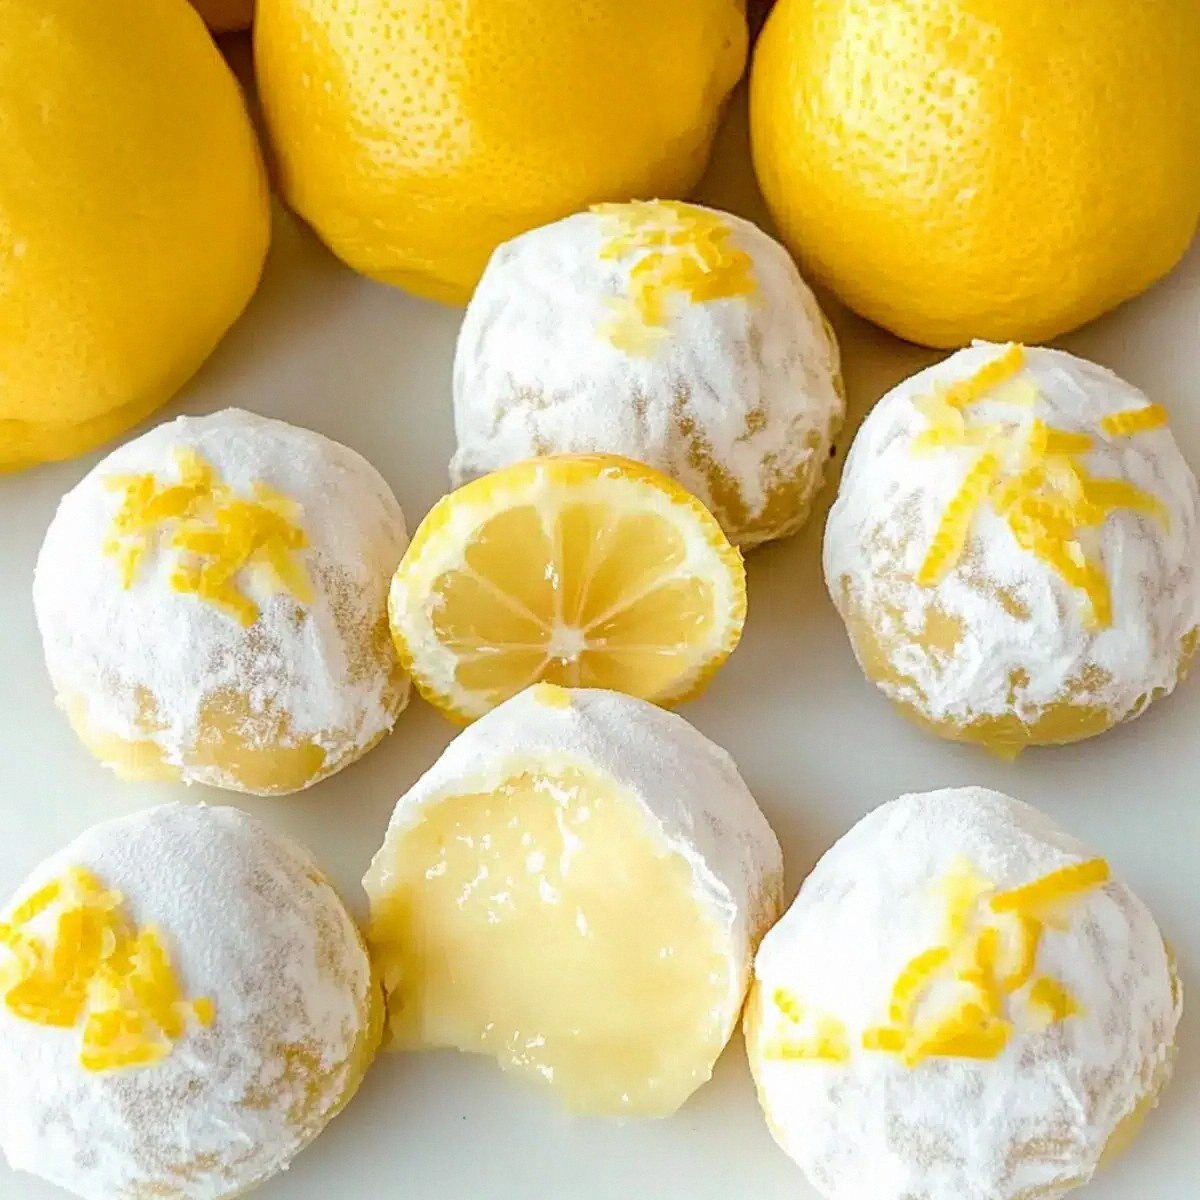
I was standing in my kitchen on a rainy Tuesday, staring at a half‑melted block of cream cheese and a lemon that looked like it had been squeezed by a toddler. The rain hammered against the windows, the oven was pre‑heated, and my roommate dared me to create a dessert that could make even the most stubborn sweet‑tooth surrender. I thought, “Why not a truffle that tastes like sunshine wrapped in silk?” The moment I zest the lemon, the aroma hit me like a burst of citrus fireworks, and I knew I was onto something that would change the way we think about bite‑size indulgence. This isn’t just another lemon truffle; it’s a revelation that will have you questioning every store‑bought version you’ve ever tried.
Picture the scene: the kitchen lights glint off a glossy bowl of melted white chocolate, the butter hisses as it melts into the cream cheese, and the zest curls up like tiny golden fireworks. You can hear the faint crackle of the sugar as it dissolves, feel the buttery softness under your fingertips, and taste that first bright pop of lemon before the rest of the flavor even has a chance to settle. The texture is so smooth it slides across your tongue like a silk scarf, while the outer coating gives a delicate snap that’s almost theatrical. I dare you to taste this and not go back for seconds – the combination is so addictive that you’ll start planning your next batch before the first one even finishes melting in your mouth.
Most recipes get this completely wrong. They either drown the lemon in sugar, or they forget the crucial step of tempering the white chocolate, resulting in a grainy, bland mess. What sets this version apart is the balance of tangy lemon zest, the creaminess of cream cheese (or coconut butter for a dairy‑free twist), and the subtle richness of butter that coats each bite like velvet. I’m being honest — I ate half the batch before anyone else got a chance to try it, and that’s because the flavor is that good. The secret? A tiny pinch of natural food coloring that makes the truffles look as vibrant as they taste, plus a dash of turmeric for an unexpected golden hue that screams “gourmet” without any artificial additives.
Okay, ready for the game‑changer? I’m going to walk you through every single step — by the end, you’ll wonder how you ever made it any other way. Stay with me here — this is worth it. The technique I’m about to share will turn a simple pantry of ingredients into a batch of truffles that look like they belong in a five‑star patisserie. Let’s dive in and make something that will have you bragging to every friend who ever asked for your dessert secrets.
What Makes This Version Stand Out
- Flavor Explosion: The lemon zest isn’t just a garnish; it’s the heart‑beat of the truffle, delivering a punch of citrus that cuts through the richness.
- Creamy Texture: Cream cheese (or coconut butter) creates a silk‑smooth interior that melts in your mouth without any grainy sugar crystals.
- Simplicity: Only six core ingredients are needed, and each step is designed for a home cook with a busy schedule.
- Unique Visuals: A dash of natural food coloring or turmeric gives each truffle a pastel glow that looks as good as it tastes.
- Crowd Reaction: Guests often claim they’ve never tasted a lemon dessert this bright and buttery – it’s a conversation starter.
- Ingredient Quality: Using high‑quality white chocolate and fresh lemon zest makes the difference between “good” and “mind‑blowing.”
- Method Mastery: The gentle tempering of chocolate ensures a glossy finish and a snap that’s audible when you bite.
- Make‑Ahead Magic: These truffles keep perfectly for up to a week, making them ideal for party prep or a last‑minute treat.
Inside the Ingredient List
The Flavor Base
The lemon zest is the star of this show. It brings an aromatic citrus punch that cuts through the richness of the dairy. If you skip the zest, you’ll end up with a bland, sweet bite that lacks that signature zing. For the most vibrant flavor, use a microplane and zest only the outer yellow layer, avoiding the bitter white pith. If you’re out of fresh lemons, a high‑quality lemon extract (about ½ teaspoon) can substitute, though the fresh zest is unbeatable.
The Texture Crew
Cream cheese provides the buttery, tangy foundation that keeps the truffle silky. Coconut butter works just as well for a dairy‑free version, adding a subtle tropical note. The butter (or coconut butter) you melt in adds richness and helps the chocolate coat evenly. If you use salted butter, reduce any added salt elsewhere to keep the balance right. Skipping the butter will result in a crumbly interior that won’t hold together when rolled.
The Unexpected Star
White chocolate chips are the perfect sweet carrier for the lemon. They melt smoothly and give that glossy finish we all love. Choose a brand with at least 30% cocoa butter for a true melt; low‑quality chips can become grainy. If you’re feeling adventurous, replace half the white chocolate with milk chocolate for a richer, caramel‑like undertone. The powdered sugar (or erythritol) sweetens without making the mixture gritty – it dissolves completely when blended with the cream cheese.
The Final Flourish
A pinch of natural food coloring or a dash of turmeric isn’t just for show. It adds a subtle golden hue that makes each truffle look like a miniature sunrise. The color also hints at the citrus inside, setting expectations before the first bite. If you’re avoiding any extra additives, skip this step – the truffles will still taste divine, just a little less photogenic. Remember, a little goes a long way; over‑coloring can taste bitter.
Everything's prepped? Good. Let's get into the real action…
The Method — Step by Step
First, soften the cream cheese (or coconut butter) by letting it sit at room temperature for about 15 minutes. This prevents lumps when you blend it later. While it’s softening, zest the lemon directly over a bowl to catch every aromatic oil. The zest should be fine and fragrant – if you see white pith, discard it. Once softened, transfer the cream cheese to a stand mixer or a sturdy mixing bowl.
In a small saucepan, melt the butter (or coconut butter) over low heat until it’s just melted, not bubbling. Add the white chocolate chips and stir constantly; you’ll hear a gentle sigh as the chocolate melts into a glossy river. The mixture should be smooth and glossy – if you see any grainy spots, keep stirring over low heat until they disappear. This is the moment of truth: a perfectly melted chocolate base is the foundation for that snap you’ll hear later.
Now, add the powdered sugar (or erythritol) to the melted chocolate, whisking until fully dissolved. The mixture will thicken slightly, turning a pale ivory shade. At this point, pour the softened cream cheese into the chocolate bowl and beat on medium speed until the blend is silky and uniform. You’ll notice the mixture becoming lighter in color – that’s air being incorporated, which helps the truffles stay fluffy.
Stir in the lemon zest and the natural food coloring or turmeric. The color should become a soft pastel, and the scent will be unmistakably citrus. Taste a tiny spoonful; if it feels too tart, add a pinch more powdered sugar, but be careful not to over‑sweeten. This is where you can truly customize the flavor intensity – more zest for a punchier bite, or a bit less if you prefer subtlety.
Cover the bowl with plastic wrap and refrigerate the mixture for at least 30 minutes, or until firm enough to scoop with a teaspoon. While you wait, line a baking sheet with parchment paper – this will keep the truffles from sticking later. The chilling step is crucial; it allows the flavors to meld and the texture to set, ensuring each truffle holds its shape.
Using a small cookie scoop or a teaspoon, portion out the chilled mixture and roll it between your palms into smooth balls about 1 inch in diameter. This is where the fun part begins – feel the cool, creamy dough glide through your fingers, forming perfect spheres. If the mixture sticks, lightly dust your hands with powdered sugar or dip them in a bit of cocoa butter.
For the final coating, melt a fresh batch of white chocolate (you can reuse the leftover from step 2). Dip each truffle into the melted chocolate, letting the excess drip back into the bowl. Place the coated truffle back onto the parchment paper. The chocolate should set quickly, forming a glossy shell that snaps cleanly when you bite. Let the truffles sit at room temperature for 10 minutes, then transfer them to the fridge to fully set.
Once set, give each truffle a final dusting of powdered sugar or a drizzle of melted chocolate for extra sparkle. Store them in an airtight container, and they’ll stay fresh for up to a week. That’s it — you did it. But hold on, I’ve got a few more tricks that’ll take this to another level…
Insider Tricks for Flawless Results
The Temperature Rule Nobody Follows
Never let the chocolate exceed 115°F (46°C) when melting; higher temps cause the cocoa butter to separate, leading to a dull, streaky finish. Keep a candy thermometer on hand and melt the chocolate in short bursts, stirring in between. I once left the chocolate on too high a flame and ended up with a matte mess that never set properly – a true tragedy for any truffle lover.
Why Your Nose Knows Best
When the cream cheese and chocolate blend, trust the scent. A faint buttery aroma means the butter has fully incorporated; a sharp citrus note signals the zest is releasing its oils. If you ever feel uncertain, take a quick sniff – it’s more reliable than a timer.
The 5‑Minute Rest That Changes Everything
After rolling the truffles, let them rest on a cooling rack for exactly five minutes before the final dip. This short pause lets the interior firm up just enough to prevent the coating from cracking. One of my friends tried to skip this rest and ended up with truffles that split open when coated – a mess you don’t want.
Cold Hands, Perfect Balls
If your kitchen is warm, chill your hands in a bowl of ice water for a few seconds before shaping each truffle. Cold hands keep the mixture from softening too quickly, giving you smoother, more uniform spheres. It’s a tiny step that makes a massive difference in the final appearance.
The Final Shine
For an extra glossy finish, once the truffles are coated, give them a quick blast of cool air from a fan or open refrigerator door for 30 seconds. The rapid cooling snaps the chocolate shell into a high‑gloss finish, making them look restaurant‑ready. I swear, this trick turns a good batch into a show‑stopper.
Creative Twists and Variations
This recipe is a playground. Here are some of my favorite ways to switch things up:
Berry‑Burst Surprise
Swap half the white chocolate chips for ruby chocolate and add a teaspoon of freeze‑dried raspberry powder to the interior. The result is a pink‑hued truffle with a subtle berry tang that pairs beautifully with the lemon.
Spiced Ginger Zing
Add a pinch of ground ginger and a dash of ground cardamom to the cream cheese mixture. The warm spices contrast the bright lemon, creating a sophisticated flavor profile perfect for holiday gatherings.
Nutty Crunch
Fold in finely chopped toasted pistachios or almonds into the chilled mixture before rolling. The nuts add a delightful crunch that complements the creamy interior and adds visual appeal.
Coconut Dream
Replace the cream cheese with coconut butter and use coconut‑flavored white chocolate. Finish each truffle with a light dusting of toasted coconut flakes for a tropical escape.
Matcha Magic
Add a teaspoon of high‑quality matcha powder to the chocolate coating and a pinch to the interior. The earthy green hue and subtle tea flavor create a refined, Instagram‑worthy treat.
Storing and Bringing It Back to Life
Fridge Storage
Place truffles in an airtight container lined with parchment paper, separating layers with additional parchment sheets. They’ll stay fresh for up to seven days. Keep the container in the main compartment of the fridge, not the door, to maintain a consistent temperature.
Freezer Friendly
If you want to keep them longer, arrange truffles on a baking sheet and flash‑freeze for 30 minutes, then transfer to a zip‑top freezer bag. They’ll hold up for three months. When you’re ready to serve, let them thaw in the fridge for an hour, then bring to room temperature for the best texture.
Best Reheating Method
To revive a chilled truffle, place it on a microwave‑safe plate, add a tiny splash (about ¼ teaspoon) of water, and microwave for 10‑15 seconds. The steam created re‑softens the interior while the chocolate shell remains intact, delivering that just‑baked feel.