I dared my roommate to a bake‑off after she claimed she could “make a cookie that doesn’t crumble the moment you touch it.” The kitchen turned into a battlefield of flour clouds, a rogue mixer, and a timer that seemed to mock us every thirty seconds. When the first batch emerged, the aroma hit me like a warm hug from an old friend—sweet vanilla, toasted oats, and a whisper of coconut that made my eyes water. I took a bite, and the cookie melted in my mouth with a chew that reminded me of a perfectly timed drum solo—crisp on the edge, gooey in the middle, and studded with chocolate that didn’t just melt, it sang. I’m going to be honest — I ate half the batch before anyone else got a chance, and that’s why I’m writing this with a slightly guilty grin.
If you’ve ever wrestled with flat, cakey, or overly crunchy chocolate chip cookies, you know the frustration of a recipe that promises “chewy” but delivers “hard as a brick.” Most recipes get this completely wrong. They either over‑bake, use the wrong fat ratio, or forget the secret weapon that makes the texture sing. This version stands out because it introduces rolled oats and sweetened shredded coconut, two ingredients that act like tiny sponges, soaking up moisture and releasing it slowly as the cookie bakes. The result? A cookie that stays soft for days, yet still has that satisfying snap when you bite the edge.
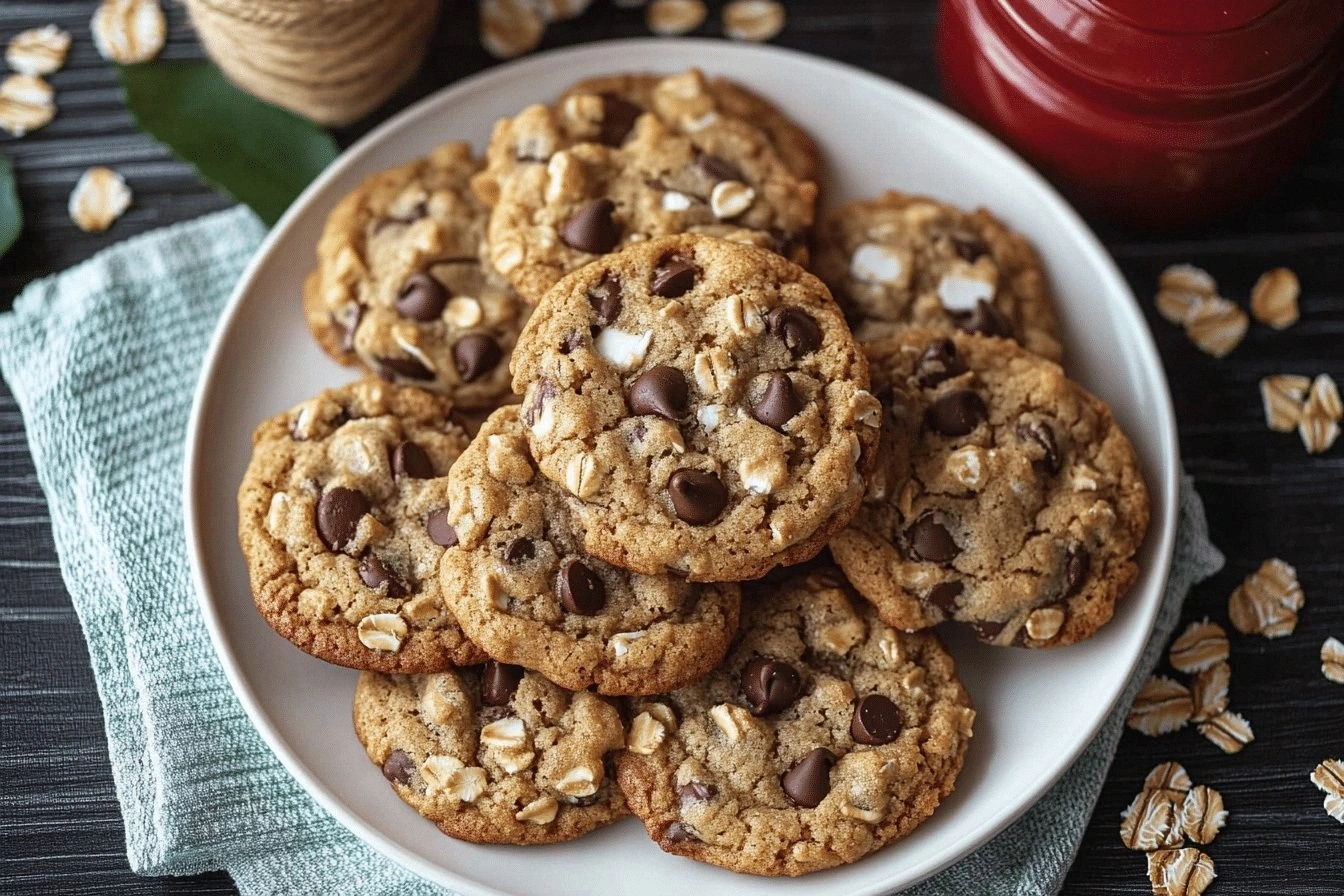
Picture yourself pulling a tray of golden‑brown cookies from the oven, the whole kitchen smelling like a tropical bakery on a breezy afternoon. The edges are lightly browned, the tops are speckled with chocolate chips that have just begun to ooze, and the center looks like a cloud of dough that’s about to burst. That sizzle when the butter hits the pan? Absolute perfection. I dare you to taste this and not go back for seconds, because once you’ve experienced the perfect balance of sweet, salty, and buttery, ordinary cookies will feel like a culinary crime.
Let me walk you through every single step — by the end, you’ll wonder how you ever made it any other way. Okay, ready for the game‑changer? The secret isn’t a fancy gadget; it’s a simple technique involving a short chill for the dough that locks in moisture and a precise bake temperature that gives you that coveted chewy interior. Stay with me here — this is worth it.
What Makes This Version Stand Out
- Chewy Texture: The combination of rolled oats and coconut creates a moist crumb that stays soft long after cooling.
- Flavor Depth: Brown sugar adds caramel notes while a pinch of sea salt amplifies the chocolate’s richness.
- Simple Prep: No fancy equipment required—just a mixing bowl, a spoon, and a willingness to get a little messy.
- Unexpected Star: Sweetened shredded coconut brings a subtle tropical sweetness that pairs beautifully with dark chocolate.
- Crowd‑Pleaser: Even the pickiest eaters (including my teenage brother) can’t resist the melt‑in‑your‑mouth chocolate pockets.
- Make‑Ahead Friendly: The dough can be portioned and frozen, giving you a ready‑to‑bake stash for any spontaneous craving.
Inside the Ingredient List
The Flavor Base
All‑Purpose Flour is the backbone of any cookie, providing structure while still allowing the dough to spread just enough for that perfect edge. If you substitute cake flour, you’ll end up with a crumb that’s too tender and may crumble apart. For best results, sift the flour with the baking soda and salt; this aerates it and ensures an even rise. Pro tip: Look for flour that’s labeled “unbleached” for a slightly richer flavor.
Unsalted Butter brings richness and moisture. Using salted butter throws off the delicate balance of sweet and salty, so always opt for unsalted and add your own pinch of sea salt. When the butter is softened—not melted—it creams smoothly with the sugars, creating tiny air pockets that later become those coveted crisp edges.
Brown Sugar and Granulated Sugar work together like a dynamic duo. The brown sugar’s molasses content deepens the flavor and keeps the cookie chewy, while the white sugar adds a subtle crunch on the outside. If you try to replace brown sugar with all white, expect a drier texture and a less complex flavor profile.
The Texture Crew
Rolled Oats are the unsung heroes of chewiness. Their fibrous nature absorbs moisture and releases it slowly during baking, preventing the cookie from drying out. If you’re in a pinch, quick‑oats can work, but they’ll give a slightly different mouthfeel—more like a granola bar than a cookie.
Sweetened Shredded Coconut adds a tropical twist and a subtle crunch that contrasts beautifully with the soft interior. It also contributes extra sweetness, so you can slightly reduce the granulated sugar if you prefer a less sweet bite. Choose a brand that doesn’t have added preservatives for the purest flavor.
The Unexpected Star
Chocolate Chips are the obvious hero, but the type you choose matters. Semi‑sweet chips strike a perfect balance, while dark chips add a bitter edge that cuts through the sweetness. If you want a gourmet touch, try a mix of milk, dark, and white chips for a rainbow of flavors.
The Final Flourish
Vanilla Extract adds warmth and depth, acting like the glue that ties every flavor together. A splash of high‑quality pure vanilla can elevate the entire batch; imitation vanilla often tastes flat. Baking Soda is the leavening agent that creates lift, giving the cookie a tender crumb and preventing it from becoming dense.
Everything's prepped? Good. Let's get into the real action…
The Method — Step by Step
- Gather and Measure. Before you even turn on the oven, line a large mixing bowl with all your measured ingredients. This is the moment of truth: the kitchen looks like a science lab, and you’re the mad scientist about to create edible magic. I always double‑check each measurement because a stray extra tablespoon of flour can throw the whole texture off. Kitchen Hack: Use a digital kitchen scale for the flour and butter; it eliminates the “fluff‑in‑the‑cup” problem.
- Cream Butter and Sugars. In a stand mixer or sturdy hand‑whisk, beat the softened butter with brown sugar and granulated sugar until the mixture is light, fluffy, and a pale golden color. This should take about 3‑4 minutes on medium speed; you’ll notice the mixture becomes almost translucent—this is the air you’re incorporating for those crisp edges. If the mixture looks grainy, keep beating; the sugar will dissolve into the butter.
- Add Eggs and Vanilla. Crack in the eggs one at a time, letting each incorporate fully before adding the next. Then pour in the vanilla extract. The dough will look glossy and slightly thickened. Watch Out: Adding the eggs too quickly can cause the batter to split, resulting in a greasy cookie.
- Combine Dry Ingredients. In a separate bowl, whisk together the all‑purpose flour, baking soda, and salt. Then gently fold the dry mix into the wet mixture, being careful not to over‑mix. Over‑mixing develops gluten, which makes cookies tough instead of tender. The dough should come together in soft, slightly sticky clumps.
- Introduce Oats, Coconut, and Chocolate. Sprinkle the rolled oats, shredded coconut, and chocolate chips over the dough. Fold them in with a spatula, ensuring each bite gets a generous amount of every component. This step is where the magic happens—imagine each chocolate chip as a tiny sunburst waiting to melt.
- Chill the Dough. Scoop the dough onto a parchment‑lined tray, shape it into a rough log, and wrap it tightly in plastic wrap. Refrigerate for at least 30 minutes, preferably an hour. This short chill firms the butter, preventing excessive spread, and lets the oats and coconut soak up a bit of moisture. Kitchen Hack: If you’re in a hurry, pop the dough in the freezer for 15 minutes; it’ll chill faster without freezing solid.
- Preheat and Prepare Baking Sheets. Set your oven to 350°F (175°C) and line two baking sheets with parchment paper. This temperature is the sweet spot: high enough to set the edges quickly, low enough to keep the center soft. If you bake at a higher temperature, the cookies will brown too fast and lose that chewy interior.
- Scoop and Shape. Using a cookie scoop (about 2‑tablespoon size), drop dough balls onto the prepared sheets, leaving about 2 inches of space between each. The dough will flatten slightly as it bakes, so give it room. If you prefer thicker cookies, gently press the tops down with the back of a spoon before baking.
- Bake to Perfection. Slide the trays into the middle rack and bake for 12‑14 minutes, or until the edges turn a light golden brown and the tops look set but still soft. The center should still look a little under‑baked; this is intentional because the residual heat will finish cooking them. The aroma at this stage is intoxicating—think toasted oats, caramelized butter, and melting chocolate.
- Cool, Then Enjoy. Let the cookies rest on the sheet for 5 minutes; they will continue to set as they cool. Then transfer them to a wire rack to cool completely, or indulge immediately if you can’t wait. That first bite? It’s a symphony of textures—crisp edge, chewy middle, and chocolate that stretches like warm taffy.
That's it — you did it. But hold on, I've got a few more tricks that'll take this to another level…
Insider Tricks for Flawless Results
The Temperature Rule Nobody Follows
Most bakers set the oven and forget it, but the real secret is to let the oven preheat fully and then turn it off for the last two minutes of baking. This gentle “carry‑over heat” ensures the center stays soft while the edges finish crisping. I once tried skipping this step and ended up with cookies that were too firm in the middle—lesson learned.
Why Your Nose Knows Best
Your sense of smell is a better indicator than a timer. When the cookies start to give off a nutty, toasted scent, you’re within a minute of perfection. If you wait for the timer alone, you risk over‑baking. Trust that nose—it's the ultimate kitchen gauge.
The 5‑Minute Rest That Changes Everything
After you pull the cookies out, let them sit on the baking sheet for exactly five minutes before moving them. This short rest allows the interior to set without becoming hard, and the chocolate chips finish their melt‑and‑set cycle. A friend tried skipping this step once — let’s just say the cookies were crumbly and the chocolate hardened like a rock.
Butter Temperature Tactics
Softened butter should be at room temperature, not melted. If it’s too warm, the dough spreads too much; if it’s too cold, you’ll get pockets of dough that never fully bake. The perfect butter feels like warm honey when pressed with a finger.
Oat Soak Secret
Before mixing, give the rolled oats a quick 5‑minute soak in a splash of milk or even the melted butter. This pre‑hydration makes the oats plumper and ensures they stay tender, contributing to that coveted chew.
Creative Twists and Variations
This recipe is a playground. Here are some of my favorite ways to switch things up:
Double‑Chocolate Delight
Swap half of the chocolate chips for cocoa‑nibs or chopped dark chocolate. The result is a richer, slightly bitter bite that balances the sweetness of the coconut and brown sugar.
Nutty Crunch
Add ½ cup of toasted chopped almonds or pecans. The nuts introduce a buttery crunch that pairs wonderfully with the chewiness of the oats.
Spiced Holiday Version
Incorporate 1 tsp of ground cinnamon, a pinch of nutmeg, and a dash of clove. This warm spice blend makes the cookies feel festive without overwhelming the chocolate.
Citrus Zest Surprise
Stir in the zest of one orange or lemon for a bright, aromatic note that cuts through the richness and adds a fresh twist.
Vegan Adaptation
Replace the butter with coconut oil, use flax‑egg equivalents, and choose dairy‑free chocolate chips. The texture stays chewy, and the coconut flavor gets an extra boost.
Storing and Bringing It Back to Life
Fridge Storage
Place cookies in an airtight container with a slice of bread on top; the bread will release moisture, keeping the cookies soft for up to a week. If you prefer a crispier edge, store them uncovered for 24 hours before sealing.
Freezer Friendly
Layer cookies between parchment sheets and seal the container or zip‑lock bag. They freeze beautifully for up to three months. When you’re ready, let them thaw at room temperature for 15 minutes, then pop them in a 300°F oven for 5 minutes to revive the chew.
Best Reheating Method
A tiny splash of water (about a teaspoon) on the plate before microwaving for 10‑15 seconds revives the cookie’s softness without making it soggy. The steam generated mimics the original bake environment, bringing the cookie back to life.