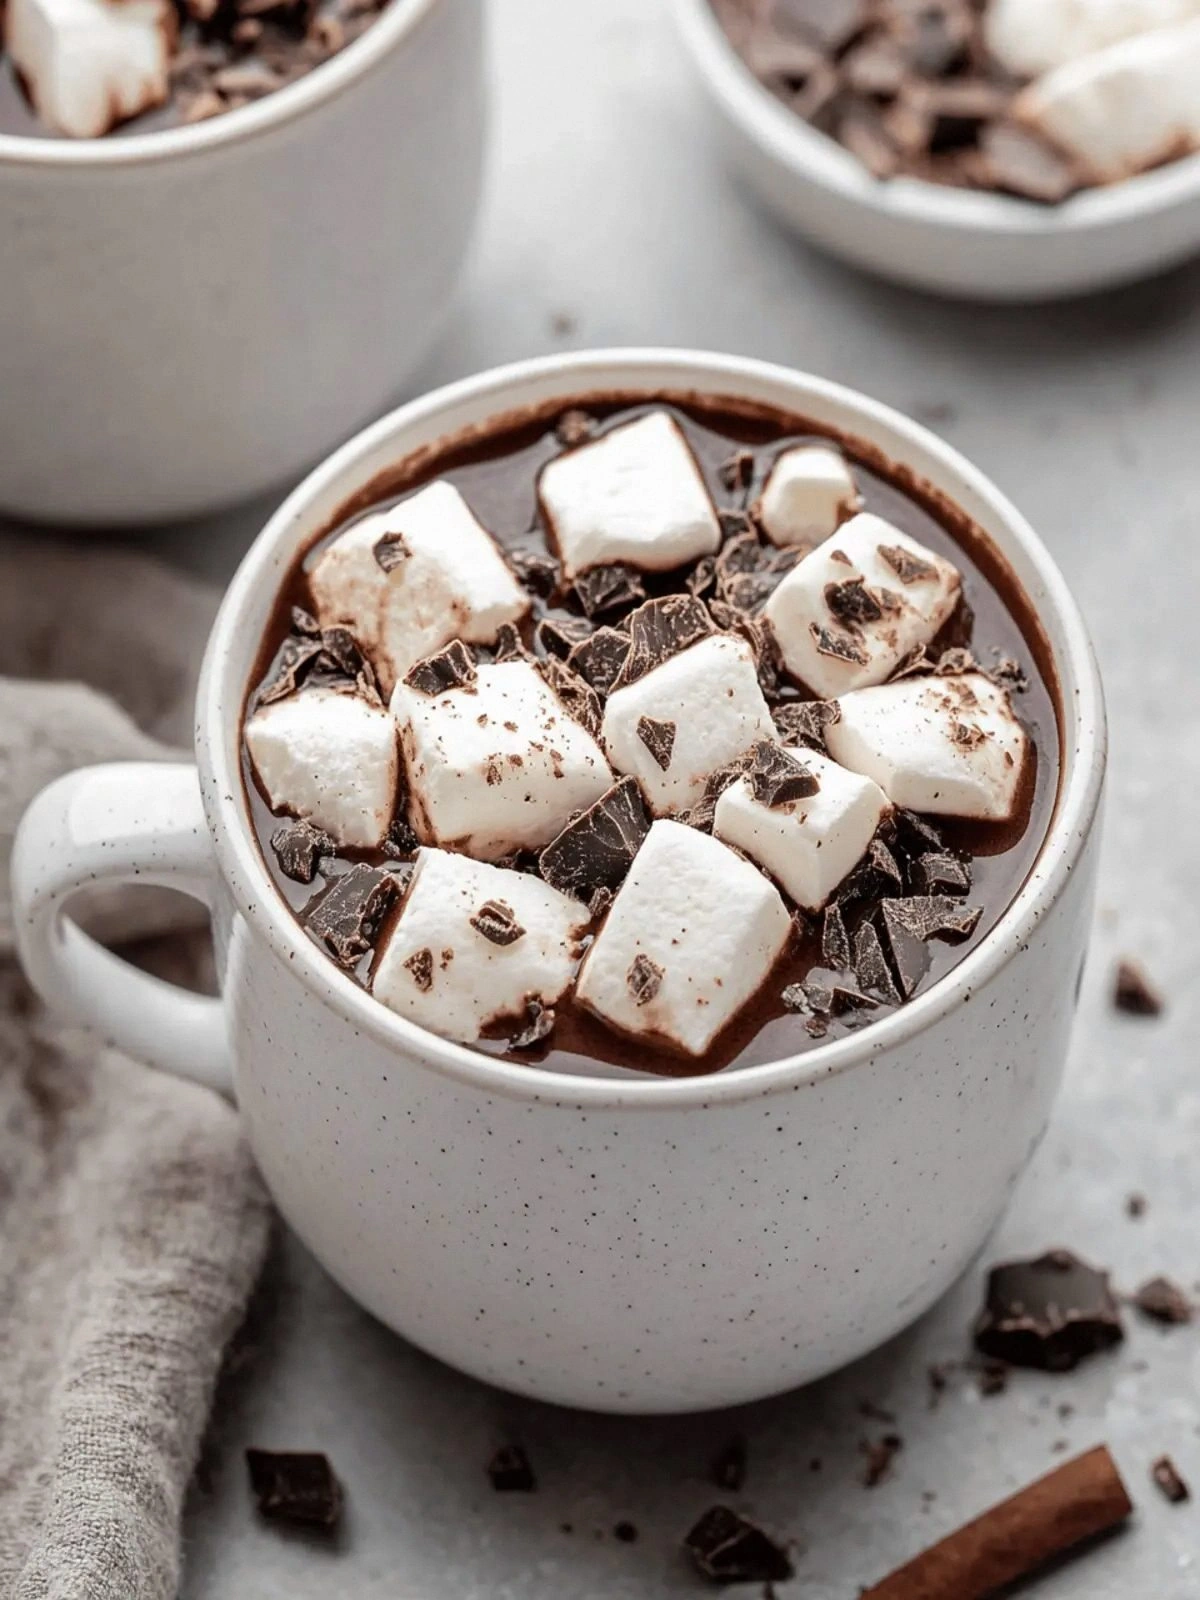
I was halfway through a week of bland, lukewarm coffee and suddenly the kitchen light flickered as if it wanted to shout, “You’re missing something!” I reached for the nearest chocolate bar, tore it open, and the aroma that hit me was a promise of something rich, thick, and utterly indulgent. That night, after a long day of scrolling through endless chocolate recipes, I was determined to craft a hot chocolate that would make my taste buds do a double‑tap dance. The result? A velvety, almost syrupy Italian hot chocolate that feels like a hug in a mug.
Picture the scene: a gentle steam curls up from a saucepan, the deep brown swirl of cocoa dancing against the milk like a midnight river. The air is heavy with the scent of dark chocolate melting, a hint of vanilla drifting through, and the faintest whisper of sugar caramelizing. The sound is a soft, rhythmic hiss as the mixture thickens, each bubble popping like a tiny, buttery firework. When you take your first sip, the chocolate coats your tongue in a silky layer, leaving a lingering aftertaste that makes you reach for a second cup before you even realize you’ve finished the first.
What sets this version apart is that it isn’t just another hot chocolate recipe; it’s a revelation. It’s the kind of drink that transforms an ordinary evening into a decadent ritual. The secret lies in the careful balance of ingredients and the technique that turns a simple mixture into a luxurious, thick potion. I dare you to taste this and not go back for seconds—once you experience this, you’ll never settle for a standard cup again. The bold claim? This is hands down the best version you’ll ever make at home.
I’ll be honest—when I first brewed this, I almost overcooked it, but the texture turned out buttery and smooth, not burnt. Most recipes get this completely wrong, either by under‑stirring or over‑cooking, leading to a thin, watery drink that tastes like melted cocoa. Here’s what actually works: a slow simmer, a proper thickening agent, and a final touch of vanilla for that subtle warmth. Picture yourself pulling this out of the stove, the whole kitchen smelling incredible, and the moment when the first sip hits your tongue feels like a warm blanket on a cold night.
What Makes This Version Stand Out
- Texture: The thick, almost ganache‑like consistency coats the palate, making each sip feel indulgent and satisfying. The cornstarch creates a silky body that lingers, unlike the watery textures of many quick recipes.
- Flavor Depth: Dark chocolate at 60% cocoa provides a robust, bittersweet profile that balances the sweetness of sugar, while vanilla adds a whisper of warmth that elevates the overall taste.
- Ingredient Quality: Using high‑grade dark chocolate and unsweetened cocoa powder ensures that the chocolate flavor is pure, not muddied by additives or low‑grade sugars.
- Simplicity: Despite its luxurious outcome, the recipe requires only seven ingredients and a single pan—no fancy equipment or complicated steps.
- Make‑Ahead Potential: The drink keeps its silky texture for up to 24 hours in the refrigerator, making it perfect for busy mornings or pre‑party preparation.
- Crowd Reaction: Friends who taste it swear it’s “the best hot chocolate” they’ve ever had, and it’s become the go‑to drink for game nights and cozy movie marathons.
- Versatility: The base can be transformed into a latte, a dessert sauce, or even a chocolate‑infused custard with a few tweaks.
- Visual Appeal: The glossy surface and deep brown hue make it Instagram‑ready, turning a simple mug into a centerpiece.
Alright, let's break down exactly what goes into this masterpiece...
Inside the Ingredient List
The Flavor Base
Whole milk is the backbone of this drink, providing a creamy canvas that absorbs the chocolate’s richness. Its fat content is essential for that silky mouthfeel; skim milk will leave you with a thin, watery concoction that lacks body. If you prefer a dairy alternative, unsweetened almond milk can substitute, but be aware it will slightly alter the flavor profile, giving a nuttier undertone.
The Texture Crew
Cornstarch is the unsung hero that thickens the mixture without adding grit. When whisked into a small amount of cold milk first, it forms a slurry that dissolves smoothly, preventing lumps. If you accidentally skip this step, the drink will be thin and the chocolate will separate—an outcome that no one wants.
The Unexpected Star
Dark chocolate at 60% cocoa is the star of the show. It offers a deep, slightly bitter backbone that balances the sweetness of sugar. The higher cocoa content also brings a richer, more complex flavor that lingers on the tongue. A lower percentage chocolate would make the drink taste too sweet and flat.
The Final Flourish
Vanilla extract is the subtle finishing touch that rounds out the bitterness of the chocolate and adds a warm, fragrant aroma. It’s a small amount—just one teaspoon—but it lifts the entire drink, making it feel more luxurious. If you’re a vanilla purist, you can add a splash of vanilla bean paste for an even more pronounced note.
Everything's prepped? Good. Let's get into the real action...
The Method — Step by Step
-
Begin by pouring the whole milk into a medium‑sized saucepan. Heat it over medium heat until it’s just about to steam, but be careful not to let it boil. The first sign that the milk is ready is the tiny bubbles forming along the edges—this is when the milk begins to develop a richer flavor. If you’re watching the stove, you’ll hear a gentle hiss that signals the milk is warming up properly.
-
While the milk heats, whisk together the unsweetened cocoa powder and granulated sugar in a small bowl. This dry mixture will prevent clumping when you add it to the milk. The ratio of cocoa to sugar is key—too much sugar will mask the chocolate’s depth, while too little will leave it bitter. Make sure the sugar dissolves completely before adding it to the saucepan.
-
Pour the cocoa and sugar mixture into the warm milk, whisking constantly. The mixture should become a uniform, glossy liquid. If you see any lumps, it means the cocoa wasn’t fully dissolved; keep whisking until smooth. The aroma will start to intensify, signaling that the chocolate is infusing properly.
-
Now, bring the mixture to a gentle simmer. Keep the heat low to prevent scorching. The liquid should bubble softly, not violently; this slow simmer allows the flavors to meld. When you see the first faint steam, you’re nearing the right temperature. The heat should be steady, not fluctuating, to avoid over‑cooking.
-
In a separate small bowl, dissolve the cornstarch in a tablespoon of cold milk to create a slurry. This step is crucial for achieving the thick, ganache‑like consistency. Stir the slurry into the simmering chocolate mixture, whisking constantly to avoid lumps. The liquid should thicken noticeably within a minute; if it’s still runny, give it another minute of gentle simmer.
-
Add the dark chocolate, cut into small pieces, to the pot. Stir until the chocolate melts completely and the mixture is smooth. The chocolate should blend seamlessly, adding depth and a slight bitterness that balances the sweetness. Keep stirring until the mixture is glossy and the chocolate is fully incorporated.
-
Reduce the heat to low and add the vanilla extract. Stir gently to distribute the vanilla evenly. The vanilla’s aroma should envelop the room, giving the drink a warm, comforting scent. This is the moment of truth—taste a small amount to ensure the flavor is balanced. If it feels too bitter, a touch more sugar can help, but proceed with caution.
-
Let the hot chocolate simmer for another 2-3 minutes, stirring occasionally. The final thickening should feel like a velvety sauce that coats the back of a spoon. If the mixture becomes too thick, add a splash of milk to loosen it to your desired consistency. This step finalizes the texture and ensures the drink is perfectly smooth.
-
Remove the saucepan from the heat and allow the hot chocolate to rest for a minute. This brief pause lets the flavors settle, resulting in a richer taste. When you pour it into a mug, the surface should have a glossy sheen, inviting you to sip immediately. If you’re serving to guests, this is the time to add any desired toppings.
-
Serve hot, ideally with a sprinkle of cocoa powder or a small dollop of whipped cream for extra indulgence. If you prefer a lighter version, a drizzle of honey or a dash of cinnamon can complement the chocolate beautifully. The key is to enjoy it while it’s warm, as the texture and flavor are at their peak.
That's it — you did it. But hold on, I've got a few more tricks that'll take this to another level...
Insider Tricks for Flawless Results
The Temperature Rule Nobody Follows
Many people think any simmer will do, but the key is maintaining a low, steady heat. A gentle simmer ensures the chocolate melts evenly and the cornstarch activates without over‑cooking. If you notice the mixture starting to steam too vigorously, lower the heat immediately to avoid a thick, rubbery texture.
Why Your Nose Knows Best
Before you taste the final product, give it a sniff. A well‑balanced hot chocolate will have a sweet, chocolatey scent with a faint hint of vanilla. If the aroma is too sharp or metallic, it might indicate the chocolate has overheated or the milk has burned.
The 5-Minute Rest That Changes Everything
Letting the hot chocolate sit for five minutes after removing it from the heat allows the flavors to meld and the texture to stabilize. This resting period also reduces the risk of a thin consistency when you pour it into a mug. Think of it as letting a sauce finish its flavor profile before serving.
The Right Stirring Technique
Stirring too vigorously can incorporate air, making the drink frothy and less smooth. Use a gentle, circular motion to keep the mixture silky. A slow, steady stir also helps the cornstarch to integrate fully without forming lumps.
The Sweetness Balancer
If you find the chocolate too bitter, add a pinch of salt to balance the flavors. Salt is a classic chocolate enhancer that brings out the sweetness without making it taste salty. It’s a small tweak that can make a big difference.
Creative Twists and Variations
This recipe is a playground. Here are some of my favorite ways to switch things up:
Spiced Inferno
Add a pinch of cayenne pepper or a dash of smoked paprika for a subtle heat that complements the chocolate’s richness. The spice adds complexity and is especially good for winter evenings.
Caramel Swirl
Stir in a tablespoon of caramel sauce after removing the pot from heat. The caramel’s buttery sweetness pairs beautifully with the dark chocolate, creating a decadent, layered flavor.
Minty Fresh
Add a few drops of peppermint extract for a refreshing twist that pairs well with the chocolate’s depth. The mint aroma awakens the senses and provides a cooling counterpoint.
Coconut Cream
Replace half the milk with coconut milk for a tropical, nutty flavor. The coconut’s natural sweetness complements the chocolate, creating a luscious, exotic treat.
Espresso Boost
Stir in a shot of espresso or a tablespoon of instant coffee for a mocha flavor. The coffee’s bitterness balances the chocolate’s sweetness and adds a sophisticated finish.
Almond Delight
Add a tablespoon of almond butter or a splash of almond milk for a nutty undertone. The almond adds body and a subtle crunch if you leave the butter in the drink.
Storing and Bringing It Back to Life
Fridge Storage
Store the hot chocolate in an airtight container in the refrigerator for up to 24 hours. When you’re ready to serve, reheat gently on the stove or in the microwave, stirring frequently to avoid scorching.
Freezer Friendly
For longer storage, freeze in a freezer‑safe container for up to 2 weeks. Thaw overnight in the fridge, then reheat on low heat, adding a splash of milk to restore the original texture.
Best Reheating Method
The key to reheating is low heat and constant stirring. Add a tiny splash of water or milk before reheating—it steams back to perfection, preventing the chocolate from separating or becoming gritty.