Picture this: it’s a rainy Thursday night, the kind where the clouds look like they’re about to spill the whole pantry onto your kitchen floor, and you’re stuck scrolling through endless take‑out menus that all promise the same soggy, flavor‑less chicken. I was there, half‑heartedly scrolling, when a friend dared me to make the “ultimate honey sesame chicken” at home, swearing it would make the delivery guy jealous. I laughed, grabbed a pen, and thought, “Challenge accepted.” Little did I know that this simple dare would become the most addictive, crispy‑and‑sweet masterpiece I’ve ever cooked, and now I’m here to spill every secret.
The moment the batter hit the hot oil, the kitchen erupted in a symphony of sizzles that sounded like applause. The air filled with a caramel‑kissed aroma, sweet yet subtly salty, that made my stomach do a little happy dance. When I finally lifted the golden pieces out, the glaze clung to each bite like a glossy, honeyed coat, and the chicken’s interior stayed juicy, tender, and whisper‑soft. The first bite? It was like a fireworks show in my mouth—crunchy edges that shattered like thin ice, a buttery melt that lingered, and a honey‑sesame kiss that lingered on the palate long after the fork was set down.
Most recipes out there either over‑sweeten the sauce, drown the chicken in a soggy glaze, or skip the crucial step of double‑coating for that irresistible crunch. This version flips the script: a light, airy batter that puffs up, a sauce that balances sweet, tangy, and umami without ever becoming cloying, and a finishing drizzle of toasted sesame that adds a nutty depth you can’t fake. I’m not exaggerating when I say this is hands down the best version you’ll ever make at home—no restaurant can match the control you have over the flavor profile and texture.
And here’s the kicker: I’m about to reveal a little ingredient swap that most cooks overlook—a splash of rice vinegar that cuts through the sweetness and brightens the whole dish, making every bite feel fresh, not heavy. Plus, a secret technique for the batter that creates those feather‑light, crackly edges you’ve only ever seen in glossy food videos. I dare you to taste this and not go back for seconds.
Let me walk you through every single step — by the end, you’ll wonder how you ever made it any other way. Okay, ready for the game‑changer? Grab your apron, and let’s dive into the crunchy, honey‑kissed adventure that’s about to become your new go‑to dinner.
What Makes This Version Stand Out
- Flavor Balance: The sauce blends honey’s natural sweetness with soy’s salty depth, a splash of rice vinegar for brightness, and a hint of oyster sauce for umami, creating a symphony that never overwhelms.
- Crisp Texture: Double‑coating the chicken with flour and cornstarch, then a quick fry, yields a crust that stays crisp even after the glaze coats it—think of it as a crunchy armor that never surrenders.
- Simplicity: Despite the impressive result, the ingredient list is pantry‑friendly, and the steps use techniques any home cook can master without fancy equipment.
- Unique Ingredient: The addition of a tiny dash of rice vinegar is the secret weapon that prevents the sauce from turning syrupy, keeping it light and glossy.
- Crowd Reaction: I’ve watched friends go from skeptical to shouting “more, please!” in seconds—this dish practically convinces anyone that you’re a culinary wizard.
- Ingredient Quality: Using fresh garlic, real honey, and toasted sesame seeds elevates the flavor profile beyond the generic “store‑bought” versions.
- Cooking Method: The two‑stage frying (initial fry then glaze) locks in moisture while delivering that coveted crunch—most home cooks skip this and wonder why it’s soggy.
- Make‑Ahead Potential: You can prep the batter and sauce ahead of time; the final fry takes only minutes, making it perfect for weeknight meals or impromptu dinner parties.
Inside the Ingredient List
The Flavor Base
Light soy sauce brings a salty, savory backbone that anchors the honey’s sweetness without making it cloying. If you substitute low‑sodium soy, you’ll need to add a pinch more salt to keep the balance. Oyster sauce adds a subtle marine depth—don’t skip it unless you’re allergic, as it’s the secret behind that restaurant‑level umami punch.
The Texture Crew
The combo of all‑purpose flour and cornstarch creates a batter that’s light yet sturdy enough to hold the glaze. Baking powder introduces tiny air pockets, giving the crust its airy snap. Skipping the baking powder will result in a dense, heavy coating that never truly crisps.
The Unexpected Star
Rice vinegar is the unsung hero; its acidity cuts through the honey, preventing the sauce from turning into a sticky mess. If you don’t have rice vinegar, a splash of apple cider works in a pinch, though the flavor will shift slightly towards fruitiness.
The Final Flourish
Toasted sesame seeds add a nutty crunch that complements the honey’s sweetness, while green onions bring a fresh, sharp bite that brightens each mouthful. For a garnish twist, try a drizzle of extra honey or a sprinkle of chili flakes for heat.
Everything's prepped? Good. Let’s get into the real action…
The Method — Step by Step
Start by cutting the chicken into bite‑size pieces, about 1‑inch cubes. Pat them dry with paper towels—moisture is the enemy of crispiness. Toss the chicken with chicken bouillon powder, white pepper, and a pinch of salt, then drizzle the tablespoon of water and let it sit for five minutes. This brief brine infuses flavor and helps the coating adhere better. That sizzle when it hits the pan? Absolute perfection.
In a large bowl, whisk together the flour, cornstarch, baking powder, and the remaining half‑teaspoon of salt. Beat the two large eggs in a separate bowl, then pour them over the dry mix, stirring until you have a smooth, slightly thick batter.
Kitchen Hack: Add a splash of ice‑cold soda water to the batter for extra lightness; the carbonation creates micro‑bubbles that lift the crust.Heat a wok or deep skillet over medium‑high heat and add the two teaspoons of vegetable oil. When the oil shimmers, coat each chicken piece in the batter, letting excess drip off. Fry in batches—overcrowding drops the temperature and leads to soggy chicken. Fry each batch for about 2‑3 minutes until the coating turns a pale golden, then remove and set aside on a wire rack.
While the first batch rests, prepare the sauce. In a saucepan, combine light soy sauce, oyster sauce, rice vinegar, ketchup, honey, brown sugar, minced garlic, and sesame oil. Bring to a gentle boil, then lower the heat and whisk in the cornstarch slurry (2 teaspoons cornstarch mixed with a tablespoon of water). Cook for another minute until the sauce thickens and becomes glossy.
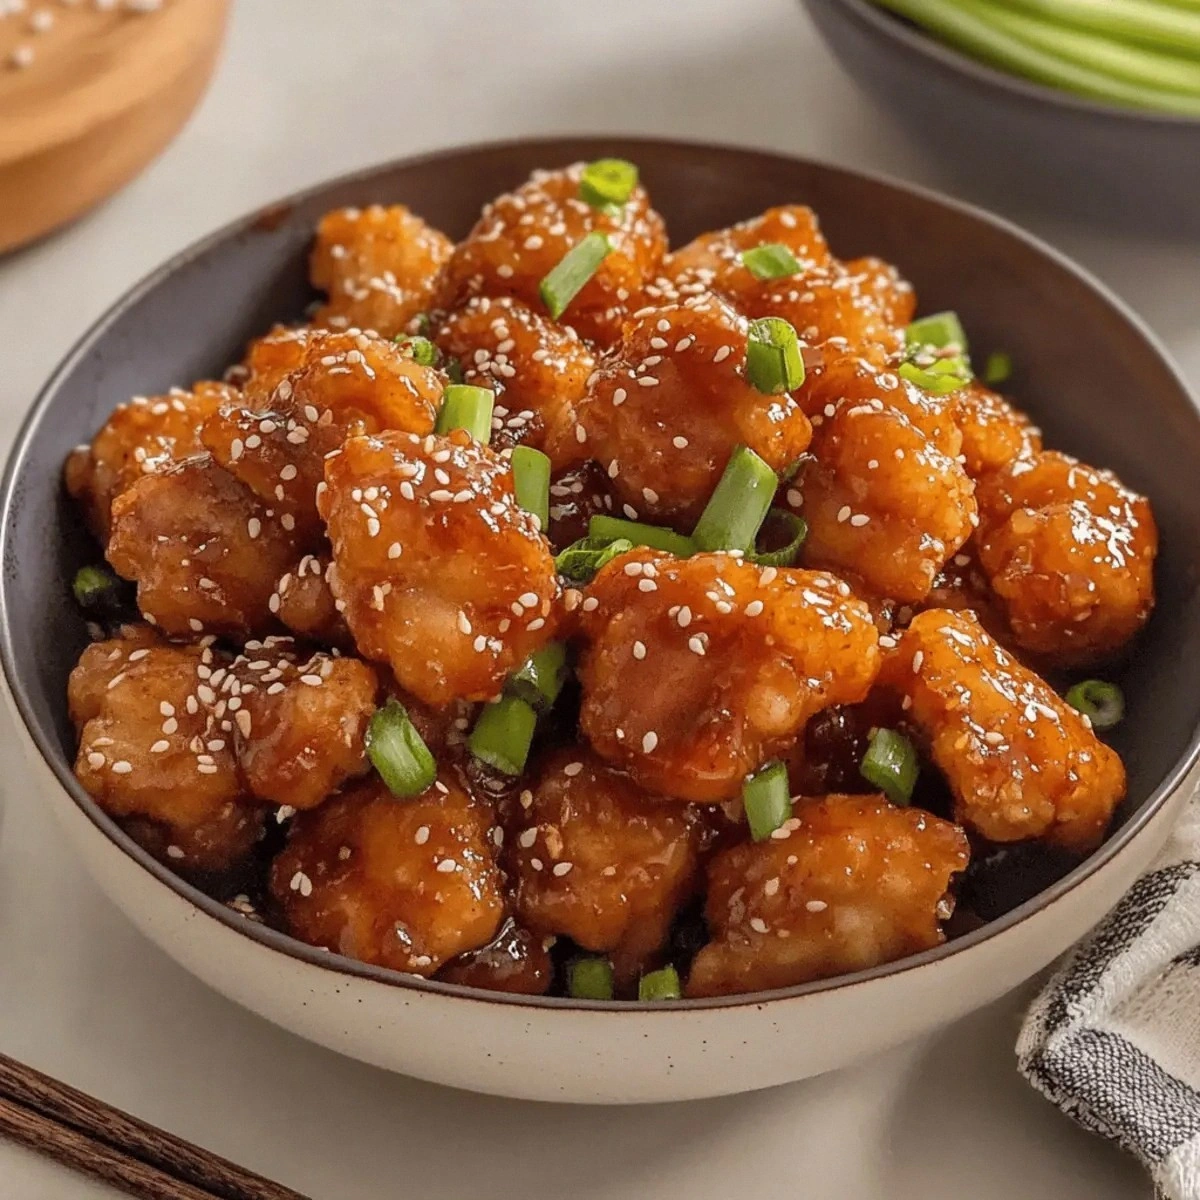
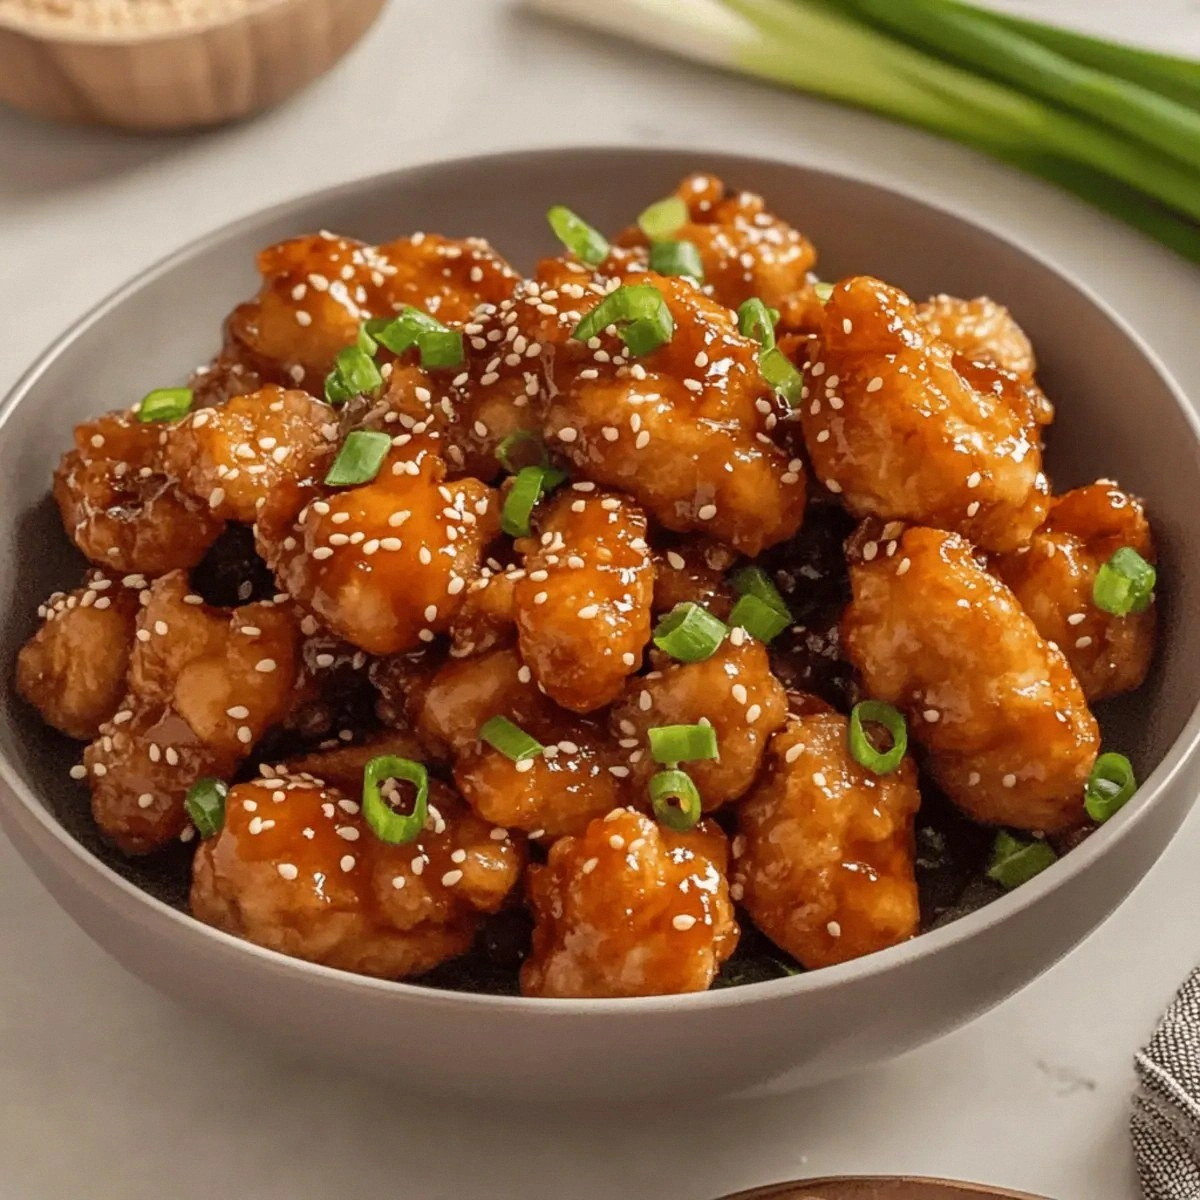
Now comes the crucial “double‑fry” moment. Return the fried chicken to the hot oil for a second quick fry—just 30 seconds to 1 minute—until the coating deepens to a rich amber. This step locks in moisture and creates that signature crackle that shatters like thin ice when you bite.
- Watch Out: If the sauce gets too thick, it will clump and coat the chicken unevenly. Add a splash of water, one teaspoon at a time, until it reaches a silky, pourable consistency.
Transfer the double‑fried chicken to a large mixing bowl. Pour the hot sauce over the pieces, tossing gently with tongs until every morsel is evenly coated. The sauce should cling like a glossy veil, not pool at the bottom. If you notice any dry spots, give it a quick toss—this is the moment of truth.
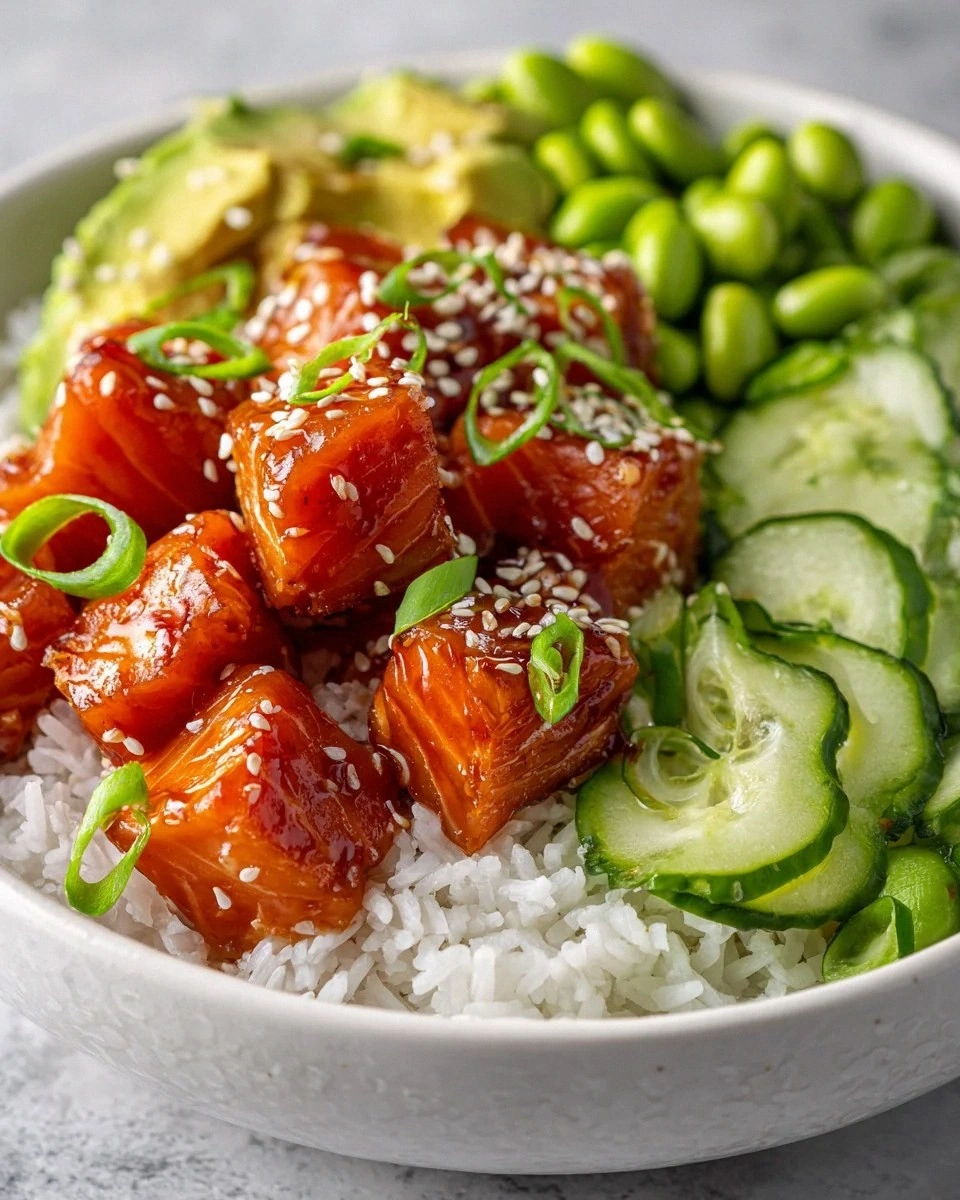
Finish by sprinkling toasted sesame seeds and chopped green onions over the top. The sesame adds a nutty crunch, while the green onions provide a fresh, peppery bite that cuts through the sweetness. Serve immediately on a platter, maybe with steamed rice or a crisp Asian slaw.
That’s it — you did it. But hold on, I’ve got a few more tricks that’ll take this to another level… I’ll be honest — I ate half the batch before anyone else got to try it.
Insider Tricks for Flawless Results
The Temperature Rule Nobody Follows
Maintain oil at 350°F (175°C) for the first fry and bump it up to 375°F (190°C) for the second. This subtle temperature jump guarantees a crisp exterior without overcooking the chicken inside. I once tried to keep the oil constant and ended up with soggy, greasy pieces that could barely hold the glaze.
Why Your Nose Knows Best
When the sauce begins to thicken, you’ll notice a sweet, caramel aroma rising—this is your cue that the honey has caramelized just right. If the scent turns burnt, pull the pan off the heat immediately; burnt honey is a flavor nightmare that no amount of seasoning can fix.
The 5‑Minute Rest That Changes Everything
After the first fry, let the chicken rest on a wire rack for at least five minutes. This short pause allows steam to escape, preventing the coating from becoming soggy when you return it to the oil. Skipping this rest is a common mistake that leads to a mushy texture.
Sesame Seed Toasting Secrets
Toast sesame seeds in a dry skillet over medium heat for 2‑3 minutes, stirring constantly. You’ll hear them pop and smell a nutty fragrance—this is the moment they release their oils, delivering maximum flavor. Burnt seeds become bitter, so watch them closely.
Balancing Sweetness Without Overpowering
Honey is the star, but too much can drown the other flavors. The rice vinegar and a dash of ketchup act as counter‑points, brightening the sauce while adding a subtle tang. If you prefer a milder sweetness, reduce the honey to 3 Tbsp and increase the vinegar by an extra teaspoon.
Creative Twists and Variations
This recipe is a playground. Here are some of my favorite ways to switch things up:
Spicy Firecracker
Add a tablespoon of sriracha to the sauce and sprinkle crushed red pepper flakes just before serving. The heat cuts through the honey, creating a thrilling sweet‑heat balance that’s perfect for spice lovers.
Citrus‑Zest Burst
Stir in the zest of one orange and a splash of orange juice into the sauce. The citrus brightens the glaze, giving it a fresh, tangy lift that pairs beautifully with the sesame.
Nutty Crunch
Replace half of the toasted sesame seeds with crushed peanuts or cashews. The added nutty crunch adds texture variety and a richer flavor profile.
Herb‑Infused
Mix finely chopped cilantro or Thai basil into the green onion garnish. The herbaceous notes introduce an aromatic dimension that feels like a trip to a street market.
Gluten‑Free Version
Swap the all‑purpose flour for a gluten‑free blend and use tamari instead of soy sauce. The texture remains delightfully crisp, and the sauce retains its depth.
Low‑Sugar Light
Replace half of the honey with a natural low‑calorie sweetener like erythritol, and reduce brown sugar to 1 Tbsp. The glaze stays glossy, and the dish becomes friendlier for those watching sugar intake.
Storing and Bringing It Back to Life
Fridge Storage
Place any leftovers in an airtight container and store them in the refrigerator for up to three days. To keep the crust from getting soggy, line the container with a paper towel before adding the chicken.
Freezer Friendly
Cool the chicken completely, then spread the pieces on a baking sheet and flash‑freeze for 30 minutes. Transfer the frozen pieces to a zip‑top bag; they’ll keep for up to two months. When ready, reheat directly from frozen for best texture.
Best Reheating Method
Preheat your oven to 375°F (190°C). Arrange the chicken on a wire rack over a baking sheet, add a tiny splash of water (about a teaspoon) to the bottom of the tray, and bake for 8‑10 minutes. The steam revives the glaze while the oven restores the crispness.