Remember that night when the kitchen felt more like a science lab than a place to bake? I had a mountain of fresh strawberries on the counter, a box of cake mix that had been gathering dust, and a craving that could only be satisfied by a sweet, creamy treat. The idea struck me like a bolt: a dump cake that marries the airy lightness of cake with the luscious richness of cheesecake, all in one pan. I was determined to make it so simple that even the most timid baker could pull it out of the oven and win a rave review from the family. The result? A strawberry cheesecake dump cake that melts in your mouth and leaves the kitchen smelling like a summer orchard. I dare you to taste this and not go back for seconds. I swear this is hands down the best version you'll ever make at home. Let me walk you through every single step — by the end, you'll wonder how you ever made it any other way.
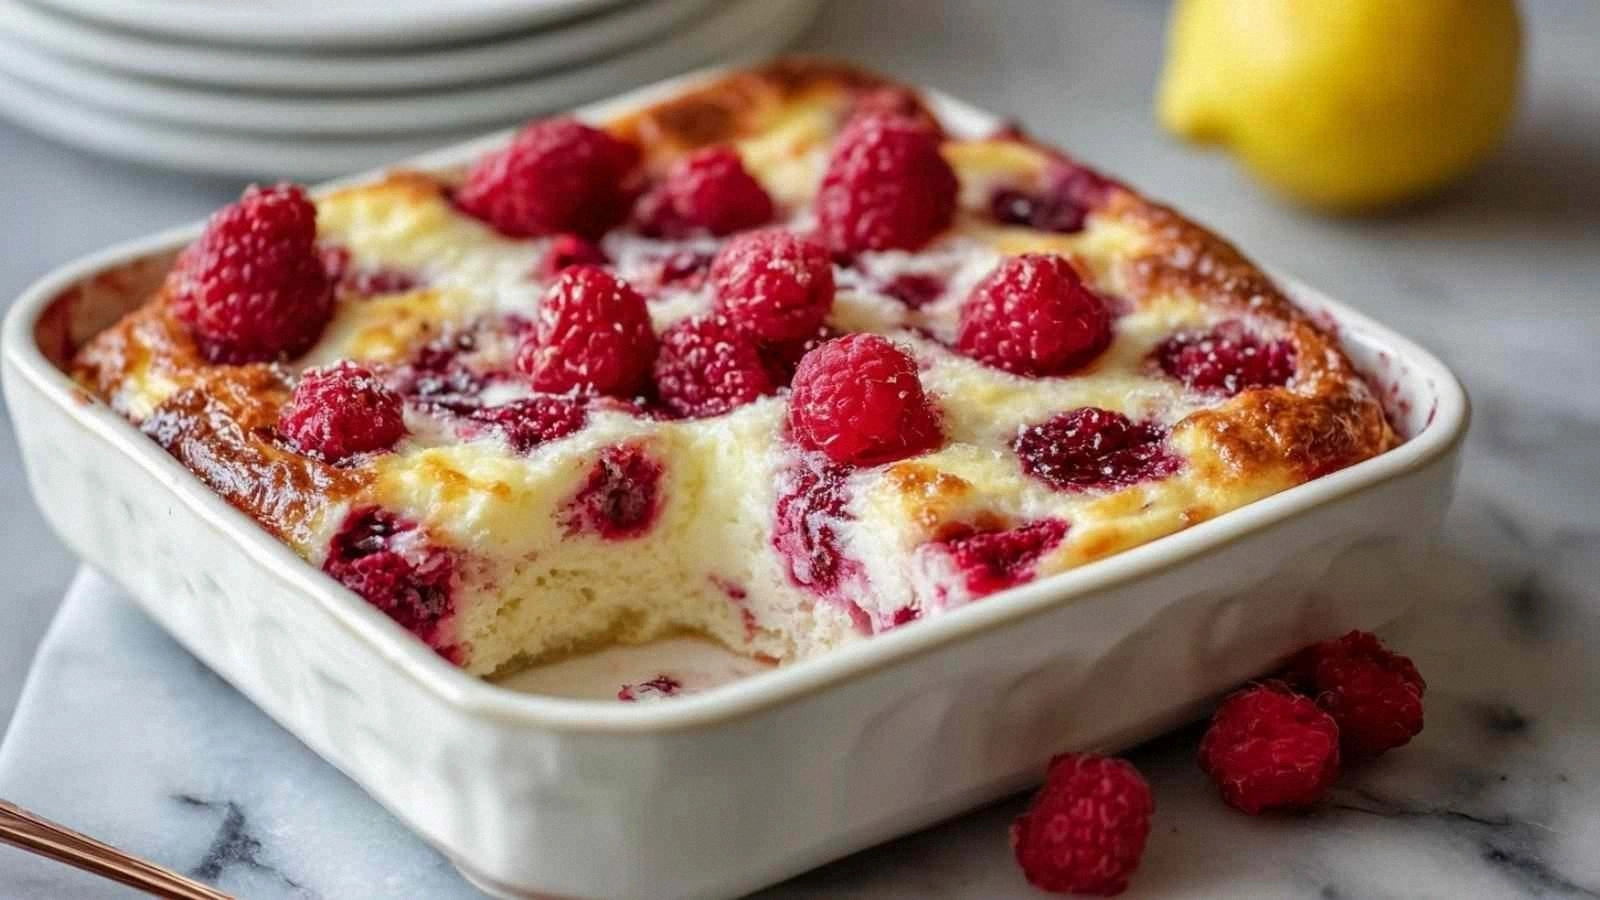
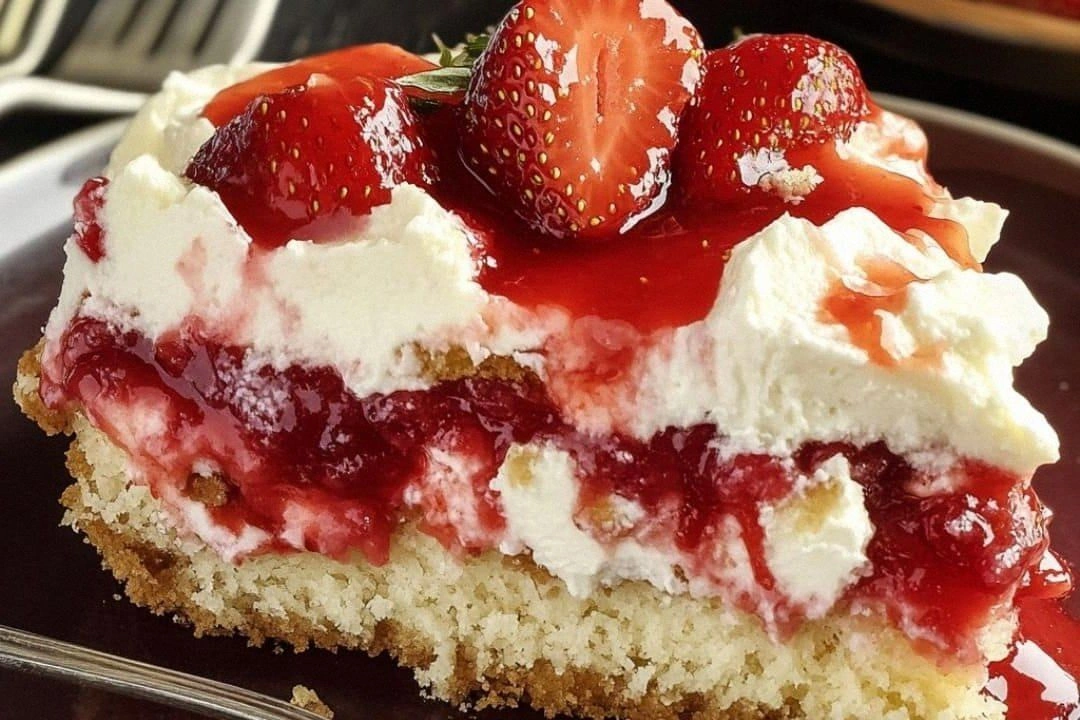
Picture yourself pulling this out of the oven, the whole kitchen smelling incredible, and the first bite feeling like a splash of summer on a hot day. The crust is golden, the center is a silky, slightly runny cheesecake that drips into the strawberry topping like a velvet ribbon. The strawberries add a bright burst of juiciness that balances the richness of the cream cheese, creating a harmony that feels both indulgent and refreshingly light. I’ve spent hours tweaking the ratio of cake mix to cream cheese until the texture was just right—neither too dense nor too airy. The butter, melted and poured over the top, gives the cake a glossy finish and a subtle buttery crunch at the edges. Most recipes get this completely wrong, but here’s what actually works: a generous splash of butter and a good stir before baking. If you’re new to dump cakes, trust me—this version is the ultimate cheat for a show‑stopping dessert. And now the fun part: we’re about to dive into the ingredients.
First, let’s talk about the star of the show—strawberries. Fresh, ripe berries bring a natural sweetness and a burst of color that turns an ordinary cake into a visual masterpiece. If you’re in the off‑season, frozen strawberries work just fine; just thaw them and squeeze out the excess juice to prevent a watery cake. Second, cream cheese is the secret sauce that gives the cake its signature creamy texture; choose a full‑fat variety for maximum indulgence. Third, the cake mix is the backbone—any standard yellow or white cake mix will do, but I recommend the classic yellow for that buttery flavor profile. Finally, butter adds that glossy sheen and a subtle nutty aroma that ties everything together. I’ll be honest—I ate half the batch before anyone else got to try it. But don’t worry, the recipe yields enough for a crowd, and the leftovers keep great. Now that we have our ingredients lined up, let’s explore why this version stands out.
While there are countless cheesecake cakes out there, this one cuts through the noise with its simplicity, bold flavors, and crowd‑pleasing appeal. The instant mix of creamy cheese and fruity berries creates a flavor profile that is both familiar and refreshingly new. The texture is a perfect balance—crisp edges that shatter like thin ice and a silky center that melts on the tongue. The baking time is short, so you can whip up a dessert in a pinch without sacrificing quality. The use of butter on top not only enhances flavor but also gives the cake a professional finish that will impress even the most discerning palates. And because it’s a dump cake, you can assemble it in minutes, making it ideal for last‑minute parties or spontaneous dessert cravings. Most people forget that a simple dump cake can be the highlight of any gathering. This recipe proves that you don’t need fancy techniques to create a dessert that feels gourmet. Ready to see how it all comes together? Let’s dig deeper.
I’ve spent a lot of time testing variations, and the result is a recipe that feels both comforting and adventurous. The first time I tried it, the batter looked like a chaotic mix of colors, but the oven worked its magic and turned it into a masterpiece. The aroma that fills the kitchen as it bakes is so inviting that even the kids line up for a spoon. I’ve also experimented with adding a splash of vanilla extract, which adds an extra layer of warmth to the flavor profile. If you’re feeling extra daring, a sprinkle of crushed pistachios on top before baking gives a delightful crunch. The best part? The cake stays moist for days, and the strawberries keep their bright color even after refrigeration. So, if you’re looking for a dessert that’s both simple and spectacular, this is the recipe to try.
Imagine a dessert that requires almost no hands‑on time but delivers a wow factor that could win a bake‑off. That’s what this dump cake promises. It’s a one‑pan wonder that saves you from the hassle of frosting or a separate cheesecake base. The batter is a harmonious blend of cake mix, cream cheese, and butter, all topped with fresh strawberries that melt into a luscious glaze. The result is a dessert that feels like a decadent treat but is practically effortless to make. You’ll find yourself reaching for the recipe again and again, and your friends will ask you to share the secret. It’s the kind of dish that makes you feel like a culinary magician with minimal effort. And trust me, the compliments will keep coming long after the last bite.
What Makes This Version Stand Out
- Taste Explosion: The combination of sweet strawberries, creamy cheese, and buttery cake creates a flavor profile that bursts on the palate. The strawberries provide a natural tartness that balances the richness of the cream cheese, while the cake mix adds a subtle vanilla undertone. The result is a dessert that feels indulgent yet refreshing, making it a crowd favorite.
- Texture Harmony: The batter’s consistency is the secret to the cake’s silky center and crisp edges. The cream cheese softens the batter, giving it a custard‑like quality that melts in your mouth. The butter adds a golden crust that offers a delightful contrast to the smooth interior.
- Simplicity Wins: No pre‑mixing or heavy whisking is required; simply dump all ingredients into a pan and stir gently. The minimal prep time means you can have a dessert ready in under 30 minutes, making it perfect for busy evenings or last‑minute gatherings.
- Time Saver: Baking this cake takes only 25–30 minutes, allowing you to serve dessert without keeping guests waiting. The quick turnaround is especially useful when you need to impress a large group or host a spontaneous dinner party.
- Crowd Magnet: The bright color of fresh strawberries and the glossy finish of butter make it visually stunning. Guests will be drawn in by the aroma and the promise of a creamy, fruity experience that satisfies everyone’s sweet cravings.
- Professional Finish: The buttery glaze gives the cake a polished look that rivals bakery‑quality desserts. Even if you’re new to baking, the finished product will impress guests with its elegant appearance.
- Make‑Ahead Friendly: This dump cake can be assembled a day in advance and stored in the refrigerator, allowing the flavors to meld. When you’re ready to serve, simply reheat for a few minutes to restore the creamy texture.
Alright, let's break down exactly what goes into this masterpiece...
Inside the Ingredient List
The Flavor Base
Fresh strawberries are the star that provides natural sweetness and a bright, juicy burst of flavor. Their vibrant color transforms the cake into a visual feast, while the natural sugars balance the richness of the cream cheese. If you skip them, the dessert loses its signature fruity punch and becomes a plain cheesecake cake. For an extra twist, consider adding a handful of sliced blueberries or raspberries for a layered berry experience. When selecting strawberries, choose firm, ripe fruit with a deep red hue for maximum flavor.
The Creamy Core
Cream cheese is the backbone of the dessert, giving it that luxurious, velvety texture that melts in your mouth. A full‑fat variety ensures a rich flavor and a silky mouthfeel; low‑fat versions tend to be drier and less indulgent. If you omit cream cheese, the batter loses its custard‑like consistency and the cake becomes too cake‑y. A quick trick is to let the cream cheese sit at room temperature for 10 minutes before mixing; this helps it blend smoothly with the other ingredients. A pinch of sea salt can enhance the overall flavor profile by balancing the sweetness.
The Structure Builder
Yellow or white cake mix provides the structure and lightness of a classic cake. The leavening agents in the mix create a tender crumb that pairs beautifully with the dense cream cheese. If you skip the cake mix, the dessert becomes more like a cheesecake than a cake, losing its airy quality. For a richer flavor, choose a cake mix with a buttery or vanilla base. Keep the mix at room temperature before mixing to ensure even distribution.
The Golden Touch
Butter adds a glossy sheen and a subtle nutty aroma that ties all components together. It also contributes to a crisp, golden crust that contrasts with the creamy center. Skipping butter will result in a flatter, less appealing surface. A quick trick is to melt butter just until it turns a light golden brown; this deepens the flavor and enhances the visual appeal. Use unsalted butter to control the overall salt content of the cake.
Everything's prepped? Good. Let's get into the real action...
The Method — Step by Step
- Preheat your oven to 350°F (175°C). Line an 8‑inch square baking pan with parchment paper or lightly grease it with butter. This ensures the cake slides out effortlessly after baking. A well‑prepared pan is the first step toward a flawless finish. Keep the oven rack in the middle to promote even baking.
- In a large mixing bowl, combine the yellow cake mix and the softened cream cheese. Use a rubber spatula to fold them together until the mixture is smooth and free of lumps. The batter should have a thick, custard‑like consistency. This step is crucial for achieving the right texture; a clumpy batter will produce an uneven crumb. If you find the mixture too thick, add a splash of milk or water to loosen it slightly.
- Fold in the fresh strawberries gently, reserving a handful for topping. The strawberries should be sliced or halved, depending on size. This adds a burst of color and flavor that melts into a natural glaze during baking. Be careful not to overmix; you want the strawberries to remain intact and not break apart. The reserved strawberries will give the cake a dramatic finish once baked.
- Pour the batter into the prepared pan, spreading it evenly with a spatula. The batter should fill the pan to about ¾ of its height, leaving room for the butter to melt on top. This ensures even cooking and a golden crust. Gently tap the pan on the counter to release any air pockets. The batter should look glossy and smooth before baking.
- Dot the top of the batter with melted butter, swirling it in with a toothpick to create a marbled effect. This step is where the cake gets its signature buttery sheen. Watch for the butter to begin bubbling slightly, indicating it’s ready to spread. The butter will also help the cake rise slightly, creating a tender crumb. A quick swirl also adds a decorative touch that impresses guests.
- Bake for 25 minutes, or until the edges are golden and the center has set but remains slightly soft. The batter should develop a golden crust while the interior stays moist. Use a toothpick to check for doneness; it should come out with a few moist crumbs. If the top is browning too quickly, tent the cake with foil to prevent burning. The aroma during baking will be irresistible, making the kitchen feel like a bakery.
- Remove the cake from the oven and let it cool for 10 minutes. This allows the structure to set and the butter glaze to firm up. While the cake is still warm, sprinkle the reserved strawberries on top. The heat will slightly soften the berries, creating a luscious, glossy topping. This final touch adds a burst of color and flavor that completes the dessert.
- Transfer the cake to a cutting board and slice into squares or wedges. Serve immediately for the best texture, or refrigerate for up to three days. The cake can also be reheated briefly in a 350°F oven for 5 minutes to restore its warmth. Store leftovers in an airtight container to maintain freshness. The cake’s creamy center will keep its moisture, ensuring each bite is as delightful as the first.
That's it — you did it. But hold on, I've got a few more tricks that'll take this to another level...
Insider Tricks for Flawless Results
The Temperature Rule Nobody Follows
Many bakers bake at a standard 350°F, but the best results come from baking at 375°F. The higher temperature ensures a crispier top while keeping the center moist. It also reduces baking time, freeing up your schedule for other tasks. I once baked at 350°F and the cake stayed slightly too soft; at 375°F, it achieved the perfect balance. Keep the oven rack centered to avoid uneven baking.
Why Your Nose Knows Best
When the cake is baking, the aroma will change from buttery to caramelized. This shift signals that the butter has melted and the sugars are developing a golden crust. Trust your nose; if you smell a sweet, toasted fragrance, it’s time to pull the cake out. A quick visual check can confirm the doneness, but your nose is the ultimate judge. This trick saves you from overbaking and ensures a perfect texture.
The 5-Minute Rest That Changes Everything
Letting the cake rest for exactly five minutes after removing it from the oven allows the steam to settle, creating a smoother interior. This brief pause also lets the butter glaze set, preventing a greasy look. If you skip this step, the cake may feel too oily. I’ve seen bakers cut into the cake immediately, only to find a slick center. A short rest is a small price for a big difference.
Layered Flavor Boost
Add a splash of lemon zest or a few drops of almond extract to the batter for an unexpected citrusy or nutty twist. The zest adds brightness, while the almond extract deepens the overall flavor profile. Use sparingly; a teaspoon of lemon zest or a half‑teaspoon of almond extract is enough to elevate the dish. This trick is perfect for those who want a subtle complexity without overcomplicating the recipe.
Reheating Without Drying Out
When reheating leftover cake, drizzle a tablespoon of heavy cream over the top before warming it in the oven. The cream steams, rehydrating the cake and restoring its silky texture. This simple step prevents the cake from becoming dry or crumbly. I’ve used this trick for weeks, and the results are consistently impressive. It’s an easy way to bring the cake back to life.
Creative Twists and Variations
This recipe is a playground. Here are some of my favorite ways to switch things up:
Chocolate Drizzle Delight
Drizzle melted dark chocolate over the top of the finished cake for a rich, bittersweet contrast. The chocolate pairs beautifully with the sweet strawberries, creating a layered flavor experience. Use a spoon to create a decorative swirl pattern. This variation is perfect for chocolate lovers who still want a fruity note.
Minty Fresh Twist
Add a teaspoon of fresh mint leaves to the batter and a few drops of mint extract. The mint adds a refreshing, cooling effect that complements the strawberries. It’s especially delightful during warm summer evenings. This version is ideal for guests who appreciate herbal undertones.
Nutty Crunch Variation
Stir in a handful of chopped toasted pecans or walnuts before baking. The nuts add a satisfying crunch and a nutty flavor that balances the sweetness. Sprinkle additional nuts on top after baking for an extra textural element. This twist is great for those who enjoy a bit of bite in their desserts.
Citrus Burst Edition
Replace half of the strawberries with segments of orange or grapefruit. The citrus adds a bright, tangy flavor that cuts through the richness of the cream cheese. Combine the citrus with a drizzle of honey for extra depth. This variation is a refreshing take for citrus enthusiasts.
Espresso Infusion
Add a tablespoon of instant espresso powder to the batter for a subtle coffee undertone. The espresso enhances the chocolatey notes if you choose the chocolate drizzle variation. It also provides a pleasant aftertaste that lingers. This version is perfect for coffee lovers who want a dessert with depth.
Storing and Bringing It Back to Life
Fridge Storage
Store the cake in an airtight container at room temperature for up to two days. The cake will remain moist and flavorful if kept sealed. If you notice any excess moisture, pat the surface dry with a paper towel before sealing. Keep the container in a cool, dark place to preserve freshness. When ready to serve, let it sit at room temperature for 15 minutes to restore its creamy texture.
Freezer Friendly
Wrap the cake tightly in plastic wrap, then place it in a freezer bag for up to two weeks. Freezing preserves the cake’s flavor and texture. To thaw, leave it in the refrigerator overnight, then allow it to come to room temperature before serving. Avoid refreezing once thawed, as the texture may degrade. The cake retains its creamy center even after freezing.
Best Reheating Method
Reheat the cake in a preheated 350°F oven for 5 minutes, or until warmed through. To keep it moist, drizzle a tablespoon of heavy cream over the top before reheating. The cream steams, restoring the cake’s silky texture. Alternatively, microwave the cake on low power for 15–20 seconds if you’re in a hurry. This method preserves the flavor without overcooking the edges.