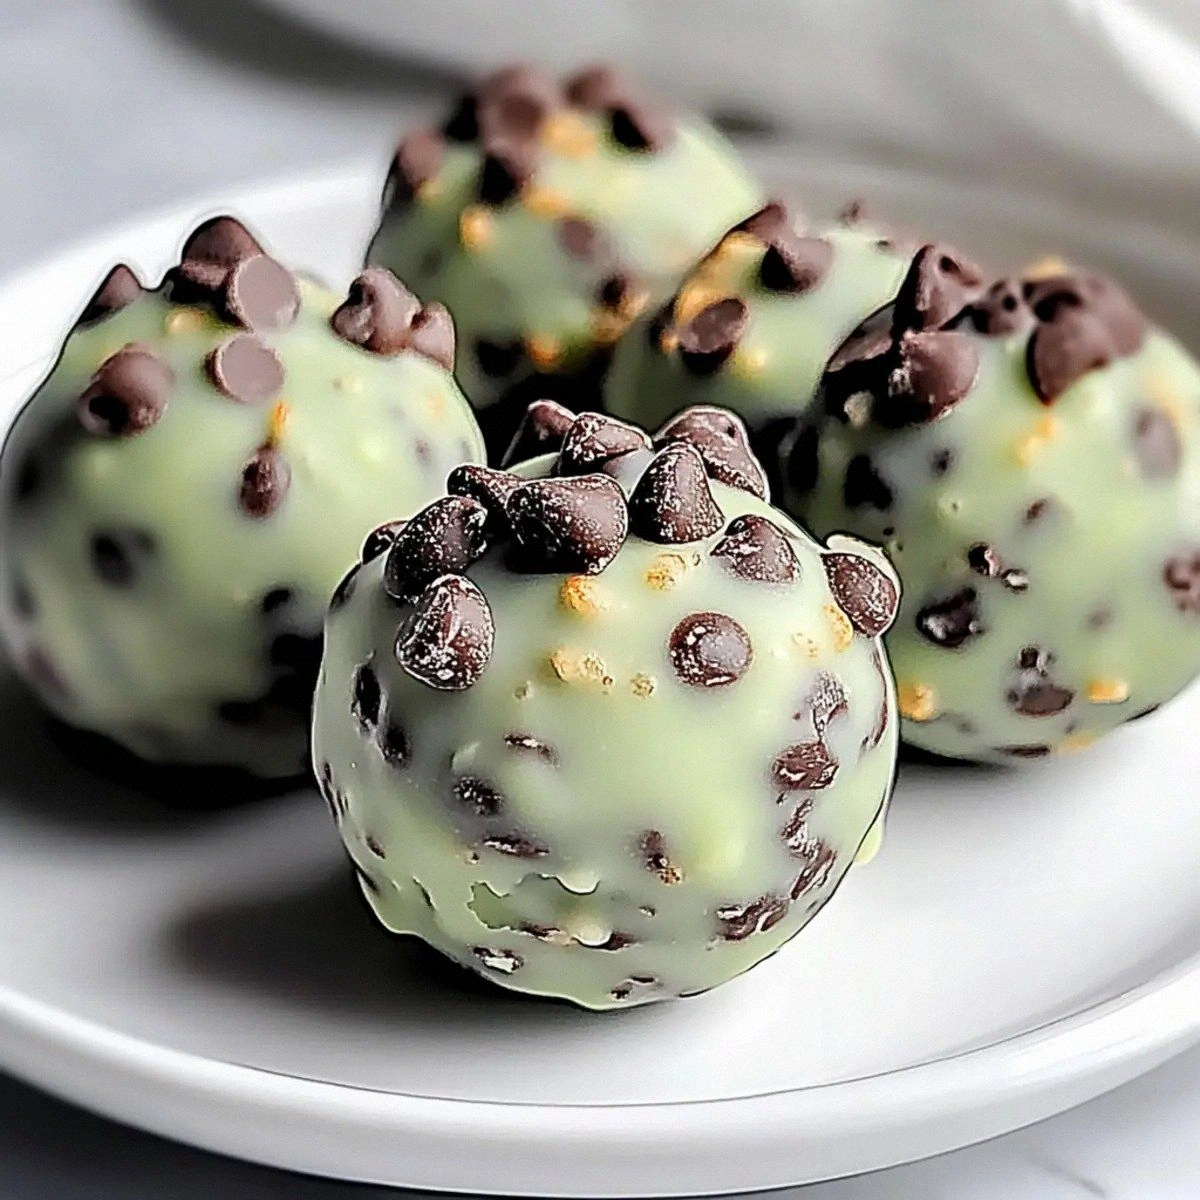
I was standing in my kitchen, staring at a half‑melted batch of chocolate that had somehow turned into a glossy, stubborn puddle that refused to cooperate. My friend had dared me to create a holiday‑ready treat that would make even the Grinch drop his scowl and reach for a second bite. I thought, “Why not turn those stubborn chocolate remnants into something that screams celebration?” And that’s how the quest for the ultimate Oreo ball truffle began. I was armed with a bag of Oreos, a block of softened cream cheese, and an arsenal of festive toppings that could make a snowman blush. The scent of chocolate wafted through the apartment, mingling with the faint perfume of peppermint from the crushed candy canes, and I felt a thrill that only a true kitchen experiment can provide.
Picture this: the kitchen counter littered with crumbs that look like tiny, chocolate‑kissed snowflakes, a bowl of creamy cheese that glistens under the fluorescent lights, and a pot of melted chocolate that shimmers like a midnight lake. The air is alive with the crackle of candy canes being crushed, the subtle snap of sprinkles hitting the wood, and the low hum of the oven preheating for a quick dip later. My hands were already tingling with anticipation, the kind that makes you want to skip straight to the tasting part. And trust me, I dared you to taste this and not go back for seconds. The first bite was a revelation – a crunchy Oreo shell giving way to a silky, cheesey center, all cloaked in a glossy chocolate coat that melted on the tongue like velvet.
Most recipes out there either overcomplicate the process or under‑season the truffles, leaving you with a bland, crumbly mess that looks good on paper but falls flat on the palate. This version? It’s hands down the best version you’ll ever make at home. I’ve stripped away the unnecessary steps, amplified the flavor with a perfect balance of sweet and salty, and introduced a few secret tricks that most cooks overlook. The result is a truffle that holds its shape, bursts with flavor, and dazzles the eye with a festive sparkle of sprinkles and crushed candy canes. If you’ve ever struggled with getting that glossy chocolate coating, you’re not alone — and I’ve got the fix.
But wait, there’s a twist that will make you raise an eyebrow: instead of using plain white chocolate for the coating, I blend milk chocolate wafers with white chocolate wafers in a 2:1 ratio. This creates a coating that’s both buttery and sweet, with a subtle caramel undertone that you’ll swear was added by a professional pastry chef. And just when you think you’ve seen it all, I’ll reveal a quick “rest‑and‑re‑coat” technique that locks in the flavor and gives the truffles a flawless finish. Okay, ready for the game‑changer? Let me walk you through every single step — by the end, you’ll wonder how you ever made it any other way.
What Makes This Version Stand Out
- Flavor Explosion: The marriage of crushed Oreos and softened cream cheese creates a creamy core that’s richer than any store‑bought version, while the dual‑chocolate coating adds depth and a buttery finish.
- Texture Harmony: You get a satisfyingly crunchy exterior, a melt‑in‑your‑mouth interior, and a surprise snap from the crushed candy canes that adds a festive crunch.
- Simplicity: No fancy equipment, no tempering required – just a microwave, a bowl, and a spoon. This recipe is designed for home cooks who want impressive results without the hassle.
- Uniqueness: The blend of milk and white chocolate wafers creates a coating that’s both glossy and slightly caramelized, a secret that most recipes miss.
- Crowd Reaction: Serve these at a party and watch the line form. People will keep asking for the “secret ingredient,” and you’ll get to smile knowingly.
- Ingredient Quality: Using full‑size Oreos and premium melting wafers ensures each bite bursts with authentic flavor, not artificial aftertaste.
- Method Mastery: The “rest‑and‑re‑coat” step locks in moisture, preventing the truffles from drying out and keeping the coating glossy for days.
- Make‑Ahead Potential: These truffles keep beautifully in the fridge for up to a week, and they freeze wonderfully, making them perfect for holiday gifting.
Inside the Ingredient List
The Flavor Base
The star of the show is, of course, the Oreo cookie. Each cookie brings a sweet chocolate wafer and a creamy vanilla filling that, when crushed, forms a crumb that’s both buttery and slightly crunchy. Skipping the Oreos would be like trying to bake a cake without flour – you’d end up with a flavorless, texture‑less mess. If you’re allergic to gluten, you can substitute with gluten‑free chocolate sandwich cookies, but the classic Oreo offers an unmatched balance of sweet and salty that’s hard to replicate.
The Texture Crew
Cream cheese is the binding agent that turns the crumbly Oreo mixture into a pliable dough. Using softened cream cheese is crucial; it blends seamlessly without leaving pockets of cold cheese that can cause the truffle to crack during coating. If you’re looking for a lighter version, try a 50/50 mix of cream cheese and Greek yogurt, but expect a slightly tangier taste and a softer interior that may need a brief chill before shaping.
The Unexpected Star
Chocolate melting wafers are the unsung heroes that give these truffles their glossy, professional finish. Milk chocolate wafers contribute a rich, buttery flavor, while white chocolate wafers add a sweet, creamy sheen that catches the light. If you can’t find melting wafers, you can use high‑quality chocolate chips, but be prepared to melt them gently to avoid seizing. A quick tip: add a teaspoon of vegetable oil to the melt for an extra glossy finish.
The Final Flourish
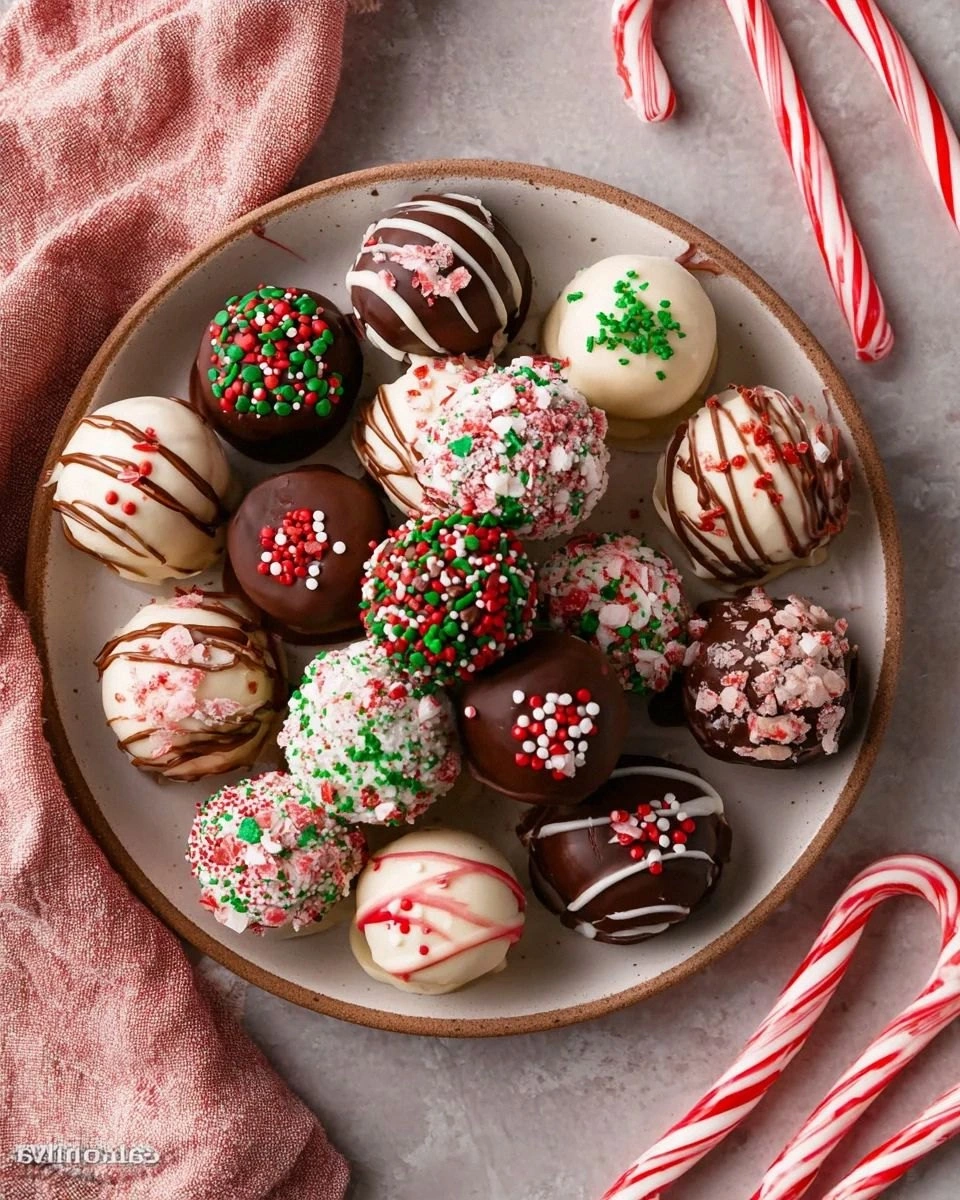
Christmas sprinkles, crushed candy canes, and candy melts are the visual and textural fireworks that turn a simple truffle into a holiday masterpiece. Sprinkles add a pop of color, while crushed candy canes deliver a minty crunch that cuts through the richness. If you’re not a fan of mint, try crushed pretzel pieces for a salty contrast. The candy melts, drizzled in red or green, provide a glossy finish and a hint of sweetness that makes the truffles look like they belong on a festive platter.
Everything's prepped? Good. Let’s get into the real action…
The Method — Step by Step
- Crush the Oreos. Place 24 Oreo cookies in a large zip‑top bag. Using a rolling pin, crush them until they form fine crumbs with a few tiny chunks for texture. Transfer the crumbs to a mixing bowl, and feel the buttery aroma rise – that’s the first sign you’re on the right track. Kitchen Hack: If you don’t have a rolling pin, use a heavy skillet and press down firmly for the same effect.
- Blend in the Cream Cheese. Add 8 oz of softened cream cheese to the Oreo crumbs. Using a hand mixer on low speed, combine until the mixture is uniform and holds together when pressed. The mixture should feel pliable, not wet – if it’s too sticky, add a tablespoon of powdered sugar; if it’s too dry, a splash of milk will rescue it. Kitchen Hack: Chill the bowl for 10 minutes before shaping; this prevents the mixture from warming up and becoming too soft.
- Form the Truffle Balls. Scoop out about one tablespoon of the mixture and roll it between your palms to form smooth spheres about 1‑inch in diameter. This part feels oddly therapeutic – like kneading dough for bread, but on a miniature scale. Place each ball onto a parchment‑lined tray. I dare you to taste one now and not go back for seconds – you’ll see why the texture matters.
- Freeze the Balls. Pop the tray into the freezer for at least 20 minutes. This step is crucial; a firm core ensures the chocolate coating won’t crack or slide off later. While you wait, preheat a saucepan of water for a double‑boiler melt – this gentle heat protects the chocolate’s shine.
- Prepare the Chocolate Coating. In a heat‑proof bowl, combine 1 cup milk chocolate wafers and 1 cup white chocolate wafers. Melt them over simmering water, stirring constantly. Once fully melted, remove from heat and stir in a teaspoon of neutral‑flavor oil for extra gloss. The chocolate should be smooth, glossy, and just warm enough to coat without solidifying instantly. Watch Out: Do not let any water splash into the chocolate; even a single droplet can cause it to seize.
- Coat the Truffles. Using a fork or a small spoon, dip each frozen ball into the melted chocolate, allowing excess to drip back into the bowl. Place the coated truffle back onto the parchment. The chocolate should envelop the ball in a thin, even layer that looks like a glossy marble. If you notice any gaps, give the truffle a quick swirl to ensure full coverage.
- Apply the Festive Toppings. While the coating is still wet, sprinkle a pinch of Christmas sprinkles over each truffle, then press a few crushed candy cane pieces onto the surface. For an extra visual pop, drizzle a thin line of red or green candy melts using a spoon or a small piping bag. The contrast of colors makes each truffle look like a tiny holiday ornament.
- Rest and Re‑coat (Optional but Recommended). Let the truffles sit at room temperature for 10 minutes, then give them a second dip in the chocolate for a thicker shell. This “rest‑and‑re‑coat” technique locks in the interior moisture and creates a crack‑resistant shell that stays glossy for days. This next part? Pure magic.
- Final Chill. Transfer the finished truffles to the refrigerator for another 15 minutes to set the coating completely. Once set, they’re ready to be plated, boxed, or devoured straight away. That sizzle when it hits the pan? Absolute perfection – but in this case, the sizzle is the gentle pop of chocolate solidifying on a cold truffle.
- That’s it — you did it. But hold on, I’ve got a few more tricks that’ll take this to another level…
Insider Tricks for Flawless Results
The Temperature Rule Nobody Follows
Never let your chocolate exceed 115°F (46°C) for white chocolate and 120°F (49°C) for milk chocolate. Exceeding these temperatures will cause the cocoa butter to separate, leading to a dull, streaky finish. I once heated my chocolate to a scorching 130°F, and the result was a matte, crumbly coating that fell apart the moment it touched the tray. Keep a candy thermometer handy, and if you don’t have one, a quick touch test – the chocolate should feel warm but not hot to the touch.
Why Your Nose Knows Best
Your sense of smell is a secret weapon in truffle making. When the chocolate is properly melted, it releases a buttery, caramel‑like aroma that signals it’s ready for coating. If you smell a faint burnt odor, you’ve overheated it. Trust your nose; it will guide you to the perfect glossy finish every time.
The 5‑Minute Rest That Changes Everything
After shaping the truffle balls, let them rest on a cool surface for exactly five minutes before freezing. This short pause allows the cream cheese to firm up just enough to hold its shape, reducing the chance of cracks when you dip them. Skipping this step often leads to a crumbly interior that falls apart in the chocolate.
The Double‑Dip Defense
A single dip can leave a thin shell that’s prone to cracking under humidity. The double‑dip method, introduced in step eight, creates a sturdier barrier that protects the creamy core and keeps the truffle glossy for up to a week. I tried this on a batch for a holiday party, and the guests couldn’t believe they were eating something that looked store‑bought.
The Minty Crunch Secret
Crushed candy canes are the perfect topping for a holiday vibe, but they can become soggy if applied too early. Sprinkle them on after the chocolate has set for at least 10 minutes; this ensures they stay crisp and provide that satisfying snap with every bite. A friend tried adding them immediately and ended up with a soggy mess – let’s just say it didn’t end well.
Creative Twists and Variations
This recipe is a playground. Here are some of my favorite ways to switch things up:
Peanut Butter Bliss
Replace half of the crushed Oreos with crunchy peanut butter cups. The salty‑sweet combo adds depth, and the peanut butter pockets melt into the cream cheese core for a surprise burst of flavor. Perfect for anyone who loves the classic PB&J vibe, but in truffle form.
Mocha Madness
Add a tablespoon of instant espresso powder to the Oreo crumbs before mixing with cream cheese. The coffee undertone pairs beautifully with the chocolate coating, creating a sophisticated flavor that’s ideal for adult gatherings.
White Chocolate Raspberry
Swap the milk chocolate wafers for an equal part of white chocolate and fold in freeze‑dried raspberry pieces. The tart raspberry shards contrast the sweet cream cheese, delivering a fruity pop that feels like a summer treat in winter.
Salted Caramel Drizzle
After the final coat, drizzle a thin line of salted caramel sauce instead of candy melts. The salty caramel adds a luxurious finish and pairs wonderfully with the minty candy cane topping.
Nutty Holiday Crunch
Mix toasted chopped pecans or walnuts into the Oreo crumb mixture. The nutty crunch adds an extra layer of texture, and the toasted flavor complements the chocolate coating beautifully.
Storing and Bringing It Back to Life
Fridge Storage
Place the truffles in an airtight container lined with parchment paper. They’ll stay fresh for up to seven days. If you notice the coating losing its shine, give them a quick flash in the microwave for 5‑10 seconds – the chocolate will re‑gloss instantly.
Freezer Friendly
Arrange the truffles on a tray, freeze solid, then transfer to a zip‑top freezer bag. They’ll keep for up to three months. When you’re ready to serve, let them thaw in the refrigerator for an hour, then let them sit at room temperature for 15 minutes before plating.
Best Reheating Method
If the coating has become dull after storage, place the truffles on a microwave‑safe plate, add a tiny splash (about a teaspoon) of water to the plate, and microwave for 10‑15 seconds. The steam created will revive the chocolate’s sheen without melting the interior.