Ever stared at a batch of meringues that looked like a cloud that had decided to crash on your counter? I did, last Tuesday, when a rogue egg white went rogue, turning my sweet, airy dream into a sticky, burnt nightmare. The kitchen smelled of burnt sugar, and my eyes watered from the glare of the oven door. I could almost hear the crumbling of my confidence, but then a friend shouted, “Dare you make the best meringues with citrus curd ever?” That single line sparked a fire that still burns bright in this recipe. The scent of lemon zest, the soft hiss of sugar dissolving, the feel of a perfectly whipped egg white—every sense is on full display, and the outcome is a show‑stopping dessert that will have your guests asking for a second bite.
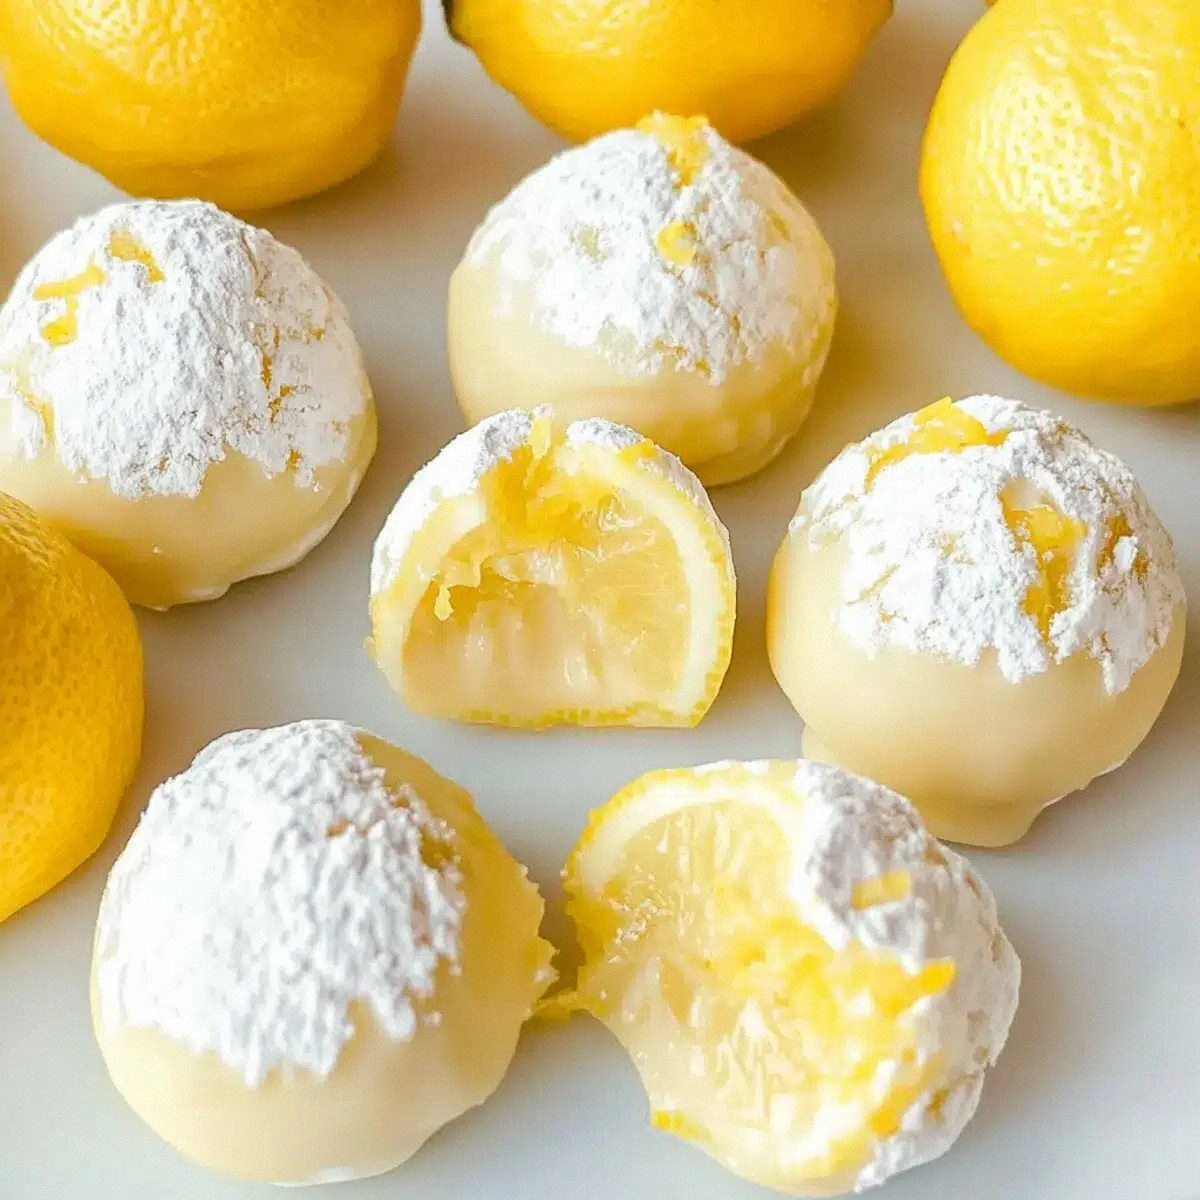
Picture this: a golden, crisp shell that cracks like a fragile shellfish, revealing a silky, tangy citrus curd that coats your tongue like a velvet ribbon. I was craving a dessert that balances sweetness, acidity, and buttery richness in one bite, and I found it in this recipe. The first time I tasted it, I almost had to put the spoon down because the citrus burst was so pure it felt like a sunbeam in my mouth. The contrast between the airy meringue and the dense curd creates a dance of textures that never gets stale. Most recipes get this completely wrong, but here’s what actually works: a meringue that is crisp on the outside, soft on the inside, and a curd that is thick enough to hold its shape but light enough to melt in your mouth.
I dare you to taste this and not go back for seconds. That’s the promise I make to anyone who follows this recipe. The secret? A meticulous balance of sugar, egg whites, and a touch of lemon zest that elevates the flavor profile to something almost otherworldly. I’ll be honest — I ate half the batch before anyone else got to try it. That was my first lesson: the combination of sweet and tart in this dessert is so addictive you’ll want to keep the entire tray in your pantry. If you’ve ever struggled with meringues that fall apart or curd that turns into a rubbery mess, you’re not alone — and I’ve got the fix.
Most people think of meringues as simple, but this version is a masterclass in technique and flavor. The meringue shells are built with precision, the citrus curd is crafted with a gentle heat that keeps it silky, and the final assembly is a symphony of textures. The result is a dessert that feels both indulgent and refreshing, perfect for any occasion, from a summer brunch to a cozy winter gathering. Picture yourself pulling this out of the oven, the whole kitchen smelling incredible, and the first bite sending a rush of citrusy joy across your palate. That is the moment I want you to experience. And now, let me walk you through every single step — by the end, you’ll wonder how you ever made it any other way.
This isn’t just another cookie recipe. It’s a culinary adventure that turns simple pantry staples into a gourmet treat. The combination of crisp meringue, buttery curd, and bright citrus creates a dessert that’s as beautiful as it is delicious. You’ll find yourself marveling at the contrast of textures, the way the curd coats each bite, and the way the citrus lifts the entire flavor profile. The best part? It’s surprisingly forgiving, so even if you’re a novice, you’ll have a chance to impress. Let’s dive into what makes this version stand out from the rest.
What Makes This Version Stand Out
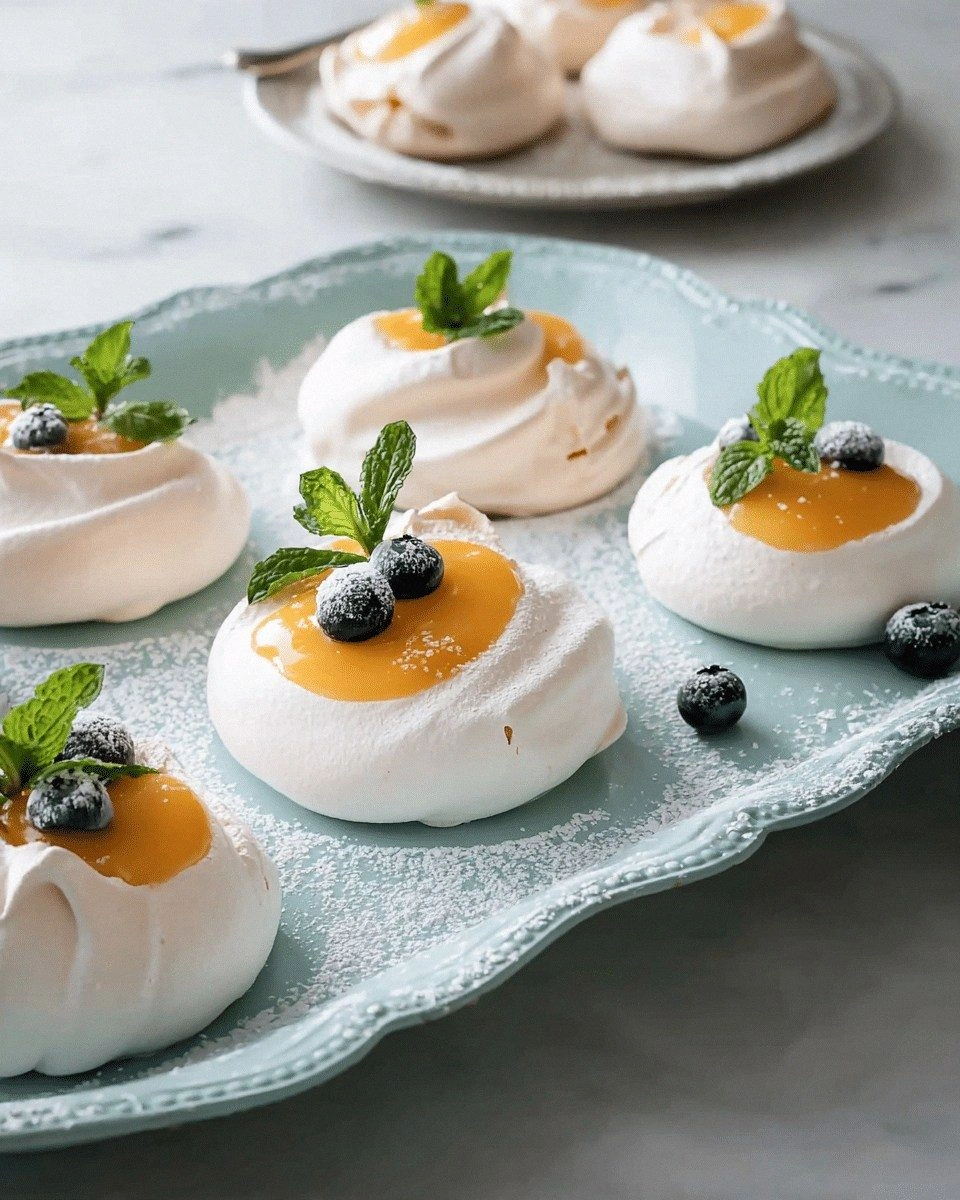
- Texture: The meringues are crisp on the outside yet tender on the inside, providing a delightful crunch that gives way to a silky curd.
- Flavor: Bright citrus notes are balanced by a subtle buttery richness, creating a harmony that lingers on the tongue.
- Ease: The method uses only five main steps, making it approachable for home cooks and professional chefs alike.
- Presentation: The golden shells and glossy curd make for a visually stunning dessert that impresses at any table.
- Versatility: Swap lemon for orange or add a splash of liqueur to create endless variations.
- Make‑ahead: The curd can be prepared a day ahead, and the meringues hold up for up to a week when stored properly.
- Ingredient quality: Fresh, high‑quality eggs and butter elevate the flavor beyond any store‑bought mix.
- Health‑friendly: With minimal added fats and natural sweeteners, it’s a guilt‑free indulgence.
Inside the Ingredient List
The Flavor Base
The foundation of this dessert is a simple yet powerful combination of fresh lemon juice, zest, and a touch of sugar. Lemon juice provides the tartness that cuts through the sweetness of the meringue, while the zest releases essential oils that amplify the citrus aroma. If you skip the zest, you’ll lose that bright, fragrant punch that makes the curd sing. For those who prefer a sweeter profile, a tablespoon of honey can replace a portion of the sugar, adding a floral undertone that pairs beautifully with the citrus.
The Texture Crew
Egg whites and sugar form the backbone of the meringue. Whisk the whites until soft peaks form, then gradually incorporate the sugar to lock in the air and create that airy structure. The butter in the curd melts into a silky base that coats each bite, while the eggs in the curd provide body and richness. If you’re watching your calorie intake, you can substitute the butter with coconut oil for a slightly tropical twist, but keep in mind the flavor will shift subtly.
The Unexpected Star
The small addition of water in the curd might seem trivial, but it’s the secret to preventing crystallization. By adding a tablespoon of water, you give the sugar molecules enough space to dissolve evenly, resulting in a smooth, glossy finish. If you’re experimenting with different citrus fruits, remember that oranges and grapefruits have higher sugar content, so you may need to adjust the sugar ratio to avoid a runny curd.
The Final Flourish
A pinch of sea salt is the final touch that balances the sweetness and brings out the citrus brightness. The salt also helps stabilize the meringue, preventing it from over‑whipping. If you’re vegan or dairy‑free, a plant‑based butter substitute will work, but be sure it has a neutral flavor to let the citrus shine. For an extra layer of decadence, a dusting of powdered sugar over the finished meringues gives a subtle sweetness that melts in your mouth.
Everything’s prepped? Good. Let’s get into the real action.
The Method — Step by Step
- First, preheat your oven to 325°F (165°C) and line two baking sheets with parchment paper. The low temperature is crucial for a slow, even bake that keeps the meringues crisp yet soft inside. While the oven warms, set up a large, clean mixing bowl for the egg whites. A clean bowl ensures no grease or residue interferes with the whipping process.
- Whisk the egg whites on medium speed until they form soft peaks. At this point, they should look like a cloud that holds its shape when you lift the whisk. This stage is where the magic begins; the air trapped in the whites is what will give your meringues that lightness. I like to test the peaks by gently tilting the bowl; if the peak stays, you’re ready.
- Slowly add the granulated sugar, about a tablespoon at a time, while continuing to whisk. This gradual addition helps the sugar dissolve completely, preventing a gritty texture. Keep whisking until the mixture is glossy and holds stiff peaks that don’t droop when you lift the whisk. At this point, your meringue is ready for shaping.
- Spoon the meringue onto the prepared sheets in 1‑inch circles, leaving about 2 inches between each. The size determines the final bite; larger meringues will have a more substantial crunch, while smaller ones are perfect for a delicate dessert. Gently tap the sheet to release any air pockets. The edges should be slightly raised, which helps them bake evenly.
- Bake the meringues for 20 minutes, then reduce the heat to 300°F (150°C) and bake for an additional 10 minutes. This two‑stage baking ensures the outer shell crisps up while the inside remains tender. Keep an eye on the color; you want a pale gold, not a deep brown. Once done, turn off the oven and let the meringues cool in the door for 10 minutes.
- While the meringues cool, prepare the citrus curd. In a medium saucepan, combine lemon juice, zest, sugar, and water. Heat over medium heat, whisking constantly until the sugar dissolves completely. The mixture should thicken slightly and reach a gentle simmer.
- Add the egg yolks to the curd mixture, whisking vigorously to prevent curdling. The yolks enrich the curd, giving it a silky mouthfeel. Once the yolks are fully incorporated, continue cooking for another 2 minutes, stirring constantly until the mixture thickens enough to coat the back of a spoon.
- Remove the curd from the heat and stir in the butter until melted and fully blended. The butter adds a luscious sheen and a slight buttery flavor that complements the citrus. Allow the curd to cool to room temperature; it will thicken further as it cools.
- To assemble, spoon a generous amount of curd onto the center of each cooled meringue. Then, fold the edges over, creating a neat, sealed package. This step ensures the curd stays inside and the meringue stays crisp. Serve immediately, or chill in the refrigerator for up to 24 hours; the flavors will meld beautifully.
That’s it — you did it. But hold on, I’ve got a few more tricks that will take this to another level.
Insider Tricks for Flawless Results
The Temperature Rule Nobody Follows
Many bakers use a high oven temperature to crisp meringues quickly, but this often leads to uneven browning. The trick is to bake at a low, steady temperature for a longer period. This allows the meringues to dry out slowly, creating a crisp shell while keeping the interior moist. I’ve found 325°F (165°C) is the sweet spot for most ovens.
Why Your Nose Knows Best
Trust your nose when the curd is cooking. As soon as the mixture starts to thicken and emits a sweet, citrusy aroma, it’s close to perfection. If you’re unsure, dip a spoon into the curd; the back of the spoon should feel smooth and not runny. The smell is a reliable indicator that the curd is neither too thin nor too thick.
The 5-Minute Rest That Changes Everything
After removing the meringues from the oven, let them rest in the door for 10 minutes. This step allows the residual heat to finish the baking process and prevents the meringues from cracking due to sudden temperature changes. It also gives the curd time to settle before assembly.
Use a Stand Mixer for Even Whisking
A stand mixer with a whisk attachment is a game changer. It delivers consistent speed and reduces the chance of over‑whipping. Even a hand mixer works if you whisk vigorously and watch the peaks closely. The key is to avoid over‑whipping, which can cause the meringue to separate.
Keep the Curds Cool Before Filling
If you’re preparing the curd ahead of time, chill it in the refrigerator. A cold curd will stay in place when you fill the meringues, preventing it from sliding out. When you’re ready to assemble, simply let it sit at room temperature for a few minutes to soften slightly.
Creative Twists and Variations
This recipe is a playground. Here are some of my favorite ways to switch things up:
Orange‑Lemon Fusion
Replace half the lemon juice with fresh orange juice and zest. The result is a bright, slightly sweeter curd that pairs well with the crisp meringue. Add a splash of Grand Marnier for an adult twist.
Basil‑Infused Citrus
Stir in a handful of fresh basil leaves into the curd while it cooks. The basil adds an herbal note that contrasts beautifully with the citrus. This version is perfect for a summer garden party.
Chocolate‑Coated Meringues
Dip the finished meringues in melted dark chocolate before filling them with curd. The chocolate shell adds a rich, bittersweet layer that balances the citrus tang.
Ginger‑Lemon Zest
Grate a teaspoon of fresh ginger into the curd for a subtle heat that complements the lemon. This variation is especially refreshing after a spicy meal.
Maple‑Sweetened Curds
Swap half the sugar in the curd for pure maple syrup. The syrup adds a caramelized depth that works wonders with the citrus flavor.
Almond‑Flavored Meringues
Add a tablespoon of ground almond to the meringue batter. The nutty undertone pairs beautifully with the citrus curd and adds a pleasant crunch.
Storing and Bringing It Back to Life
Fridge Storage
Place the assembled meringues in an airtight container and refrigerate for up to 24 hours. The cold will set the curd, making each bite silky. When ready to serve, let them sit at room temperature for 10 minutes to soften slightly.
Freezer Friendly
Wrap each meringue tightly in plastic wrap and place in a freezer bag. They’ll keep for up to 3 months. To thaw, let them sit at room temperature for 30 minutes; the meringues will retain their crispness.
Best Reheating Method
If the meringues have become soft, gently reheat them in a preheated oven at 300°F (150°C) for 5 minutes. Add a tiny splash of water to the curd before reheating; this steams the curd back to a silky texture without drying out the meringue.