Picture this: you’re halfway through a marathon of breakfast recipes, feeling like a culinary daredevil, when the kitchen clock flashes 3:07 a.m. You’ve just smashed a batch of muffins that turned out drier than a desert, and the only thing left is a single apple on the counter. That moment of frustration became the spark that led me to this cake—an oat‑laden, apple‑scented wonder that refuses to disappoint. I was determined to create something that would not only taste like a warm hug but also feel like a healthy victory lap.
I pulled a ripe apple from the fridge, its skin glistening like a fresh coat of paint, and sliced it into bite‑sized cubes. The aroma that rose as the apple hit the pan was a sweet, spicy whisper of cinnamon and nutmeg, instantly turning the kitchen into a cozy, aromatic sanctuary. The sound of the apples sizzling against the coconut oil was a rhythmic drumbeat, promising a moist interior that would keep you coming back for seconds. And the texture—soft, slightly chewy, with a crisped edge that crackled like thin ice—was a revelation. It felt like a secret handshake between comfort and nutrition.
What makes this version stand out is that it’s not just a cake; it’s a statement. I dared you to taste it and not go back for seconds, and the result is a cake that is hands down the best version you'll ever make at home. It’s the kind of dessert that feels indulgent without the guilt, with every bite delivering a balanced hit of protein, fiber, and healthy fats. I’ll be honest—I ate half the batch before anyone else got a chance to try it—because it’s that good. If you've ever struggled with a cake that turns out too dry or too sweet, you’re not alone, and I’ve got the fix.
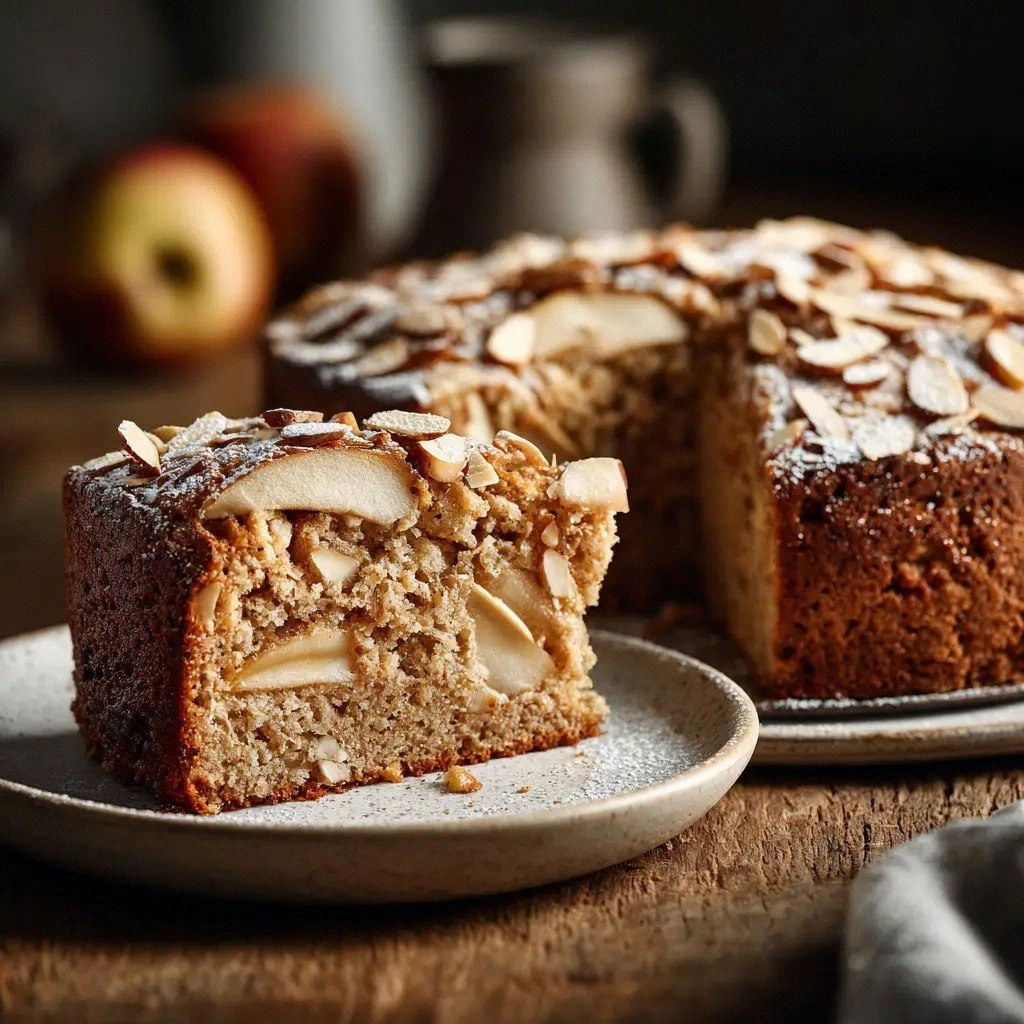
Picture yourself pulling this out of the oven, the whole kitchen smelling incredible, the timer beeping like a triumphant drum. The golden top shimmers, the edges pull away just enough to reveal a moist, spongy center, and the scent of apple and cinnamon wafts through the air. I promise you, this cake is the kind of sweet that makes you pause, savor, and then crave more. Let me walk you through every single step—by the end, you'll wonder how you ever made it any other way.
What Makes This Version Stand Out
- Flavor: The apple is the hero, its natural sweetness balancing the spices without any added sugar.
- Texture: Oats give the cake a chewy crumb, while yogurt adds moisture and a subtle tang.
- Health: With only one cup of whole wheat flour and no refined sugars, this cake is a nutrition powerhouse.
- Ease: Every ingredient is pantry‑friendly, and the process takes less than an hour.
- Versatility: The recipe scales beautifully for a single serving or a crowd.
- Make‑ahead: The batter can be refrigerated for up to 48 hours, making it perfect for busy mornings.
- Presentation: The golden crust and caramelized apple bits look as good as they taste.
- Ingredient Quality: Using fresh, high‑quality apples and pure maple syrup elevates the flavor profile.
Alright, let's break down exactly what goes into this masterpiece. And before we dive deeper, here’s a quick kitchen hack that will save you time.
Inside the Ingredient List
The Flavor Base
At the heart of this cake lies the apple—two medium, diced into cubes that release their sweet juices as they bake. The apples not only add natural sweetness but also a subtle tartness that cuts through the richness of the coconut oil. If you skip the apples, the cake becomes a plain oat cake, lacking that signature fruity punch. For a different twist, try using a mix of apples and pears for a slightly sweeter, more complex flavor.
The cinnamon and nutmeg duo is the secret sauce that turns ordinary batter into an aromatic masterpiece. Ground cinnamon provides warmth and depth, while nutmeg adds a hint of earthiness. Together, they create a spice profile that feels like a hug from the inside. If you’re sensitive to spices, reduce the amount, but keep the cinnamon; it’s the backbone of the flavor.
The Texture Crew
Rolled oats are the unsung hero that gives the cake its chewy, hearty texture. They absorb the liquids, creating a dense yet tender crumb that feels like a wholesome hug. If you can’t find rolled oats, rolled oat groats will work, but the texture will be a bit denser. For an extra layer of crunch, sprinkle a handful of toasted oats on top before baking.
Greek yogurt is the moisture engine that keeps the cake from drying out. Its thick, creamy consistency coats every grain of oat, creating a cake that’s soft and airy. If you prefer a dairy‑free version, replace yogurt with coconut yogurt, but expect a slightly different flavor profile. The yogurt also adds a subtle tang that balances the sweetness of the maple syrup.
The Unexpected Star
Coconut oil is the silent star that brings richness without the heaviness of butter. Its subtle tropical note adds depth to the overall taste, while also providing healthy fats that keep you feeling full. If you’re watching your calorie intake, you can substitute half the coconut oil with unsalted almond butter for a nutty twist. The oil also helps the cake bake evenly, ensuring a golden crust.
The Final Flourish
Baking powder and soda are the leavening agents that lift the cake, giving it a light, airy rise. They also help the batter spread evenly, creating a uniform crumb. If you’re allergic to sodium, reduce the baking soda slightly, but be mindful that the cake may not rise as much. Vanilla extract is the final touch that rounds off the flavor, adding a subtle sweetness that ties all elements together.
Everything's prepped? Good. Let's get into the real action.
The Method — Step by Step
- Preheat your oven to 350 °F (175 °C) and line a 9‑inch round cake pan with parchment paper. The parchment ensures easy removal and a clean finish. While the oven heats, whisk together the dry ingredients—rolled oats, whole wheat flour, baking powder, baking soda, cinnamon, nutmeg, and salt—in a large bowl. This dry mix is the foundation that holds the cake together. Once combined, set the bowl aside for a moment.
- In a separate bowl, beat the eggs with the Greek yogurt until the mixture is smooth and slightly frothy. The eggs bind everything together, while the yogurt adds moisture. Pour in the maple syrup and melted coconut oil, whisking until the liquids are fully incorporated. The maple syrup provides natural sweetness, while the coconut oil ensures a tender crumb. This wet mixture should smell like warm, sweet maple when you stir it.
- Combine the wet and dry ingredients, stirring gently until just combined. Be careful not to overmix; a few lumps are fine and will create a more textured crumb. Fold in the diced apples, letting them swirl through the batter. The apples will caramelize slightly as they bake, adding flavor pockets. This step is the moment of truth—watch the batter’s consistency; it should be thick but pourable.
- Pour the batter into the prepared pan, smoothing the top with a spatula. Tap the pan lightly on the counter to release any air pockets, ensuring a uniform rise. Place the pan in the preheated oven and bake for 25 to 30 minutes, or until the top is golden brown and a toothpick inserted into the center comes out clean. The edges should pull away slightly, indicating that the cake is ready. The aroma that fills the kitchen will make your heart race.
- Watch Out: When the cake is almost done, keep a close eye on the edges. If they brown too quickly, cover the cake loosely with aluminum foil to prevent over‑browning while the center finishes baking. This small adjustment can make the difference between a perfect cake and a slightly burnt one. Remember, the cake continues to cook a bit after you remove it from the oven.
- Let the cake cool in the pan for 10 minutes before transferring it to a wire rack. This rest period allows the structure to set, preventing the cake from crumbling. Once on the rack, let it cool completely—about 20 minutes. The cake will firm up, making slicing easier. While it cools, you can prepare a simple glaze if desired.
- Slice the cake into wedges and serve warm or at room temperature. The moist interior and slightly crisp edges will delight everyone. Pair it with a dollop of whipped Greek yogurt for extra richness. For a nostalgic touch, sprinkle a pinch of cinnamon on top. And remember—this cake is best enjoyed fresh, but it stays delicious for a few days in the fridge.
That's it—you did it. But hold on, I've got a few more tricks that'll take this to another level.
Insider Tricks for Flawless Results
The Temperature Rule Nobody Follows
Many bakers set the oven to 375 °F, but that high heat can dry out the cake before it sets. I’ve found that 350 °F strikes the perfect balance, allowing the cake to rise evenly while keeping the interior moist. If your oven runs hot, lower the temperature by 10–15 °F and add a few extra minutes to the baking time. This small tweak saves the day and results in a cake that feels like a cloud.
Why Your Nose Knows Best
The scent of a cake baking is a powerful cue for doneness. As the batter bakes, the smell of caramelized apple and toasted oats will fill the kitchen. If the aroma becomes too strong or starts to smell burnt, it’s time to pull the cake out. A subtle sweet scent means the cake is ready to come out and cool.
The 5-Minute Rest That Changes Everything
Allowing the cake to rest in the pan for 10 minutes before transferring it to a wire rack is more than a courtesy. The residual heat finishes the cooking process, ensuring the center is fully set. If you rush the cake out of the pan, it can collapse and become gummy. This rest period also lets the flavors meld together, creating a more cohesive taste.
Keep the Batter Smooth
When combining wet and dry ingredients, stir just until the flour is moistened. Over‑mixing can develop gluten, leading to a tougher crumb. A few lumps are okay and actually help create a more interesting texture. Think of it as a gentle dance rather than a frantic scramble.
Use a Parchment‑Lined Pan
A parchment‑lined pan ensures a clean release and a perfectly shaped cake. It also helps prevent the batter from sticking to the sides, which can create uneven edges. If you prefer a more rustic look, you can use a silicone mat instead; just be sure to grease it lightly to avoid sticking.
Cool Completely Before Slicing
Slicing a warm cake can cause it to crumble and lose its structure. Let the cake cool entirely on a rack before cutting. This also allows the flavors to settle, making each bite more harmonious. A cool cake is the ultimate comfort dessert, especially when paired with a hot cup of tea.
Creative Twists and Variations
This recipe is a playground. Here are some of my favorite ways to switch things up:
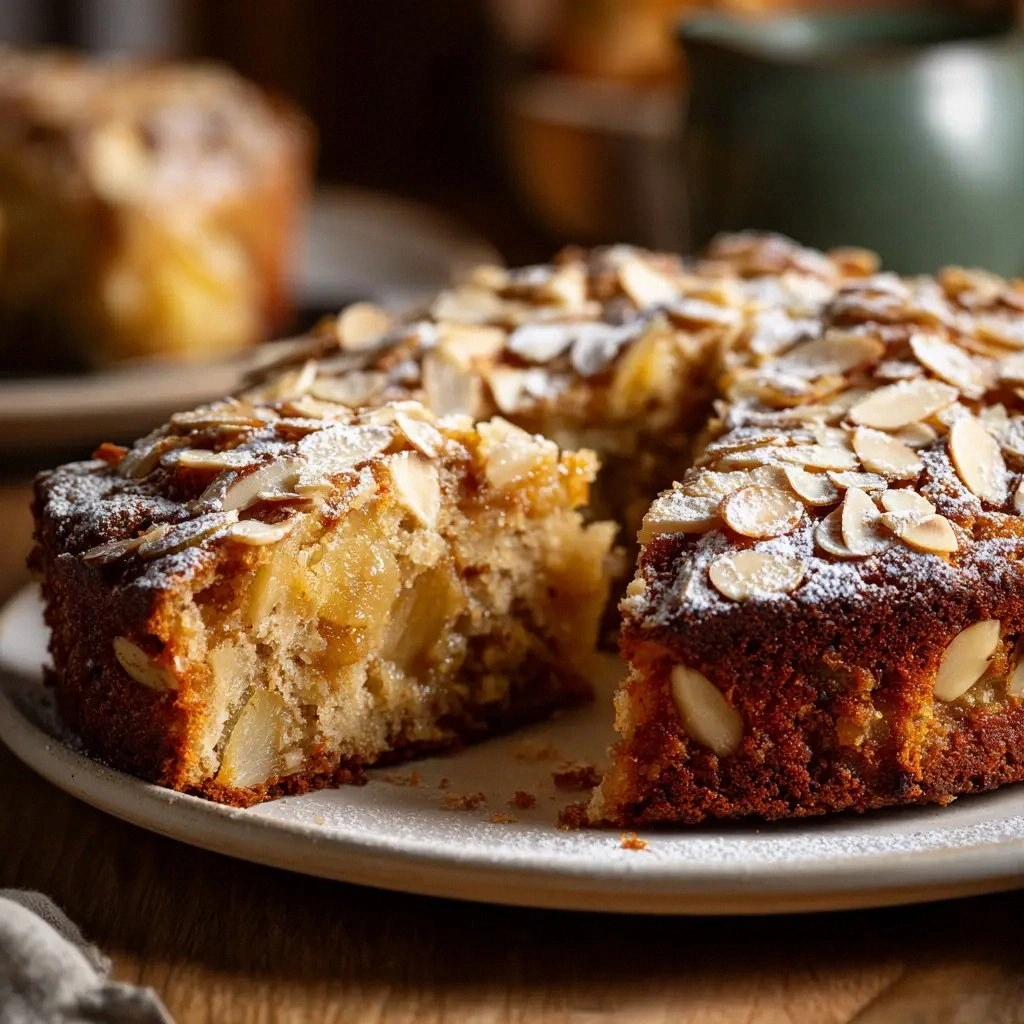
Maple‑Glazed Crunch
After baking, drizzle a simple maple glaze over the cake and sprinkle toasted almond slivers. The glaze adds a glossy finish, while the almonds introduce a delightful crunch. This version is perfect for holiday gatherings or a sweet brunch.
Cinnamon Swirl Surprise
Before baking, swirl a mixture of cinnamon, brown sugar, and a touch of butter into the batter. The swirl creates a caramelized ribbon of spice that melts into the cake as it bakes. Guests will be amazed by the hidden flavors.
Nutty Banana Boost
Add mashed ripe banana and a handful of chopped walnuts to the batter. The banana adds natural sweetness, while walnuts contribute a satisfying crunch and nutty flavor. This variation turns the cake into a wholesome, protein‑rich treat.
Chocolate Chip Delight
Fold in a quarter cup of dark chocolate chips just before baking. The chocolate melts into pockets of gooey goodness, creating a decadent yet still healthy dessert. Pair it with a scoop of vanilla Greek yogurt for a balanced indulgence.
Herbal Infusion
Add a teaspoon of dried rosemary or thyme to the batter for an unexpected herbal note. The herbs complement the apple’s sweetness and add a savory undertone. This version is surprisingly refreshing and works well for a brunch menu.
Berry‑Apple Fusion
Replace half the apples with fresh blueberries or raspberries. The berries introduce a tart contrast that brightens the cake’s flavor profile. This variation is ideal for summer mornings when berries are at their peak.
Storing and Bringing It Back to Life
Fridge Storage
Store the cooled cake in an airtight container in the refrigerator for up to 4 days. The airtight seal keeps the cake from drying out and preserves its moisture. When you’re ready to eat, let it sit at room temperature for 15 minutes to soften slightly. If you prefer a warmer slice, reheat in the microwave for 15–20 seconds. The cake will taste fresh as if it just came out of the oven.
Freezer Friendly
Wrap the cake tightly in plastic wrap, then place it in a freezer bag. It can stay frozen for up to 2 months without losing quality. Thaw overnight in the refrigerator before serving. For a quick pick‑up, microwave on high for 30–45 seconds. The texture remains tender, and the apple flavor stays vibrant.
Best Reheating Method
The best way to reheat the cake is to warm it in a toaster oven or conventional oven at 300 °F for 5–7 minutes. This method restores the cake’s warmth without drying it out. For a quick fix, add a splash of water to the bottom of a microwave-safe dish and heat for 15–20 seconds. The water steams the cake back to perfection, keeping it moist and fluffy.