I once tried to make a batch of store‑bought graham crackers for a weekend movie marathon, only to discover they were as soft as a pillow and crumbled like dust the moment I tried to dunk them in milk. I stared at the sad, soggy pieces and thought, “There has to be a better way.” That moment sparked a kitchen experiment that turned into a full‑blown love affair with the perfect crunch. I’m daring you to taste this and not go back for seconds, because once you experience the crackle, you’ll understand why I’m so obsessed.
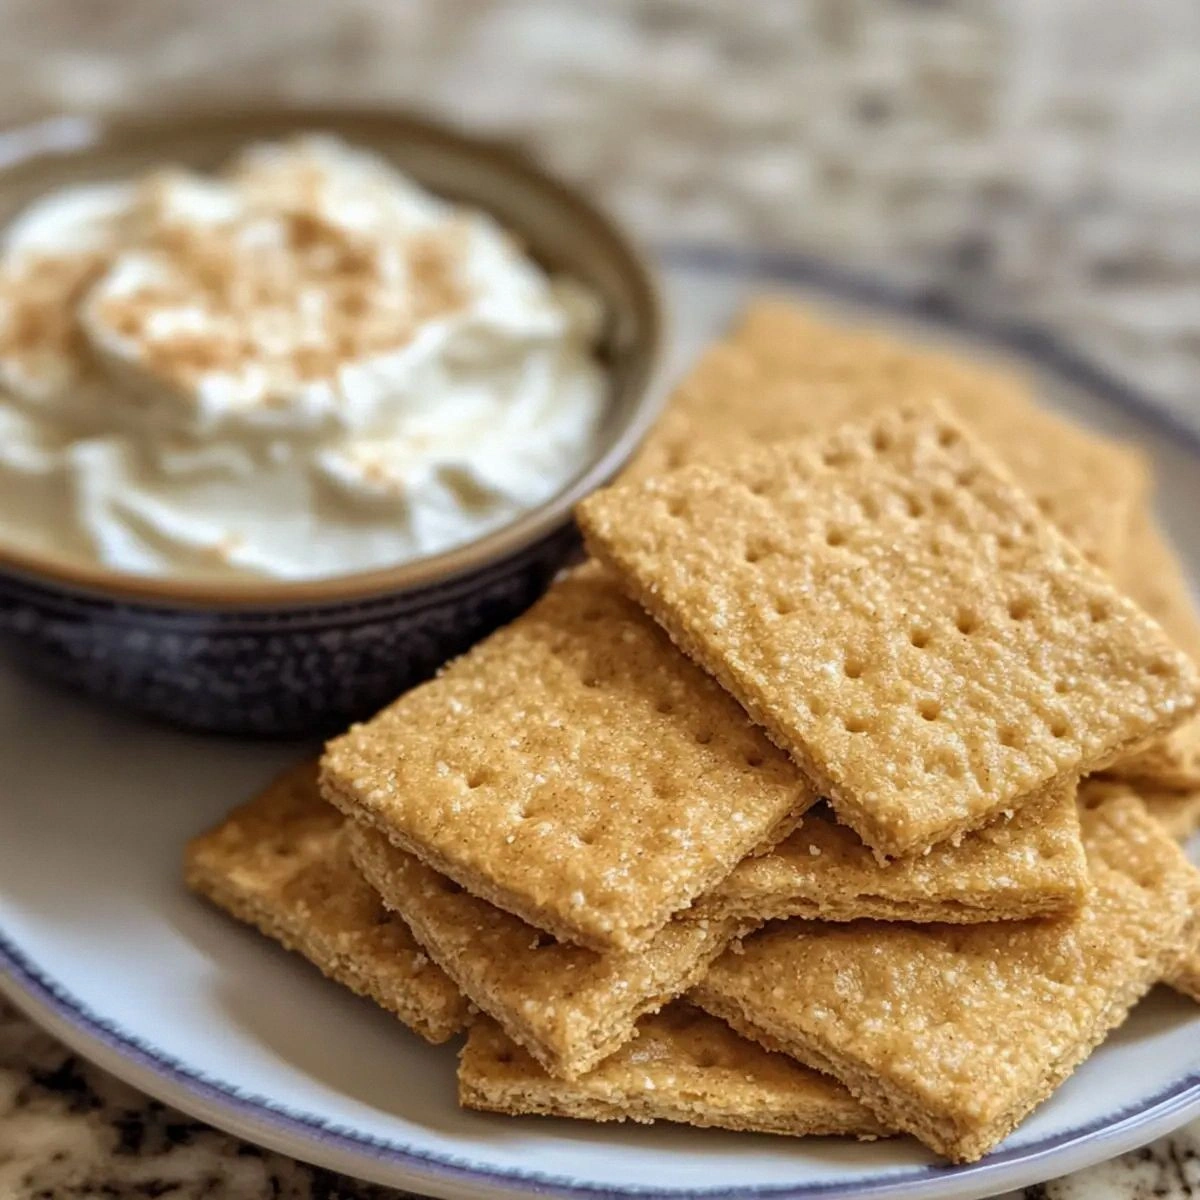
Picture yourself pulling a tray of golden squares out of the oven, the whole kitchen smelling like a warm hug wrapped in cinnamon and honey. The edges are crisp enough to snap with a satisfying crack, while the centers stay tender enough to melt in your mouth like butter on hot toast. The aroma wafts through the house, making your nose tingle with anticipation and your taste buds start a little dance. I’ll be honest — I ate half the batch before anyone else got to try it, and I have no regrets.
Most recipes get this completely wrong. They either over‑sweeten, under‑bake, or forget the secret that makes a graham cracker truly addictive: a balanced blend of whole‑wheat and all‑purpose flour, a splash of honey, and a dash of dark brown sugar that gives depth without cloying. This version stands out because it embraces the grainy heart of whole wheat while still delivering that melt‑in‑your‑mouth softness on the inside. The result is a cracker that’s crunchy, flavorful, and surprisingly elegant.
I’m about to walk you through every single step — by the end, you’ll wonder how you ever made it any other way. Okay, ready for the game‑changer? The trick that elevates this batch from good to legendary is a brief chill of the dough before rolling, which locks in air pockets and creates those delicate, airy layers. Stay with me here — this is worth it.
What Makes This Version Stand Out
- Texture: The combination of a buttery melt and a toasty snap makes every bite feel like a tiny celebration in your mouth.
- Flavor: Dark brown sugar and honey team up for a caramel‑like richness that outshines any store‑bought version.
- Simplicity: Only eight ingredients, all pantry staples, meaning you won’t need a trip to the specialty shop.
- Uniqueness: Whole‑wheat flour adds a nutty depth that most recipes skip, giving you a more complex flavor profile.
- Crowd Reaction: Friends claim these are the best crackers they’ve ever tasted, and they’ll beg you for the recipe.
- Ingredient Quality: Using real butter and honey, not margarine or corn syrup, ensures a clean, natural taste.
- Method: The chilling step and precise baking temperature create a perfect crunch without burning.
- Make‑Ahead Potential: They store beautifully, staying crisp for weeks if sealed properly.
Alright, let's break down exactly what goes into this masterpiece...
Inside the Ingredient List
The Flavor Base
Dark brown sugar is the unsung hero here, delivering a deep, molasses‑like sweetness that pairs beautifully with the honey’s floral notes. If you swapped it for white sugar, you’d lose that rich undertone and end up with a one‑dimensional sweet. For a vegan twist, use coconut sugar, but expect a slightly different caramel profile.
The Texture Crew
All‑purpose flour provides structure, while whole‑wheat flour introduces a nutty earthiness and a bit of extra fiber. Skipping the whole‑wheat will make the crackers lighter but also less robust in flavor. If you’re gluten‑free, a 1:1 blend of oat flour and rice flour works, though the texture will be a touch softer.
The Unexpected Star
Honey isn’t just a sweetener; it acts as a natural humectant, keeping the interior tender while the exterior crisps. Using maple syrup instead will give a different flavor note and a slightly lighter color. When selecting honey, choose a mild clover or wildflower variety so it doesn’t overpower the spice.
The Final Flourish
Baking soda is the leavening agent that creates tiny air pockets, ensuring the crackers aren’t dense. Too much will give a metallic aftertaste, while too little makes them flat. A pinch of salt amplifies every other flavor, acting like a backstage crew that makes the stars shine.
Everything's prepped? Good. Let's get into the real action...
The Method — Step by Step
Preheat your oven to 350°F (175°C). While the oven warms, line two large baking sheets with parchment paper; this ensures the crackers release cleanly and prevents any sticky drama. The heat should feel like a gentle summer breeze, not a raging inferno, because we want an even golden color.
Kitchen Hack: Place a cooling rack on top of the parchment; this lifts the crackers and promotes airflow for an even bake.In a large mixing bowl, whisk together the all‑purpose flour, whole‑wheat flour, baking soda, cinnamon, and salt. The mixture should look like fine sand, with the spices creating a faint amber hue. This dry blend is the foundation that will hold everything together, so take a moment to enjoy the aroma of cinnamon and wheat.
In a separate saucepan over low heat, melt the butter until it just begins to foam. Add the dark brown sugar and honey, stirring constantly until the sugar dissolves and the mixture becomes glossy. This is the moment of truth: you should hear a soft hiss, and the scent will turn buttery with caramel notes.
Pour the wet mixture into the dry ingredients, stirring with a wooden spoon until a shaggy dough forms. It will look slightly sticky, but resist the urge to over‑mix; over‑mixing develops gluten and can make the crackers tough. The dough should hold together when pressed between your fingertips.
Watch Out: If the dough feels too dry, add a teaspoon of cold water; too wet and the crackers will spread excessively.Turn the dough out onto a lightly floured surface and knead it just until it forms a smooth ball, about 30 seconds. Then, flatten it into a disc, wrap it in plastic wrap, and chill in the refrigerator for 30 minutes. This chill is pure magic—it firms the butter, preventing the crackers from spreading too much, and creates those coveted airy layers.
After chilling, divide the dough into two equal portions. On a parchment‑lined sheet, roll each portion out to a uniform thickness of about 1/8 inch (3 mm). Use a ruler or the back of a baking sheet to gauge consistency; the thinner you roll, the crunchier the final product.
Using a sharp pizza cutter or a cookie cutter, cut the dough into 2‑inch squares or rectangles. Transfer the shapes to the prepared baking sheets, leaving a small gap between each piece to allow for expansion. Press the edges lightly with a fork to create the classic “criss‑cross” pattern that adds visual charm.
Bake for 12‑15 minutes, or until the edges turn a deep golden brown and the tops are lightly speckled. Keep a close eye on the color; the moment you see the edges start pulling away from the parchment, you know they’re done. The scent at this stage is intoxicating—think toasted sugar, warm butter, and a whisper of cinnamon.
Kitchen Hack: Let the crackers cool on the baking sheet for 2 minutes before transferring to a wire rack; this lets the steam escape and preserves the crunch.Once completely cooled, store the crackers in an airtight container with a slice of bread to absorb any residual moisture. The crackers will stay crisp for up to two weeks, and the flavor only deepens with time. That sizzle when it hits the pan? Absolute perfection.
That's it — you did it. But hold on, I've got a few more tricks that'll take this to another level...
Insider Tricks for Flawless Results
The Temperature Rule Nobody Follows
Never bake at a temperature higher than 375°F for these crackers. Higher heat will cause the sugars to caramelize too quickly, resulting in a burnt edge and a gummy center. Keep it steady at 350°F, and you’ll get that even golden hue. A friend once cranked the oven to 425°F and ended up with a batch that resembled charcoal—let's just say the smoke alarm got a workout.
Why Your Nose Knows Best
Your sense of smell is the ultimate timer. When the kitchen fills with a toasty, buttery aroma, that’s your cue that the edges are just about to turn perfect. Trust that nose over the clock; a visual cue can be misleading if your oven has hot spots. I’ve learned to step away from the timer and rely on the scent, and it never fails.
The 5‑Minute Rest That Changes Everything
After the dough has chilled, let it rest at room temperature for five minutes before rolling. This short pause relaxes the gluten, making the dough easier to roll thin without tearing. Skipping this step leads to uneven thickness and a less consistent crunch. It’s a tiny patience exercise that pays off big.
The Light‑Touch Rolling Technique
Apply just enough pressure to flatten the dough; too much force squeezes out the air pockets that give you that delicate crunch. Use a rolling pin with gentle, even strokes, rotating the dough a quarter turn after each pass. If you hear a faint pop as the dough gives way, you’re on the right track.
The Secret of the Cooling Rack
Cooling the crackers on a wire rack, rather than a solid surface, prevents steam from re‑condensing underneath, which would make them soggy. This simple switch keeps the bottom side crisp and maintains that satisfying snap. I once left them on a plate and they turned out limp—lesson learned.
Creative Twists and Variations
This recipe is a playground. Here are some of my favorite ways to switch things up:
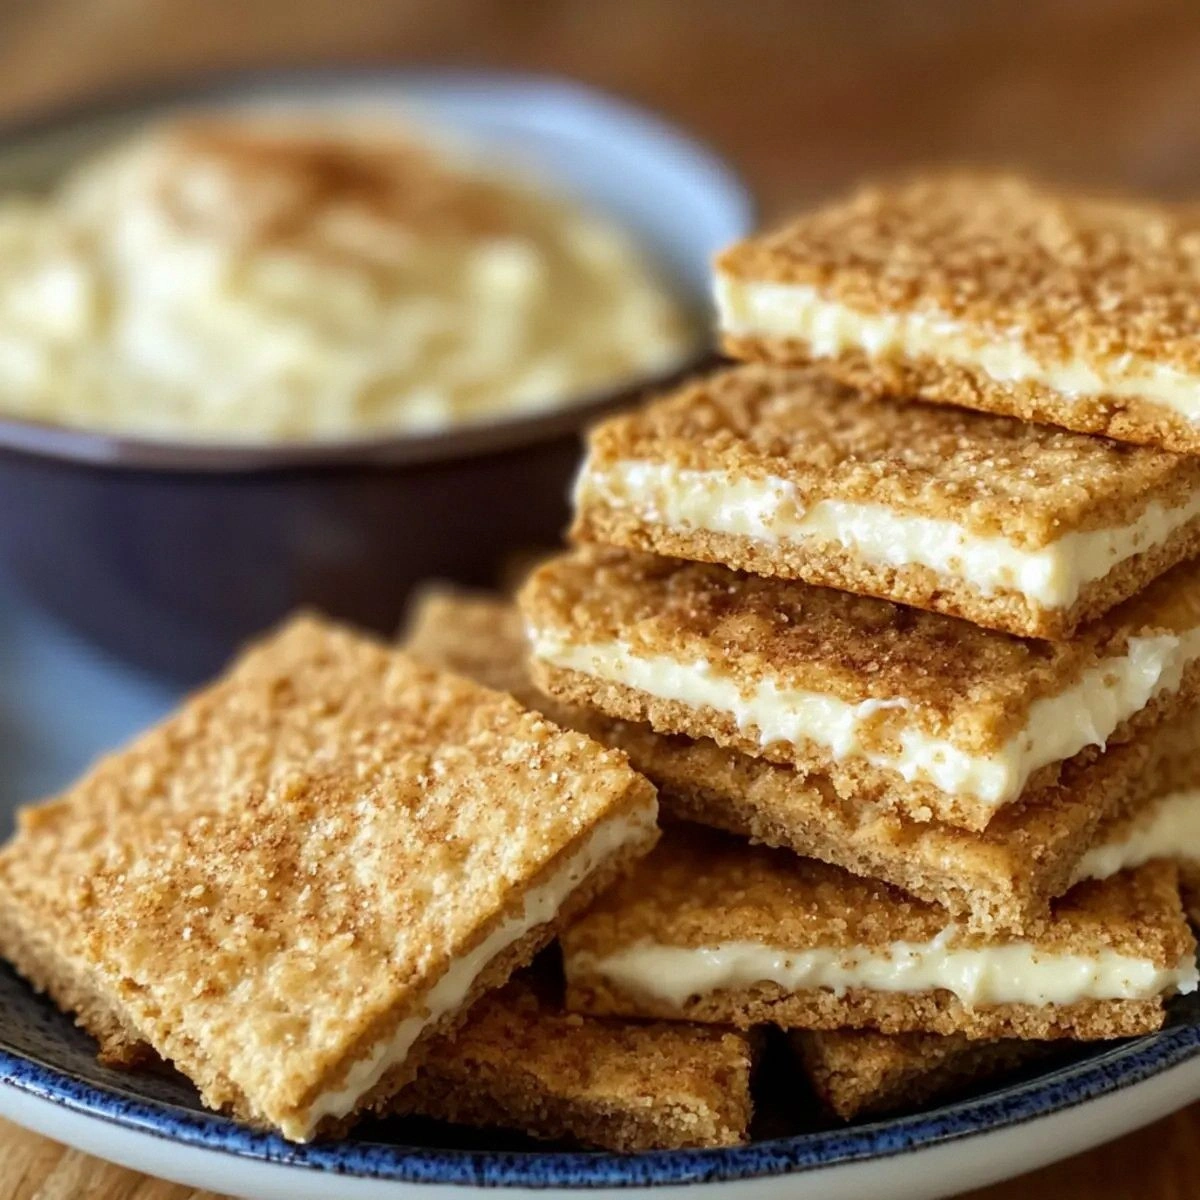
Chocolate‑Swirl Delight
Add 2 tablespoons of unsweetened cocoa powder to the dry ingredients and drizzle melted dark chocolate over the baked crackers before cooling. The result is a bittersweet contrast that pairs wonderfully with a glass of milk.
Spicy Chili‑Honey Kick
Mix ½ teaspoon of cayenne pepper into the cinnamon, and brush the tops with a thin layer of extra honey mixed with a pinch of chili flakes before baking. The heat builds slowly, delivering a surprising zing after the initial sweet bite.
Nutty Oat Crunch
Replace half of the whole‑wheat flour with rolled oats and stir in ¼ cup of finely chopped toasted almonds. This adds texture and a nutty aroma that makes the crackers feel heartier, perfect for a snack with cheese.
Zesty Lemon‑Honey
Add the zest of one lemon to the wet mixture and swap half of the honey for maple syrup. The citrus brightens the flavor, making the crackers a refreshing accompaniment to tea.
Savory Herb Fusion
Omit the cinnamon and honey, increase the butter to ¾ cup, and fold in 1 tablespoon of dried rosemary and a pinch of smoked paprika. These savory crackers are fantastic with olive tapenade or hummus.
Storing and Bringing It Back to Life
Fridge Storage
Place the cooled crackers in an airtight container with a slice of fresh bread. The bread absorbs excess moisture, keeping the crackers crisp for up to two weeks. If you notice any soft spots, replace the bread slice and let the crackers sit for another day.
Freezer Friendly
Layer the crackers between parchment sheets and seal them in a zip‑top freezer bag. They’ll stay fresh for three months. When you’re ready to enjoy them, let them thaw at room temperature for 10 minutes, then re‑crisp in a 300°F oven for 5 minutes.
Best Reheating Method
To revive a day‑old batch, preheat the oven to 300°F, place the crackers on a baking sheet, and add a tiny splash of water (about a teaspoon) to the sheet. The steam will re‑hydrate the interior while the heat restores the crunch. Within 5 minutes, they’ll be as fresh as when they first came out of the oven.