I’ll be honest — I ate half the batch before anyone else got to try it, and that was the moment I realized I had stumbled onto something truly magical. It all started on a rainy Saturday when my kitchen turned into a battlefield of burnt toast, soggy batter, and a lingering scent of disappointment. I was daring myself to recreate that iconic butterbeer taste from the movies, but every attempt left me with a cake that was either dry as a desert or sweet as a candy store gone rogue. I tossed a handful of butterscotch pudding into the mix, whispered a few extra seconds in the oven, and suddenly the whole house filled with a buttery, caramel‑kissed aroma that made the rain outside feel like a distant memory.
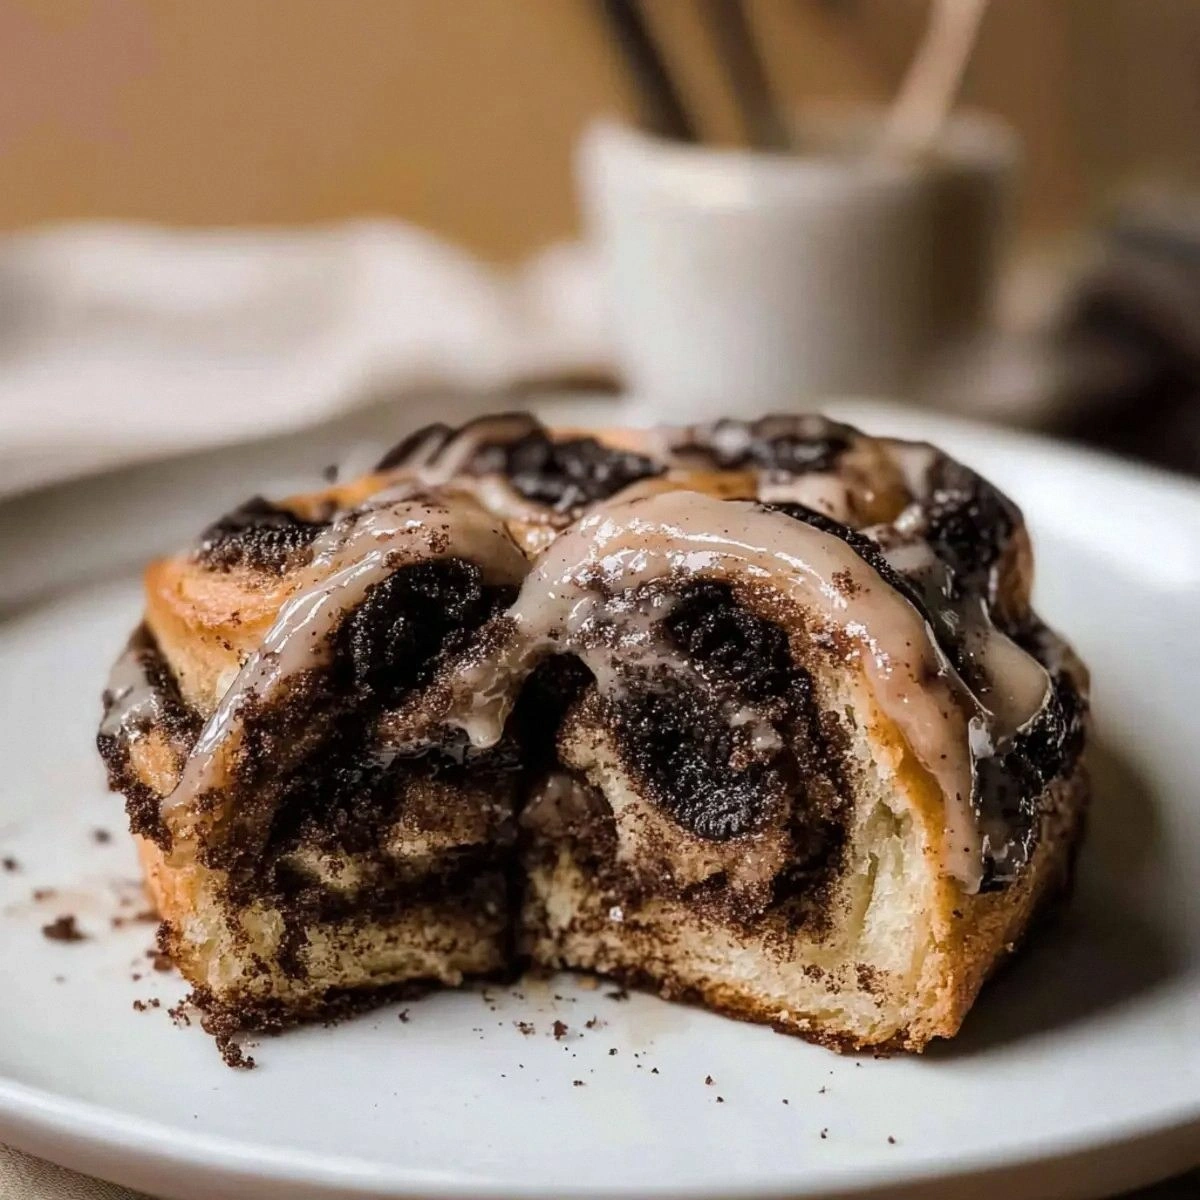
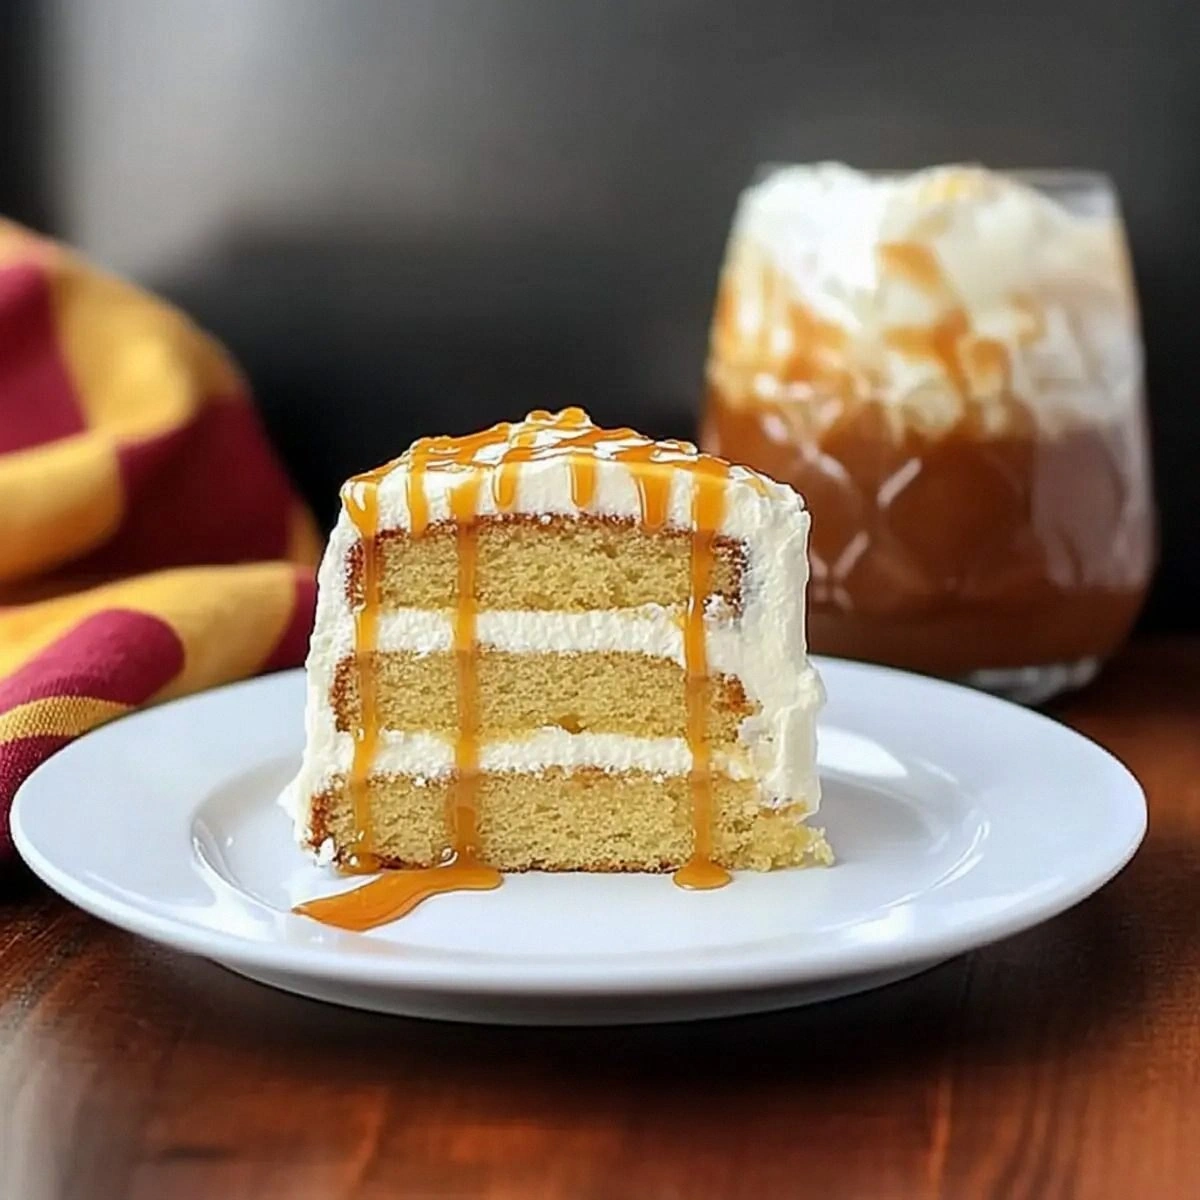
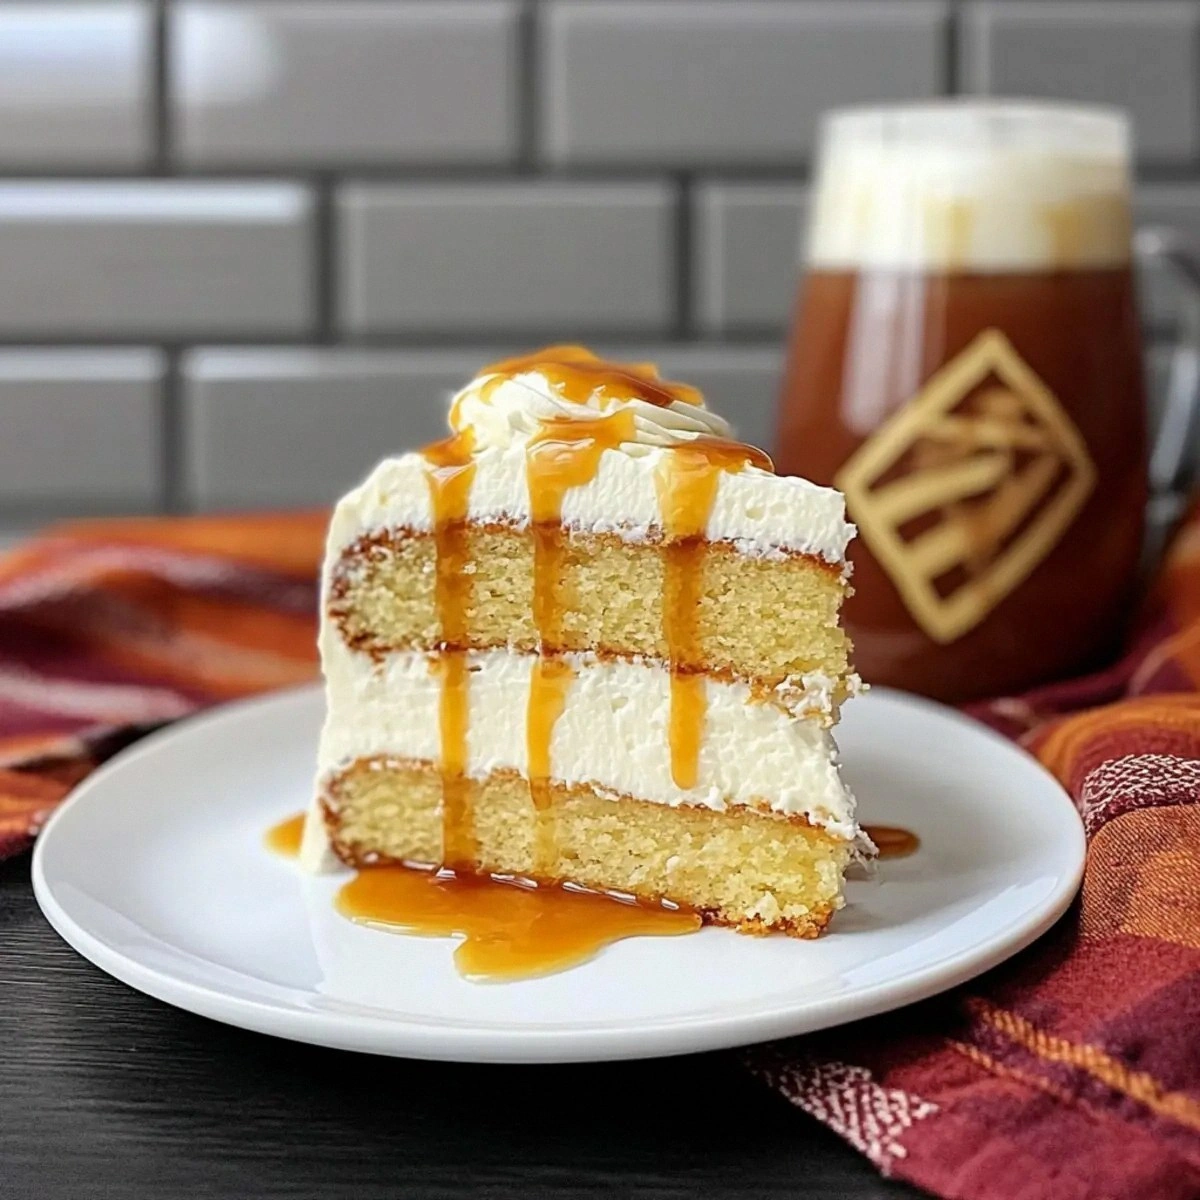
Picture this: the oven door swings open and a golden dome rises, its surface shimmering with a glossy caramel glaze that catches the light like a polished wand. The first bite is a symphony—soft, buttery crumb that melts on the tongue, followed by a creamy, buttery‑butterscotch frosting that clings like a silky cloak. The subtle fizz of the buttermilk and the gentle rise from the baking soda create a texture that’s airy yet indulgent, like a cloud that’s been sweetened with a splash of liquid gold. The whole experience is a full‑on sensory overload, from the crackle of the crust to the lingering aftertaste that whispers “more, please.”
Most butterbeer cakes out there either skip the buttery depth or drown the flavor in too much sugar, leaving you with a one‑note dessert. This version, however, balances the buttery richness with a tangy buttermilk undertone, a dash of pure vanilla, and a buttery‑butterscotch frosting that’s thick enough to hold its own but light enough to melt in seconds. I dare you to taste this and not go back for seconds, because the combination of textures and flavors is engineered to keep you coming back for that next spoonful of heaven.
And now the fun part: I’m about to walk you through every single step — by the end, you’ll wonder how you ever made a butterbeer cake any other way. Okay, ready for the game‑changer? This next part? Pure magic. Stay with me here — this is worth it.
What Makes This Version Stand Out
- Flavor Explosion: The marriage of butterscotch pudding and real butter creates a depth that mimics the iconic butterbeer taste without any artificial shortcuts.
- Velvet Texture: The buttermilk and baking soda combination yields a crumb that’s airy, yet the frosting stays luxuriously creamy.
- Simplicity: Despite the complex flavor profile, the ingredient list is straightforward and the technique is beginner‑friendly.
- Unique Frosting: A dual‑layer frosting—cream cheese meets butterscotch topping—gives you that perfect balance of tang and sweet.
- Crowd Reaction: Guests swear they’ve been transported to a magical tavern; the “wow” factor is off the charts.
- Ingredient Quality: Using half‑and‑half and real unsalted butter elevates the richness beyond store‑bought mixes.
- Make‑Ahead Potential: The cake stays moist for up to three days, and the frosting can be frozen for later indulgence.
- Cooking Method: A single‑pan bake means less cleanup, and the gentle rise prevents a dense, heavy crumb.
Inside the Ingredient List
The Flavor Base
The unsalted butter is the heart of this cake. Its creamy richness coats every crumb, ensuring the final product feels indulgent without being greasy. If you ever wondered why some butter cakes feel flat, it’s usually because the butter was too cold or low‑fat; here we use a full‑fat, unsalted variety to let the natural dairy flavors shine. Swap tip: If you’re dairy‑free, a high‑quality plant‑based butter works, but expect a slightly different mouthfeel.
Granulated sugar does more than sweeten; it helps create that golden crust by caramelizing during baking. The precise two‑cup measurement is crucial—too much sugar can make the cake overly sweet and cause a crust that’s too hard. A good practice is to sift the sugar with the flour to avoid any gritty texture. Pro tip: Use fine‑grained sugar for a smoother crumb.
The Texture Crew
Instant vanilla pudding mix and instant butterscotch pudding mix act as secret texture enhancers. They introduce a silky smoothness that keeps the cake moist for days, while also amplifying the flavor without extra effort. Skipping these mixes would result in a drier, less cohesive crumb, especially if you’re not an expert baker. Alternative: Homemade pudding mix can be used, but the instant version guarantees consistency.
Buttermilk adds a gentle acidity that reacts with the baking soda, creating lift and a tender crumb. Without it, the cake would be dense and heavy, missing that airy lift that makes each bite feel like a cloud. If you’re out of buttermilk, you can make a quick substitute: one tablespoon of lemon juice or white vinegar per cup of milk, let sit for five minutes.
The Unexpected Star
Half and half is the secret liquid that bridges the gap between richness and lightness. It adds a silky mouthfeel that milk alone can’t achieve, while still being thin enough to mix evenly into the batter. If you substitute with heavy cream, the cake may become too heavy; if you use skim milk, you’ll lose the luxurious texture. Buying tip: Look for the freshest half and half; the fresher it is, the brighter the butter flavor.
The combination of corn starch and powdered sugar in the frosting stabilizes the whipped topping, ensuring the frosting holds its shape even on a warm kitchen day. Without the cornstarch, the frosting could weep, turning your masterpiece into a soggy mess. If you’re gluten‑free, cornstarch is already safe, but double‑check that your powdered sugar isn’t cross‑contaminated.
The Final Flourish
Cream cheese brings a subtle tang that cuts through the sweetness, creating a balanced flavor profile that keeps the palate from becoming cloying. The salted butter in the frosting adds depth, echoing the buttery notes in the cake itself. If you skip the cream cheese, the frosting will taste flat and overly sweet.
Butterscotch topping sauce is the crowning jewel—its glossy sheen and deep caramel notes turn a simple cake into a show‑stopper. A drizzle over the top just before serving adds that final magical sparkle. For a dairy‑free version, a coconut‑based caramel sauce can mimic the flavor, though the texture will be slightly different.
Everything's prepped? Good. Let's get into the real action...
The Method — Step by Step
Preheat your oven to 350°F (175°C) and grease a 9‑inch round cake pan with a thin layer of vegetable shortening. The moment the butter hits the pan, you’ll hear a soft sizzle that tells you the pan is ready for the batter. Let the pan sit while you whisk the dry ingredients; this tiny pause ensures the oven reaches a stable temperature, preventing any sudden temperature drops when you slide the cake in.
In a large mixing bowl, cream together 1 cup unsalted butter and 2 cups granulated sugar until the mixture is light, fluffy, and a pale golden color. This is the moment where you can see the sugar crystals dissolve, creating a cloud‑like texture—watch for the edges pulling away from the sides of the bowl, a sign you’ve reached the perfect creamed stage.
Add the four large eggs, one at a time, beating well after each addition. The batter will thicken, then smooth out; this rhythm is essential for incorporating air. Follow with 2 teaspoons pure vanilla extract and 1 teaspoon clear imitation vanilla extract for a layered vanilla backdrop that supports the butterscotch notes without overpowering them.
In another bowl, whisk together 3 cups pre‑sifted cake flour, 1 tablespoon baking powder, 1 teaspoon baking soda, and 1 teaspoon salt. Sifting the flour ensures there are no lumps and introduces air, which is vital for a tender crumb. Once combined, set aside; you’ll be folding this into the wet mixture in two stages to keep the batter light.
Combine 1 cup buttermilk, 1 cup half and half, and 1 cup water, then stir in the instant vanilla pudding mix until smooth. The pudding mix dissolves, thickening the liquid slightly—this creates a custardy base that keeps the cake moist. Pour half of this liquid into the creamed butter mixture, mixing just until incorporated, then add the dry flour blend, mixing on low speed.
Repeat the alternating addition of the remaining liquid and flour, finishing with a gentle stir to achieve a silky batter. The batter should be thick yet pourable, with a faint sheen that hints at the buttery richness to come. At this point, the kitchen should be filled with an intoxicating aroma of vanilla and butter—if you’re not drooling, you’re doing it wrong.
Pour the batter into the prepared pan, smoothing the top with a spatula. Tap the pan gently on the counter three times; this releases any trapped air bubbles, ensuring an even rise. Slide the pan onto the middle rack of the oven and bake for 30‑35 minutes, or until a toothpick inserted into the center comes out clean with just a few moist crumbs.
While the cake bakes, whip up the frosting. In a large bowl, beat together 8 oz softened cream cheese, ½ cup salted butter, and 1 teaspoon clear imitation vanilla until creamy. Gradually add 3 cups powdered sugar, mixing until smooth, then fold in 8 oz frozen whipped topping and 2 tablespoons cornstarch for stability. Finally, drizzle in 1 cup butterscotch topping sauce, creating a swirl that looks like liquid gold.
Allow the cake to cool in the pan for 10 minutes, then turn it out onto a wire rack to cool completely. Once cooled, spread the frosting evenly across the top and sides, using an offset spatula for a smooth finish. For that final magical touch, drizzle extra butterscotch sauce over the top and let it cascade down the sides, creating a glossy, caramel river.
That's it — you did it. But hold on, I've got a few more tricks that'll take this to another level...
Insider Tricks for Flawless Results
The Temperature Rule Nobody Follows
Never bake a butter‑rich cake straight from a cold refrigerator. Let the batter sit at room temperature for five minutes before sliding it into the oven; this prevents a sudden temperature shock that can cause the cake to sink in the middle. I once tried to bake it cold and ended up with a flat, dense disaster—lesson learned.
Why Your Nose Knows Best
When the cake is done, you’ll hear a faint “pop” as the edges pull away from the pan, but the real cue is the aroma. A fully baked butterbeer cake releases a caramel‑butterscotch perfume that fills the kitchen; if you still smell raw batter, give it another 2‑3 minutes.
The 5‑Minute Rest That Changes Everything
After frosting, let the cake rest for at least five minutes before slicing. This short pause lets the frosting set slightly, preventing it from sliding off the slice like a waterfall. Trust me, the first bite after a brief rest is dramatically cleaner.
The Frosting Fold Technique
When incorporating the whipped topping into the frosting, use a gentle folding motion rather than vigorous beating. This preserves the airy texture of the whipped topping, giving you a frosting that’s light enough to spread but still holds its shape.
The Secret of the Butterscotch Drizzle
Warm the butterscotch sauce just enough to become pourable, but not hot. A warm drizzle creates a glossy finish that hardens slightly as it cools, forming a beautiful crust that adds a subtle crunch to each bite.
Creative Twists and Variations
This recipe is a playground. Here are some of my favorite ways to switch things up:
Spiced Pumpkin Butterbeer
Replace half of the buttermilk with canned pumpkin puree and add a teaspoon of pumpkin pie spice to the dry mix. The result is a seasonal twist that feels like a cozy autumn evening in a tavern.
Mocha Butterbeer Fusion
Stir in two tablespoons of instant espresso powder into the wet ingredients and drizzle a chocolate ganache over the finished cake. Coffee lovers will appreciate the subtle bitterness that balances the sweet butterscotch.
Salted Caramel Ripple
Swirl in a homemade salted caramel sauce into the batter before baking, creating pockets of gooey caramel that burst with each bite.
Vegan Velvet
Swap the butter and cream cheese for coconut oil and a vegan cream cheese alternative, and use almond milk with a splash of lemon juice as the buttermilk substitute. The flavor profile stays true, and the texture remains luxuriously soft.
Berry‑Infused Butterbeer
Fold in a cup of fresh raspberries or blueberries into the batter for a fruity surprise that pairs beautifully with the buttery base.
Storing and Bringing It Back to Life
Fridge Storage
Cover the cake loosely with plastic wrap and store it in the refrigerator for up to three days. The frosting will stay firm, and the cake will retain its moisture thanks to the buttermilk and pudding mixes.
Freezer Friendly
Wrap the cake tightly in a double layer of foil, then place it in a freezer‑safe bag. It will keep for up to two months. When you’re ready to enjoy, thaw it overnight in the fridge, then let it sit at room temperature for 30 minutes before serving.
Best Reheating Method
To revive a slice, preheat your oven to 300°F (150°C), place the slice on a baking sheet, and add a tiny splash of water (about a tablespoon) to the plate. Cover loosely with foil and heat for 8‑10 minutes; the steam will bring the cake back to its original fluffiness.