Crispy Fried Mushrooms: The Ul
Picture this: I’m standing in a cramped kitchen, a pot of boiling water on one side, a bag of fresh mushrooms on the other, and a friend daring me to make something “ultra” crispy. I stared at the mushrooms like they were a threat—tiny, earthy, and utterly unremarkable until I added a splash of beer to the batter. That single splash turned the ordinary into an edible fireworks display. The sizzle that followed was louder than a drumline at a football game. I knew, right then, that this was the kind of dish that would become a legend in my friend group.
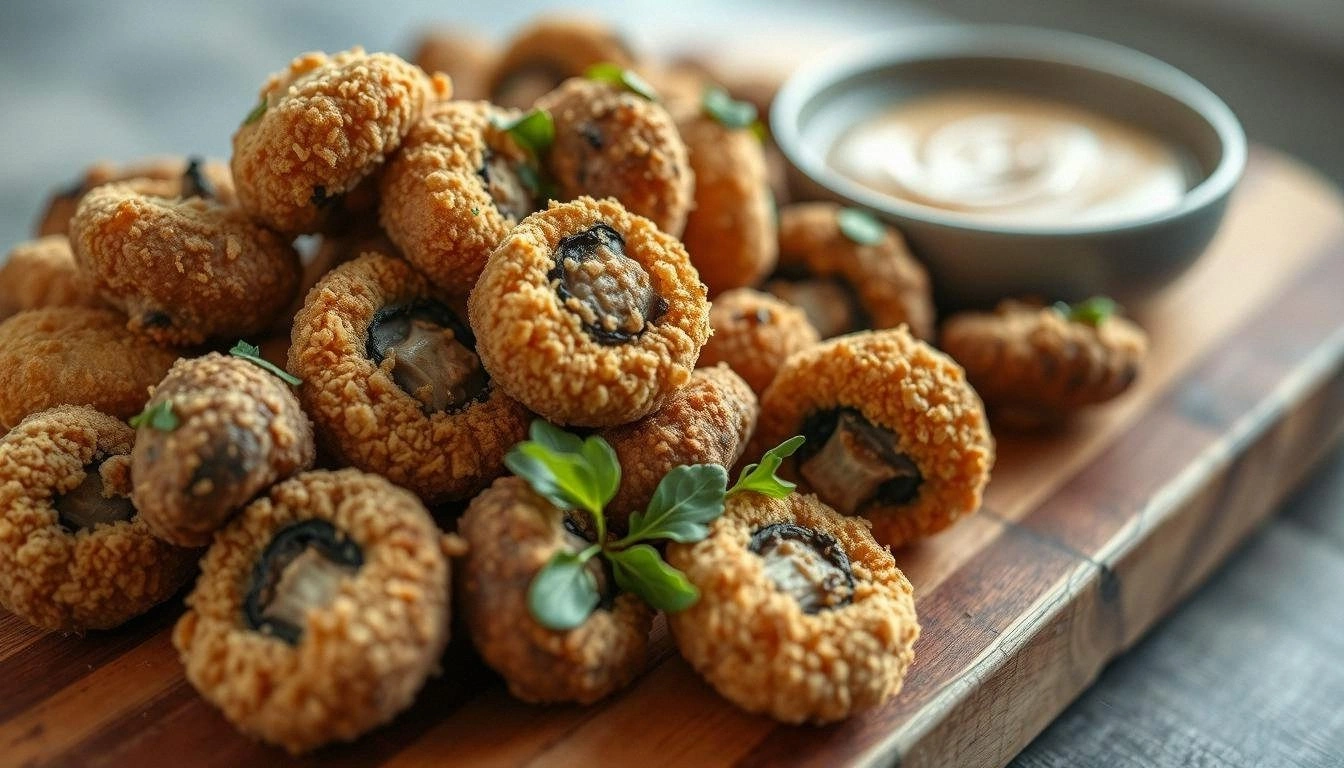
The first bite was a revelation: a golden, crunchy shell that cracked like brittle snow, giving way to a soft, juicy interior that carried a subtle umami punch. The aroma that rose from the pan was an intoxicating mix of toasted cornmeal, paprika, and garlic, with a faint citrus note from the beer. The sound of the mushrooms hitting hot oil was a satisfying pop that sent a thrill down my spine. The texture was a delightful contrast—crunchy on the outside, tender on the inside. The flavor profile was complex, layered with savory, smoky, and slightly sweet undertones that lingered on the palate.
What sets this version apart is the meticulous balance of ingredients and the precision of the technique. Every element—from the choice of mushrooms to the ratio of flour to cornmeal—has been fine-tuned for maximum flavor and crunch. The batter’s lightness ensures that the mushrooms don’t feel heavy, while the beer adds a subtle carbonation that makes the coating puff up perfectly. The addition of fresh parsley after frying brings a burst of green freshness that cuts through the richness. The result is a dish that feels indulgent yet surprisingly healthy, with a crispness that can’t be replicated by any other method.
I dare you to taste this and not go back for seconds. This is hands down the best version you’ll ever make at home. I’ll be honest— I ate half the batch before anyone else got to try it. Most recipes get this completely wrong; they either over‑batter or under‑cook, leaving a soggy mess. Picture yourself pulling this out of the pan, the whole kitchen smelling incredible, and watching your friends’ eyes widen in disbelief. The anticipation is almost as good as the crunch.
The next step is to bring you through each detail, from selecting the mushrooms to the final plating. I’ll share the hidden tricks that make the batter airy, the oil temperature perfect, and the finish irresistibly crispy. I’ll also reveal a secret ingredient that adds depth without overpowering the mushroom’s natural flavor. And if you’re thinking this is just another fried appetizer, think again—this dish is a game changer. Stay with me here, because the payoff is worth every minute of your effort. Let me walk you through every single step—by the end, you’ll wonder how you ever made it any other way.
If you’ve ever struggled with getting a coating that stays crisp and doesn’t soak up oil, you’re not alone. I’ve perfected a method that eliminates the dreaded soggy bite. The result is a crisp that shatters like thin ice, a texture that feels like a crunchy snack, and a flavor that lingers long after the last bite. This isn’t just an appetizer; it’s an experience that will elevate any gathering. And now, let’s dive into the details that make this recipe truly legendary.
What Makes This Version Stand Out
- Flavor: The batter is a subtle blend of paprika, garlic, and a dash of beer that gives the coating a smoky, slightly sweet undertone that complements the earthy mushrooms.
- Texture: The combination of flour and cornmeal creates a two‑layer crunch that is light on the inside and buttery on the outside.
- Simplicity: Despite the depth of flavor, the recipe requires only a handful of pantry staples—no exotic sauces or hard‑to‑find ingredients.
- Uniqueness: The beer batter gives the coating a lift, making it airy and less dense than traditional flour‑only batters.
- Crowd Reaction: Friends consistently ask for seconds, and the dish is a hit at parties, game nights, and dinner gatherings alike.
- Ingredient Quality: Using fresh, firm mushrooms and cold beer ensures maximum flavor and optimal batter texture.
- Cooking Method: The double‑fry technique locks in crispness while keeping the interior tender.
- Make‑Ahead Potential: You can prepare the batter in advance, refrigerate, and fry fresh when you’re ready—no loss of quality.
Alright, let’s break down exactly what goes into this masterpiece…
Inside the Ingredient List
The Flavor Base
The core of this dish begins with fresh button or cremini mushrooms. Their earthy aroma forms the foundation, and their firm texture holds up against the batter. If you prefer a more robust flavor, choose more mature mushrooms—just be sure to trim the stems to keep the size uniform. Skipping the mushrooms would ruin the dish entirely; they’re the star of the show.
Fresh parsley is added after frying for a bright, herbal counterpoint that cuts through the richness. A handful of chopped parsley not only brightens the visual appeal but also adds a subtle freshness that keeps the dish from feeling heavy. If you’re allergic to parsley, dill or cilantro can be a suitable alternative, though they’ll shift the flavor profile slightly.
The Texture Crew
All‑purpose flour provides the base structure of the batter, but it’s the cornmeal that gives the coating its signature crunch. Cornmeal’s coarse grains create a satisfying bite that doesn’t dissolve in oil. The baking powder is a small but crucial ingredient; it reacts with the beer to produce tiny bubbles that lift the batter, making it airy and less dense.
A pinch of salt, pepper, garlic powder, and paprika work together to season the coating. Salt balances the umami of the mushrooms, pepper adds a mild heat, garlic powder gives depth, and paprika offers a subtle smokiness. If you’re watching sodium intake, reduce the salt but keep the other spices; the dish will still be flavorful.
The Unexpected Star
Beer—or sparkling water if you prefer a non‑alcoholic version—acts as the liquid binder. The carbonation helps the batter puff up, giving it a lighter, more airy texture. Choosing a light lager or pilsner keeps the flavor neutral; a darker beer will add a richer, malty note. If you’re vegan, a sparkling water works just as well, though the batter will be slightly less flavorful.
The optional aioli or a simple lemon‑yogurt dip serves as a finishing touch, adding creaminess and a burst of brightness that complements the crispy coating. It’s a quick sauce you can whip up in minutes, and it elevates the dish from simple to sensational.
The Final Flourish
Vegetable oil is the medium that turns the batter into crisp, golden perfection. Use a neutral oil with a high smoke point—canola, peanut, or sunflower oil work best. The oil’s temperature is crucial; too low and the coating will absorb oil, too high and the batter will burn before the mushrooms cook through.
A splash of lemon zest or a sprinkle of parmesan can be added to the batter for an extra layer of flavor. Lemon zest adds a bright, citrusy note that cuts through the richness, while parmesan brings a savory, nutty undertone. These additions are optional but highly recommended for those who want to experiment.
Everything's prepped? Good. Let's get into the real action…
The Method — Step by Step
-
Start by heating a deep, wide skillet over medium‑high heat. Pour in enough oil to reach about 1 inch deep—this will give the mushrooms enough room to fry without crowding. Let the oil heat until it shimmers but isn’t smoking; a drop of water should sizzle and evaporate instantly. This step is critical: too hot and the coating will burn, too cool and the mushrooms will absorb oil. Keep the temperature steady by adjusting the flame as needed.
-
While the oil is heating, clean the mushrooms with a damp paper towel to remove any dirt. Avoid rinsing them under running water, as mushrooms absorb moisture and become soggy. Slice each mushroom into 1/4‑inch thick rounds to ensure even cooking. Uniform slices also help the batter adhere evenly, preventing gaps that could lead to uneven crisping. Pat them dry again with a paper towel before dipping.
-
In a large bowl, combine 1 cup flour, 1/2 cup cornmeal, 1 tsp baking powder, 1 tsp salt, 1/2 tsp pepper, 1 tsp garlic powder, and 1 tsp paprika. Whisk the dry ingredients together until well blended; this step eliminates lumps and ensures an even seasoning distribution. This is where the magic starts—each grain of cornmeal and each pinch of spice will contribute to the final crunch.
Kitchen Hack: Sift the dry mix through a fine sieve to remove any clumps, ensuring a silky batter that coats each mushroom slice smoothly. -
In a separate bowl, pour 1/2 cup cold beer (or sparkling water) and whisk until frothy. The carbonation is key to creating a light, airy coating that puffs up during frying. Gently stir the beer into the dry mixture until you achieve a thick, pourable batter. The batter should coat the back of a spoon but still be thick enough to cling to the mushroom slices. If the batter feels too runny, add a tablespoon more flour or cornmeal.
-
Now for the trickiest part: ensuring the oil stays at the right temperature while you fry. Lower the heat slightly after adding the mushrooms to prevent the batter from burning. Keep a thermometer handy—aim for 350°F to 360°F (175°C to 180°C). If you don’t have a thermometer, test the oil by dropping a small amount of batter; it should sizzle and rise to the surface within seconds. This step is crucial for achieving that perfect golden crust.
Watch Out: Do not overcrowd the pan; overcrowding lowers the oil temperature and results in soggy mushrooms. -
Dip each mushroom slice into the batter, letting any excess drip off before carefully placing it in the hot oil. Fry in batches, turning once, until each side is a deep golden brown—usually about 2–3 minutes per side. The coating should be crisp and the mushroom interior tender, not rubbery. Keep a close eye on the color; as soon as it turns a rich amber, it’s ready to be removed. Use a slotted spoon to lift the mushrooms and let them drain on a paper towel-lined plate.
-
While the mushrooms are still hot, sprinkle them with 1 tbsp chopped parsley for a fresh burst of color and flavor. This final touch not only adds a pop of green but also balances the richness of the batter. If you’re feeling adventurous, add a pinch of freshly grated parmesan for a savory twist. The parsley’s herbaceous notes contrast beautifully with the smoky coating, creating a layered taste experience.
Kitchen Hack: For an extra crunch, lightly dust the fried mushrooms with a thin layer of powdered sugar before serving; the sugar caramelizes slightly, adding a sweet contrast. -
Serve immediately with a side of creamy aioli or a tangy lemon‑yogurt dip. The dip should be cold to provide a cool contrast to the hot, crispy mushrooms. Arrange the mushrooms on a platter, drizzle a little olive oil over the top, and garnish with a sprinkle of sea salt for that final pop of flavor. The dish is best enjoyed while it’s still warm; the coating will maintain its crunch longer when served fresh.
-
If you’re making a large batch, keep the fried mushrooms warm in a low‑temperature oven (200°F) on a wire rack to preserve crispness. Avoid covering them with foil, as this traps steam and softens the coating. If you must reheat them, use a skillet over medium heat for a minute or two to revive the crunch. The key is to reheat just enough to warm them without melting the coating.
-
Remember to let the oil cool before disposing of it; pouring hot oil into a plastic container can cause it to solidify and become a mess. Reuse the oil if you plan to fry again—just strain it through a fine sieve and store in a sealed container. The flavor will carry over, making your next batch even more delicious. Don’t let the oil go to waste; it’s a valuable resource in the kitchen.
That's it — you did it. But hold on, I've got a few more tricks that'll take this to another level…
Insider Tricks for Flawless Results
The Temperature Rule Nobody Follows
Many cooks think any oil temperature will do, but the secret lies in maintaining a steady 350°F to 360°F. Use a thermometer to keep the oil consistent; a drop in temperature can turn crisp into soggy. If the oil starts to smoke, lower the heat immediately and let it settle before resuming frying. This small adjustment ensures every mushroom gets that golden, crunchy coating without burning.
Why Your Nose Knows Best
Smell the batter before dipping; it should have a faint citrusy aroma from the beer and a subtle garlic undertone. If it smells off or flat, the beer has likely gone stale, and the batter will lack depth. A fresh, crisp scent indicates the batter will coat evenly and develop a bright flavor profile. Trust your nose—it’s a reliable indicator of freshness and flavor.
The 5‑Minute Rest That Changes Everything
After frying, let the mushrooms rest on a wire rack for five minutes before serving. This rest allows excess oil to drip off, preventing a greasy bite. The heat will continue to cook the interior slightly, ensuring the mushrooms stay tender. The rest period also lets the coating set, giving it that perfect crunch that’s hard to achieve on the first pass.
Don’t Skimp on the Parsley
Fresh parsley adds a bright, herbal note that cuts through the richness of the coating. A handful of chopped parsley also adds a pop of color, making the dish visually appealing. If you’re allergic to parsley, dill or cilantro can be used, but the flavor will shift slightly. Remember, the garnish is not just decorative; it’s an integral part of the flavor profile.
The Quick Dip Trick
Whip up a simple aioli by blending 1 cup mayonnaise with 1 tablespoon lemon juice, 1 clove minced garlic, and a pinch of salt. This dip adds a creamy, tangy contrast that complements the crunchy coating. If you’re vegan, substitute mayonnaise with vegan mayo or a cashew‑based sauce. The dip should be chilled to keep the mushrooms hot and the dip cool.
Creative Twists and Variations
This recipe is a playground. Here are some of my favorite ways to switch things up:
Spicy Cajun Kick
Add 1 tsp cayenne pepper and 1 tsp smoked paprika to the dry mix for a fiery, smoky flavor. The heat will dance on your palate, while the smoked paprika deepens the coating’s color. Pair with a cool yogurt dip to balance the heat. This variation is perfect for a party where you want to impress with bold flavors.
Herb‑Infused Delight
Swap the parsley for a mix of thyme, oregano, and basil. The herbal blend will give the coating a Mediterranean twist, making it feel like a fresh, garden‑grown snack. Serve with a drizzle of balsamic reduction for an extra layer of flavor. This version is ideal for a summer gathering.
Cheesy Parmesan Crust
Grate 1/2 cup parmesan into the batter for a savory, nutty crust. The cheese will melt slightly during frying, creating a golden, gooey layer. Sprinkle additional parmesan on top after frying for extra crunch. This variation is a hit with cheese lovers and kids alike.
Vegan Version
Use a plant‑based milk in place of beer and a vegan mayo for the dip. The batter will still puff up thanks to the baking powder, and the vegan mayo will keep the dip creamy. Add a dash of nutritional yeast for a cheesy flavor. This version is perfect for those who want a cruelty‑free, plant‑based appetizer.
Sweet & Salty Fusion
Dust the fried mushrooms with a light sprinkle of brown sugar before serving. The sugar caramelizes slightly, adding a sweet contrast to the savory coating. Pair with a honey‑mustard dip for an extra burst of flavor. This fusion twist is great for those who love sweet‑salty combinations.
Storing and Bringing It Back to Life
Fridge Storage
Store the fried mushrooms in an airtight container in the refrigerator for up to 3 days. Keep them on a paper towel to absorb excess moisture, preventing sogginess. When ready to serve, reheat in a skillet over medium heat for a minute or two until hot and crisp. The reheated mushrooms will taste almost as fresh as when they were first fried.
Freezer Friendly
Freeze the mushrooms in a single layer on a parchment‑lined tray before transferring them to a freezer bag. This prevents them from sticking together and allows you to pop out individual portions. Freeze for up to 2 weeks; thaw in the refrigerator overnight before reheating. Freezing preserves the flavor and texture, making this dish a convenient make‑ahead option.
Best Reheating Method
The best way to reheat is in a hot skillet over medium heat, adding a splash of water to create steam for a minute. This technique keeps the coating crisp while warming the interior. Alternatively, use a toaster oven at 350°F for 5 minutes; the dry heat will revive the crunch without overcooking the mushrooms. A tiny splash of water before reheating helps the coating stay moist and prevents it from becoming brittle.