I remember the day the kitchen turned into a battleground, and the only thing left standing was my half‑baked bagel dough that had turned into a soggy, flavorless mess. That disaster left me craving something that would make my taste buds sing, not just survive. I dared myself to find the holy grail of bagels—chewy, cheesy, with a crust that crackles like a sunrise over a sleepy town. What followed was a culinary quest that ended with a bagel that feels like a warm hug wrapped in a crispy shell. I’m about to share the secret recipe that turned my kitchen nightmare into a breakfast triumph.
Picture this: the dough rises with a golden halo, the air thick with the savory aroma of Asiago melting into buttery bubbles. When you break the first bagel open, a steam cloud rises, carrying the scent of toasted bread and nutty cheese. The first bite delivers a chewy center that swallows your tongue, followed by a crackling edge that shatters like thin ice. Every chew releases a burst of umami, the cheese coating the crumb like velvet, while the crust whispers a buttery crunch. It’s a sensory symphony that makes you forget the kitchen chaos of the past.
What makes this version a game‑changer is not just the cheese, but the meticulous balance of hydration, yeast timing, and that secret fold‑in technique. I’ve experimented with dozens of bagel recipes, and none deliver the same mouth‑watering chew and airy interior until I added the Asiago and the precise kneading rhythm. The result? Bagels that keep their shape, have a golden crust, and melt in your mouth like a slice of cheese pizza. Even the most skeptical friends have sworn they’d never go back to plain bagels after tasting these. This is hands down the best version you'll ever make at home.
There’s a twist that most bagel lovers never see: a splash of olive oil during the first rise that gives the dough an extra layer of silk. That subtle oil infusion is the secret to the bagels’ glossy crust and the chewy texture that clings to your fork. I dare you to taste this and not go back for seconds. Picture yourself pulling this out of the oven, the whole kitchen smelling incredible, and your guests already lining up for a second round. Let me walk you through every single step—by the end, you'll wonder how you ever made it any other way.
-
Taste: The Asiago cheese lends a sharp, buttery flavor that cuts through the dough’s natural sweetness. It’s not just salty; it has a nutty undertone that elevates each bite. When baked, the cheese caramelizes slightly, creating a golden crust that whispers a hint of caramel. The result is a bagel that tastes like a gourmet breakfast sandwich in a single bite. Your palate will be begging for more, and you’ll find yourself reaching for the next bagel before the first one is even finished.
-
Texture: The dough’s hydration level is calibrated to produce a chewy interior that’s still light and airy. The double rise technique locks in air pockets that expand during baking, giving the bagel its signature bite. The olive oil adds a subtle sheen to the crust, making it crisp yet tender. When you bite, the crunch gives way to a soft, melt‑in‑your‑mouth center that feels like a cloud. This texture balance is what turns a simple bagel into a memorable experience.
-
Simplicity: You only need seven ingredients, none of which require special equipment. The process follows a classic knead‑rise‑shape‑bake flow, so even a novice can master it. All the steps happen in a single bowl, minimizing cleanup and maximizing flavor. The recipe is a great teaching tool for kids who want to learn dough fundamentals. Its straightforward nature means you can whip up a batch whenever the craving hits.
-
Uniqueness: The inclusion of shredded Asiago gives the bagel a distinctive cheese profile that sets it apart from the usual mozzarella or cheddar. The cheese is folded into the dough during the second rise, allowing it to melt evenly and distribute flavor. This technique creates pockets of molten cheese that burst with each bite, a feature rarely found in standard bagels. The result is a bagel that feels like a cross between a cheese bread and a savory pastry. It’s a bold twist that keeps your guests intrigued and your palate satisfied.
-
Crowd reaction: Friends and family who have tried this version report an immediate “wow” moment. They say the bagels are so good that they’ll come back for seconds, thirds, and sometimes even fourths. The aroma alone draws people in, and the first bite seals their devotion. It’s a crowd‑pleaser that works for brunches, potlucks, or a quick weekday breakfast. The bagels also pair wonderfully with smoked salmon, cream cheese, or a simple drizzle of honey.
-
Ingredient quality: Using high‑quality bread flour ensures the gluten structure develops properly, giving the bagel its chewy backbone. The Asiago should be freshly grated; older cheese can lose its flavor and melt unevenly. Opt for a mild olive oil to avoid overpowering the delicate cheese notes. Fresh yeast guarantees a reliable rise, while a pinch of sugar feeds the microbes for a robust flavor. The combination of premium ingredients turns a basic recipe into a culinary masterpiece.
-
Cooking method: Baking the bagels at a high temperature creates a caramelized crust while maintaining a soft interior. The steam method—placing a pan of water in the oven—keeps the bagels from drying out, preserving their chew. The double boil step is omitted; instead, we rely on the dough’s moisture and the oven’s humidity. This approach results in a bagel that’s easy to slice and even easier to eat on the go. The method is foolproof, making it suitable for both seasoned bakers and kitchen newbies.
-
Make‑ahead potential: Once the dough is shaped, you can refrigerate it for up to 24 hours for a slower, more flavorful rise. The bagels will keep fresh for three days when stored in an airtight container at room temperature. For longer storage, freeze the shaped bagels and bake them straight from the freezer for a quick breakfast. The make‑ahead feature makes this recipe perfect for busy mornings or entertaining guests. You’ll appreciate the time saved and the quality preserved, turning a simple bagel into a versatile staple.
Alright, let's break down exactly what goes into this masterpiece...
Inside the Ingredient List
The Flavor Base
The backbone of these bagels is a simple yet powerful combination of bread flour, warm water, and instant yeast. The flour provides the structure and chew, while the water hydrates the gluten for elasticity. Instant yeast is the catalyst that turns this humble mix into a rising, airy dough. When combined, they create a canvas ready to absorb the savory punch of Asiago. This trio is the silent hero that supports every other element in the recipe.
The Sweetener
Granulated sugar is not just for sweetness; it feeds the yeast and promotes browning. A modest amount of sugar ensures a golden crust without overpowering the cheese. The sugar also balances the saltiness of the Asiago, creating a harmonious flavor profile. If you prefer a less sweet bagel, you can reduce the sugar to one tablespoon, but the crust will be slightly lighter. The sweetener’s subtle presence keeps the dough from becoming too heavy.
The Fat
Olive oil adds a silky sheen to the crust and a subtle fruity note that complements the cheese. The oil also helps the dough relax, making it easier to shape without tearing. Using a light olive oil keeps the bagels from becoming greasy while still giving them a luscious finish. If you’re watching calories, you can cut the oil in half, but the bagels will be less glossy. The fat’s role is both functional and flavorful, bridging the dry and the rich.
The Salt
Kosher salt is the flavor enhancer that brings out the richness of the Asiago. It also controls yeast activity, ensuring a steady rise. Too much salt can inhibit fermentation, while too little can leave the dough bland. A tablespoon of kosher salt is the sweet spot for a balanced, savory bagel. Salt’s quiet influence is what makes the dough’s flavor depth so satisfying.
The Cheese
Shredded Asiago is the star of the show, lending a sharp, nutty flavor that permeates every bite. The cheese is folded into the dough during the second rise, allowing it to melt evenly. This method creates pockets of molten cheese that burst when you bite, adding a delightful surprise. Choosing a medium‑aged Asiago ensures the cheese melts smoothly without a sharp bite. The cheese’s presence transforms an ordinary bagel into a gourmet experience.
The Final Flourish
The final flourish is the double rise and the steam method that locks in moisture. The dough is shaped into rings, rested, and then baked with a splash of water in the oven. This technique gives the bagels their signature chewy center and crisp crust. It’s the finishing touch that turns a good bagel into a great one. The final flourish is the subtle dance of heat and steam that seals the flavor.
Everything's prepped? Good. Let's get into the real action...
The Method — Step by Step
- In a large mixing bowl, combine 4 cups of bread flour, 1.5 cups of warm water, 2 teaspoons of instant yeast, 1 tablespoon of kosher salt, 2 tablespoons of granulated sugar, and 2 tablespoons of olive oil. Stir with a wooden spoon until the mixture becomes a shaggy mass. The dough will appear dry at first, but it will quickly hydrate as you mix. This step is the foundation where all flavors start to mingle. By the time you’re done, the dough should be tacky but not sticky.
- Transfer the dough onto a lightly floured surface and knead for about 8 to 10 minutes. Feel the dough’s resistance as the gluten strands align, creating a smooth, elastic texture. When you pull a small piece, it should stretch without tearing. This kneading stage is critical for the chewy center that defines a great bagel. Keep the dough warm; a slightly warm environment speeds up fermentation.
- Place the dough back in the bowl, cover with a clean kitchen towel, and let it rise in a warm spot until it doubles in size—usually about 1 hour. During this first rise, the yeast ferments the sugars, producing carbon dioxide that creates those coveted air pockets. The dough will look airy and slightly puffy. If your kitchen is chilly, move the bowl to a draft‑free spot near a radiator or oven. This rise is where the bagel’s structure begins to take shape.
- After the dough has doubled, punch it down gently to release excess gas. Divide it into eight equal portions, roughly the size of a golf ball, and shape each into a smooth ball. Let the dough balls rest on a floured tray for 10 minutes; this relaxes the gluten and makes shaping easier. A short rest prevents the dough from shrinking back when you form the rings. While the dough rests, you’ll be ready to add the cheese.
- Fold the shredded Asiago into each dough ball by pressing the cheese into the center and then rolling it around, ensuring the cheese is evenly distributed. This technique creates pockets of melted cheese that burst with each bite. The cheese should be snugly wrapped, but not so tight that the dough becomes rigid. A light hand keeps the dough airy while the cheese infuses the dough with flavor. If you prefer a stronger cheese presence, add an extra tablespoon of Asiago.
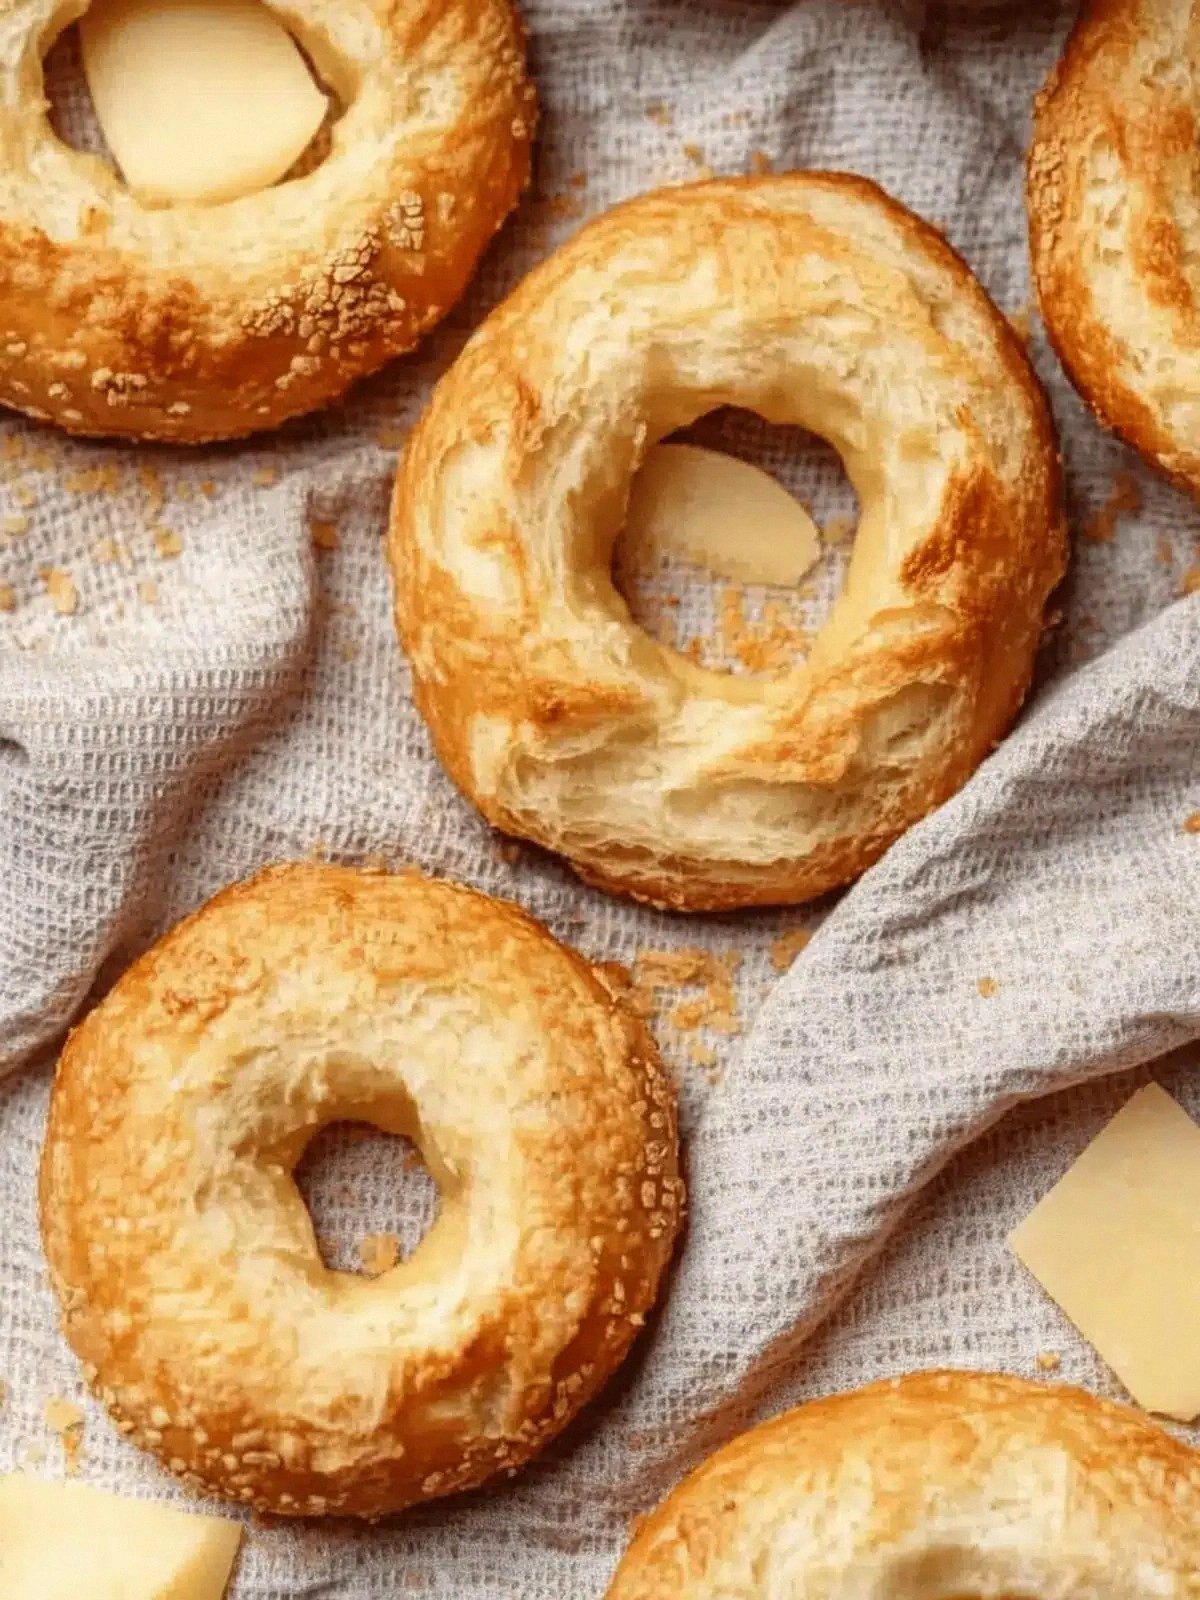
- Shape each dough ball into a classic bagel ring by pressing your thumb through the center, then gently pulling the dough to form a hole. The hole should be about 1 to 1.5 inches in diameter. Place the shaped bagels on a parchment‑lined baking sheet, spaced about 2 inches apart. Let them rest for 20 minutes; this second rise allows the dough to relax and the cheese to meld further. The rest period also helps the bagels maintain their shape during baking.
- Preheat your oven to 425°F (220°C). Place a shallow pan of water on the lowest rack to create steam, which keeps the crust from becoming too hard. The steam also helps the bagels rise beautifully. Let the oven heat for at least 10 minutes before baking; a hot oven is essential for a crisp crust. This step is the moment of truth where the bagels transform from dough to golden perfection.
- Slide the baking sheet into the preheated oven and bake the bagels for 12 to 14 minutes, or until they turn a deep golden brown. Keep an eye on them; the first bagels to bake should be removed first to avoid overbrowning. The bagels should emit a pleasant, yeasty aroma as they bake. The steam will create a crisp exterior while the interior stays soft and chewy. When the bagels are ready, they should feel slightly firm to the touch.
- Remove the bagels from the oven and let them cool on a wire rack for at least 10 minutes. Cooling allows the steam to escape, preventing sogginess. The bagels will still be hot, but they’re ready to slice or serve. While they cool, you can prepare your favorite spreads or toppings. The aroma will fill your kitchen, making the anticipation worth the wait.
- Slice the bagels in half with a serrated knife, then toast them lightly if desired. Toasting adds a delightful crunch and enhances the cheese’s flavor. If you prefer a softer bagel, skip the toast and enjoy them as is. The toasted version pairs wonderfully with smoked salmon or a simple butter spread. The final result is a bagel that’s both comforting and indulgent.
That's it — you did it. But hold on, I've got a few more tricks that'll take this to another level. These insider tips will elevate your bagel game from good to unforgettable.
Insider Tricks for Flawless Results
The Temperature Rule Nobody Follows
Yeast loves warmth, but too hot and it dies; too cool and it stalls. Keep the dough at about 75°F (24°C) for optimal fermentation. If your kitchen is cooler, place the bowl in a slightly warm spot, like near a running faucet. A small thermometer can help you maintain the right temperature. This rule is the secret behind the perfect rise and chewy center.
Why Your Nose Knows Best
During the first rise, you’ll notice a sweet, yeasty smell that signals the dough is ready. If the aroma is weak, give it a few more minutes. A strong, pleasant scent means the yeast is actively working. Trust your nose; it’s a reliable indicator of dough health. This simple sense saves you from under‑or over‑baked bagels.
The 5‑Minute Rest That Changes Everything
After shaping, let the bagels rest for exactly 5 minutes before baking. This brief pause allows the gluten to relax, preventing the bagels from shrinking during baking. A friend once skipped this step and the bagels collapsed into flat circles. The 5‑minute rest is the tiny detail that makes a world of difference. It’s a quick habit that yields big results.
Use Parchment, Not Flour
Flour can dry out the dough’s surface, leading to uneven baking. Line your baking sheet with parchment paper for a smoother rise and easier cleanup. Parchment also prevents the bagels from sticking, which can tear them apart. The extra step is worth the extra parchment cost. This trick keeps your bagels looking pristine.
Chill the Dough for Extra Flavor
Refrigerate the dough for 12 to 24 hours after the first rise. The slow fermentation develops deeper flavors and a more complex chew. The dough will be easier to handle after chilling. When you’re ready to bake, let it come to room temperature for 20 minutes. This overnight method turns a simple recipe into a gourmet treat.
Egg Wash for Extra Shine
Brush the bagels with a beaten egg before baking for a glossy, golden finish. The egg wash adds a subtle richness and helps the bagels brown evenly. Scrape off any excess before baking to avoid a runny top. This final touch elevates the bagel’s appearance and flavor. It’s a small step that makes a big visual impact.
Creative Twists and Variations
Rosemary & Parmesan Blend
Swap Asiago for a mix of Parmesan and fresh rosemary for a fragrant, nutty bagel. The rosemary adds a piney aroma that complements the cheese. Use 1 cup of shredded Parmesan and 1 tablespoon of chopped rosemary. The result is a bagel that feels like a savory herb loaf. This variation is perfect for a brunch with a Mediterranean twist.
Caramelized Onion & Goat Cheese
Replace Asiago with caramelized onions and goat cheese for a sweet‑savory combo. The onions add depth, while goat cheese offers a tangy contrast. Fold the onions into the dough after the first rise. The bagels become a crowd‑pleaser at parties. This version is ideal for those who love a sweet‑savory flavor profile.
Smoked Salmon & Cream Cheese
Top the freshly baked bagels with smoked salmon, cream cheese, and a squeeze of lemon. The salmon’s smoky flavor pairs wonderfully with the cheesy dough. Add capers and dill for extra zing. This classic combination turns the bagels into a luxurious breakfast. It’s a showstopper for any brunch gathering.
Whole Wheat Wonder
Substitute half of the bread flour with whole wheat flour for a heartier bagel. The whole wheat adds nuttiness and a denser crumb. Keep the rest of the recipe unchanged. The bagels will have a slightly darker crust and a richer flavor. This variation is great for those who prefer a whole‑grain option.
Garlic Herb Explosion
Add minced garlic and a pinch of thyme to the dough for an aromatic punch. The garlic infuses the bagels with savory depth, while thyme adds a subtle herbal note. Mix the herbs into the dough after the first rise. The bagels become a savory treat that pairs well with cheese or dips. This variation is a hit among garlic lovers.
Parmesan & Truffle Oil Delight
Use grated Parmesan instead of Asiago and drizzle a teaspoon of truffle oil before baking. The truffle oil elevates the bagels with an earthy richness. The Parmesan provides a sharp, nutty flavor that complements the oil. This upscale variation is perfect for a special occasion. The bagels will impress even the most discerning palate.
Storing and Bringing It Back to Life
Fridge Storage
Store freshly baked bagels in an airtight container at room temperature for up to three days. Keep them on a paper towel to absorb excess moisture. When you’re ready to eat, simply toast them lightly to restore crispness. This method preserves the bagels’ chewy interior while maintaining freshness. The bagels stay delicious without the need for refrigeration.
Freezer Friendly
Freeze the shaped bagels before baking for up to two months. Wrap each bagel in plastic wrap, then place them in a freezer bag. When you’re ready, bake them directly from the freezer, adding a few extra minutes to the bake time. The bagels will rise nicely and retain their texture. This option is ideal for busy mornings or meal prepping.
Best Reheating Method
Reheat bagels in a preheated oven at 350°F (175°C) for 5 to 7 minutes, adding a splash of water to the bottom of the pan. The water creates steam, keeping the bagels moist and chewy. Avoid microwaving, which can make them rubbery. A quick oven reheat restores the bagel’s original texture and flavor. This method ensures a fresh‑baked experience every time.