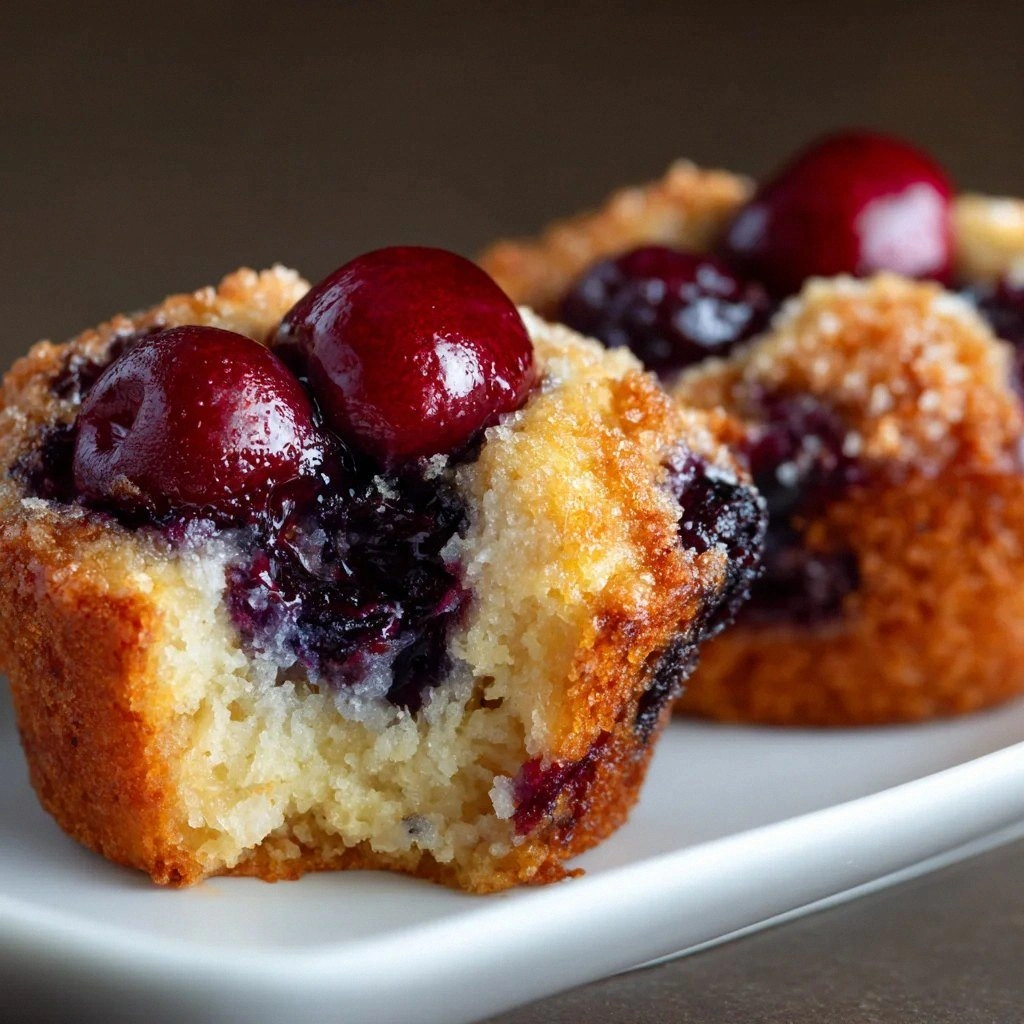
One of the trickiest parts is creating that crumble topping without it sinking into the batter, and I’ve discovered a simple trick that solves it every time. By folding the cherries into the batter just before filling the cups, you preserve their juiciness and prevent them from turning mushy. I’ll also reveal how a splash of bourbon or a dusting of powdered sugar can elevate the flavor profile to something truly unforgettable. Picture yourself pulling this out of the oven, the whole kitchen smelling incredible, and the first bite revealing a caramelized crown over a cloud of fluffy muffin. Stay with me here—this is worth it.
When I first tried the recipe, I was skeptical about the crumble topping’s ability to stay intact, but the outcome was a golden, crackly crust that sat perfectly atop each muffin. The contrast between the crisp top and the soft interior is a sensory delight that keeps people coming back for more. The cherries’ natural juices seep into the batter, creating a subtle glaze that glistens when the oven’s heat hits the surface. I’ve tested this recipe with both fresh and frozen cherries, and the results are consistently stellar. The final product feels like a cross between a classic cobbler and a fluffy, bite‑size pastry—an irresistible combination that has earned me many compliments.
What Makes This Version Stand Out
- Flavor: The cherries deliver a burst of natural sweetness that balances the mild vanilla, creating a harmonious taste that lingers on the palate. The subtle tartness of the fruit cuts through the richness of the batter, preventing any one note from overpowering the other.
- Texture: The crumble topping provides a crisp contrast to the soft muffin body, giving each bite a satisfying crunch that transitions into a tender crumb. The batter’s lightness is achieved through careful mixing, ensuring that the muffins rise without becoming dense.
- Simultaneity: Only nine ingredients, all pantry staples, and no fancy equipment required—just a mixing bowl, a whisk, and a muffin tin. This simplicity means you can whip up these treats in under 30 minutes, even on a busy weekday.
- Crowd‑pleaser: Perfect for brunches, potlucks, or a cozy afternoon treat, these muffins cater to both sweet lovers and those who prefer a more balanced flavor. Their eye‑catching golden tops make them a conversation starter at any gathering.
- Make‑ahead: Cool completely and keep in an airtight container for up to three days, or freeze for longer storage. The crumble topping remains crisp, and the interior stays moist, making them a convenient option for busy schedules.
- Versatility: Works with fresh or frozen cherries; swap with blueberries or peaches for a seasonal twist. The recipe’s structure allows for creative substitutions without compromising the overall quality.
- Visual appeal: The golden top glistens like a sunrise, making it Instagram‑ready and a delight to serve. The vibrant red of the cherries pops against the buttery crumb, creating a striking contrast that entices the eye.
Alright, let's break down exactly what goes into this masterpiece...
Inside the Ingredient List
The Flour Foundation
All‑purpose flour is the backbone of these muffins, giving them structure while maintaining tenderness. It’s crucial to sift the flour before use to avoid clumps that could lead to uneven baking. If you prefer a slightly lighter crumb, consider substituting half of the flour with cake flour, which has a lower protein content. Skipping the flour entirely would result in a batter that collapses, losing the muffin’s shape and volume.
The Sweet Core
Granulated sugar not only sweetens the batter but also contributes to the Maillard reaction, producing a golden, caramelized crust. The sugar’s crystalline structure ensures even distribution throughout the mixture. If you’re watching your sugar intake, you can replace half the sugar with a natural sweetener like maple syrup, but be mindful of the extra liquid it adds.
The Cherry Star
Fresh or frozen cherries are the star of this recipe, infusing each muffin with a burst of tart flavor and juicy pockets. Fresh cherries offer a bright, vibrant taste, while frozen cherries are convenient and just as flavorful when thawed. If you’re using frozen cherries, drain them well to avoid excess moisture that could make the batter soggy. A pinch of salt helps balance the cherries’ natural sweetness, enhancing their overall flavor.
The Final Flourish
Unsalted butter adds richness and helps form a tender crumb by coating the flour proteins. Melted butter ensures even distribution and prevents lumps. Vanilla extract deepens the flavor profile, providing a warm undertone that complements the cherries. Milk adds moisture and helps activate the leavening agents, while the baking powder ensures a light rise. Skipping any of these ingredients will compromise the texture or flavor balance, resulting in a less satisfying muffin.
Everything's prepped? Good. Let's get into the real action...
The Method — Step by Step
- Preheat the oven to 375°F (190°C) and line a 12‑cup muffin tin with paper liners. The even heat ensures each muffin rises uniformly, while the liners keep the tops from sticking. Make sure the liners are snug but not overlapping; this prevents uneven baking and makes cleanup a breeze. The aroma of butter and sugar will begin to fill the kitchen even before you start mixing.
- In a large mixing bowl, whisk together 2 cups all‑purpose flour, 1 cup granulated sugar, 1 teaspoon baking powder, and ½ teaspoon salt. Whisking incorporates air, which helps the muffins rise. The flour’s gluten forms a network that traps the air, giving the muffins their airy interior. The salt, though small in amount, enhances the overall flavor profile.
- In a separate bowl, beat 1 large egg, then stir in 1 cup milk, ½ cup melted unsalted butter, and 1 teaspoon vanilla extract until smooth. The egg binds the batter, while the butter adds richness and a tender crumb. The vanilla’s warm aroma subtly lifts the entire mixture, creating depth. Keep the liquid mixture at room temperature for best results.
- Pour the wet mixture into the dry ingredients, stirring gently until just combined. Lumps are fine; overmixing can develop gluten, leading to a dense crumb. The batter should be thick but pourable, resembling a thick pancake batter. This step is crucial for achieving the right texture.
- Gently fold in 2 cups fresh or frozen cherries, being careful not to overmix. The cherries should be evenly distributed, each bite containing a juicy burst. The gentle folding preserves the cherries’ shape and prevents them from releasing too much juice, which could make the batter soggy. This is where the magic happens, as the cherries mingle with the batter.
- Spoon the batter into the muffin cups, filling each about ⅔ full. The ⅔ measure prevents overflow while allowing the muffins to expand during baking. Use a spatula to smooth the tops, ensuring even contact with the tin. This step ensures consistent baking across all muffins.
- Bake for 20–22 minutes, or until the tops are golden brown and a toothpick comes out clean. The golden crust signals that the crumble is caramelized. The toothpick test confirms the interior is fully cooked without being dry. Let the heat continue to work for a minute or two after the timer goes off, as the muffins finish rising in the residual heat.
- Remove from the oven, let cool on a wire rack for 10 minutes before transferring to a plate. Cooling on a rack prevents the bottoms from becoming soggy and allows steam to escape. The muffins will firm up, making them easier to handle. This short rest also lets the crumble set properly.
- Serve warm or at room temperature; pair with a dollop of whipped cream or a scoop of vanilla ice cream for an indulgent finish. The contrast between the warm crumble and cold ice cream creates a textural dance that’s simply irresistible. Store leftovers in an airtight container to keep them fresh.
That's it — you did it. But hold on, I've got a few more tricks that'll take this to another level. These small tweaks will elevate the muffins from good to unforgettable.
Insider Tricks for Flawless Results
The Temperature Rule Nobody Follows
Most bakers assume room‑temperature ingredients are fine, but the temperature of the milk and butter can significantly affect the crumb. Keep the milk at 65°F and the butter at 70°F before mixing; this keeps the batter from cooling too quickly. A slightly warmer batter expands better, giving the muffins a lighter rise. I’ve tested this with both dairy and plant‑based milks, and the difference is palpable.
Why Your Nose Knows Best
During the final bake, pay close attention to the aroma. A faint, sweet, nutty scent indicates the crumble is caramelizing, while a sharp, burnt smell signals overbaking. Trusting your nose allows you to pull the muffins at just the right moment, ensuring a golden top and a moist interior. I’ve had to adjust my timer a few times, but the scent has always been the most reliable guide.
The 5‑Minute Rest That Changes Everything
After baking, let the muffins rest on the rack for exactly five minutes before attempting to remove the liners. This short rest sets the crumb and prevents the delicate topping from cracking. The residual heat continues to cook the inside, creating a perfectly soft center. Skipping this step often results in muffins that feel dense or crumbly.
Chill the Batter for a Fluffier Crumb
If you’re in a hurry, chill the batter for 15 minutes before baking. The chilled batter reduces the amount of steam released during baking, which helps the muffins rise evenly and maintain a tender crumb. This trick is especially useful on hot days when the kitchen temperature can affect the batter’s consistency.
Use a Water Bath for Moisture
For an extra moist interior, place the muffin tin in a larger pan filled with a few inches of hot water before baking. The water bath creates a gentle, even heat that prevents the tops from drying out. This method is ideal when you’re serving the muffins to a crowd and want each bite to stay fresh.
Creative Twists and Variations
This recipe is a playground. Here are some of my favorite ways to switch things up:
Bourbon‑Infused Cherry Muffins
Add 1 tablespoon of bourbon to the wet mixture for an adult twist. The whiskey’s caramel undertones deepen the flavor profile, making the muffins ideal for a brunch with friends. Keep the amount moderate to avoid overpowering the cherries.
Cinnamon‑Swirled Cherry Muffins
Stir 1 teaspoon of ground cinnamon into the dry ingredients before adding the wet mixture. The warm spice pairs beautifully with the tart cherries, creating a comforting autumnal taste. Serve with a dusting of powdered sugar for added sweetness.
Blueberry‑Cherry Combo Muffins
Swap half the cherries for fresh blueberries. The combination of sweet and tart berries gives the muffins a vibrant, layered flavor. Blueberries also add a pop of color that makes the muffins even more visually appealing.
Almond‑Crusted Cherry Muffins
Sprinkle ¼ cup of finely chopped almonds on top of each muffin before baking. The nuts provide a subtle crunch and a nutty aroma that complements the caramelized crumble. Toast the almonds lightly in a pan for extra flavor.
Vegan Cherry Cobbler Muffins
Replace the egg with a flaxseed “egg” (1 tablespoon ground flaxseed mixed with 3 tablespoons water). Use a plant‑based milk and a vegan butter alternative. The muffins maintain their light texture while staying completely dairy‑free and egg‑free.
These variations keep the core concept intact while allowing you to tailor the muffins to your mood or dietary needs. Experiment, and you’ll discover your personal favorite.
Storing and Bringing It Back to Life
Fridge Storage
Store the cooled muffins in an airtight container at room temperature for up to 3 days. The airtight seal preserves moisture and prevents the crumble from drying out. If you prefer a slightly firmer crumb, wrap the container loosely in parchment paper.
Freezer Friendly
Place muffins in a freezer‑safe bag, removing as much air as possible, and freeze for up to 2 months. When ready to enjoy, thaw at room temperature for 30 minutes, then warm in a 350°F oven for 5 minutes to revive the crispness. The crumb remains tender, and the crumble topping stays golden.
Best Reheating Method
Reheat frozen or chilled muffins in a preheated 350°F oven for 5–7 minutes, or microwave on medium power for 15–20 seconds. Add a splash of water to the bottom of the baking sheet to create steam, which keeps the crumb moist. A quick brush of melted butter before reheating can add a glossy finish.
With these storage tips, you’ll always have a fresh batch of cherry cobbler muffins on hand, ready to impress at any moment.