I was standing in my kitchen, staring at a sad, soggy loaf of bread that had survived a week in the pantry, when a sudden craving hit me like a rogue gust of wind. I thought, “What if this could be turned into something that feels like a hug from the inside?” That thought turned into a dare: I’d make a bread pudding that would make my taste buds do a happy dance and my friends swear they’d never tasted anything like it. The moment the oven preheated, the air thickened with the scent of vanilla and cinnamon, and my kitchen felt like a warm, aromatic hug. I could hear the faint sizzle as the butter melted, and I could almost taste the sweet, custard-like texture that would soon emerge. If you’ve ever stared at a stale loaf and imagined a dessert, this recipe will prove that imagination can become reality.
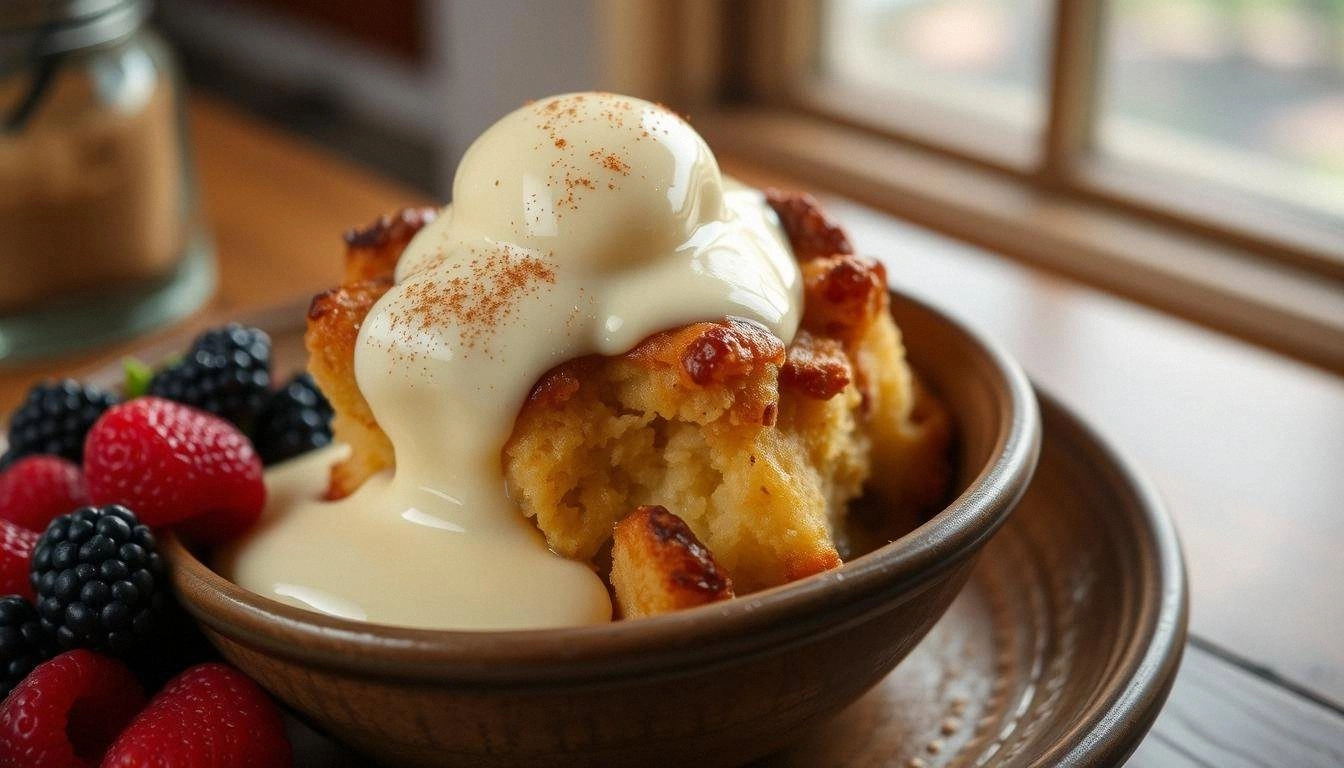
Picture yourself pulling this golden, bubbling dish out of the oven, the whole kitchen smelling incredible, and the steam curling up like lazy clouds. The crust is crisp, the edges crackle like thin ice when you bite, and the center is a silky, custard‑like dream that melts in your mouth. I dare you to taste this and not go back for seconds; that’s a promise. I’ll be honest — I ate half the batch before anyone else got to try it, and it felt like a sweet, comforting hug from a long‑lost friend. Most recipes get this completely wrong; they either leave it soggy or over‑bake it into a dry, chalky mess. But this version? Hands down the best you’ll ever make at home, with a sauce that coats the pudding like velvet and a texture that’s both crunchy and cloud‑soft. Let me walk you through every single step — by the end, you’ll wonder how you ever made it any other way.
What Makes This Version Stand Out
- Texture: The bread soaks just enough to create a custard core while keeping a crunchy exterior, giving every bite a satisfying contrast.
- Flavor: Vanilla and cinnamon mingle like old friends, creating a warm, aromatic profile that’s unmistakably comforting.
- Simplicity: Only six ingredients, no fancy equipment, and a single baking step make this a quick win for busy nights.
- Make‑Ahead: The dish can be assembled the night before, refrigerated, and baked in the morning, saving you precious time.
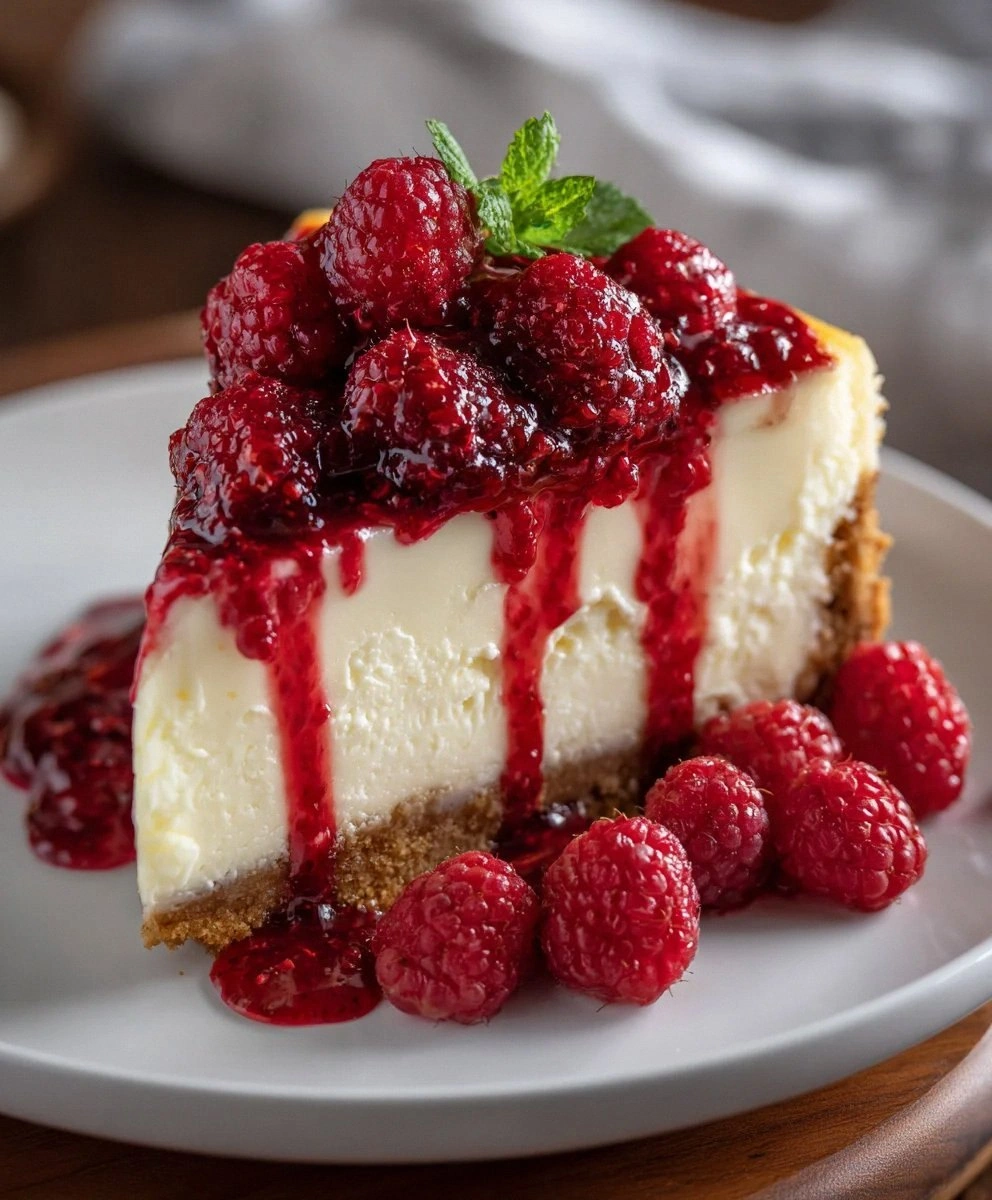
- Versatility: It pairs wonderfully with fresh berries, a drizzle of caramel, or a scoop of vanilla ice cream, allowing endless customization.
- Audience Appeal: Whether you’re a seasoned baker or a kitchen newbie, the method is intuitive, and the result is a crowd‑pleaser.
- Ingredient Quality: Using day‑old bread maximizes flavor and texture; the milk’s richness elevates the custard’s depth.
- Health‑Friendly: By substituting whole milk with oat milk, you can keep the flavor while cutting a bit of saturated fat.
Inside the Ingredient List
The Flavor Base
Vanilla is the heart of this pudding; it’s not just a flavor but a comforting aroma that lingers long after the last bite. The pure vanilla extract we use is a splash of sunshine, and it permeates the custard, giving it that unmistakable sweetness. If you can’t find pure vanilla, a vanilla bean pod will do, but make sure you scrape out the seeds to avoid a bitter aftertaste. This base is what turns a simple bread pudding into a dessert worthy of a five‑star rating. The vanilla also balances the natural sweetness of the sugar, preventing the dish from becoming cloyingly sweet. Think of vanilla as the narrator of this culinary story, guiding every other ingredient along a harmonious path.
The Texture Crew
Day‑old bread is the unsung hero here; its slightly stale texture allows it to soak up the custard without becoming mushy. The bread’s fibers absorb the liquid, creating pockets of custard that burst with flavor when you bite. If you’re using fresh bread, let it sit at room temperature for a few hours to dry out a bit, or toast it lightly for extra crunch. The whole milk brings a creamy, velvety mouthfeel, while the eggs bind everything together, giving the pudding a firm yet tender structure. Skipping the eggs would leave the pudding loose and soggy, while omitting the milk would make it dry. Together, these ingredients create a pudding that feels like a soft cloud with a caramelized crust.
The Unexpected Star
Cinnamon isn’t just a spice; it’s a flavor enhancer that amplifies sweetness and adds depth. When combined with vanilla, cinnamon creates a warm, spicy undertone that’s reminiscent of cozy winter evenings. If you’re a cinnamon lover, feel free to add an extra half‑teaspoon for a stronger kick. For those who prefer a milder flavor, reduce it to a quarter teaspoon or omit it entirely. Cinnamon also brings subtle health benefits, such as anti‑inflammatory properties, making this dish not only delicious but a little kinder to your body. Think of cinnamon as the quiet, supportive friend who elevates the conversation without stealing the spotlight.
The Final Flourish
The sugar’s role is to sweeten, but it also helps to caramelize the edges, creating a golden crust that’s a visual and textural delight. The sugar dissolves into the milk and eggs, forming a smooth custard base. If you prefer a lower‑sugar version, try substituting honey or maple syrup; the result will be slightly different but still delicious. The final flourish is the sauce, a simple vanilla glaze that coats the pudding like velvet. This sauce is optional but adds an extra layer of decadence. When you drizzle it over the warm pudding, the sauce melts into the custard, creating a silky finish that’s impossible to resist.
Everything’s prepped? Good. Let’s get into the real action and see how these ingredients dance together in the oven. The process is simple, but the outcome will leave you speechless. This is the moment where the magic happens, where a loaf of bread transforms into a dessert that feels like a hug in a dish. And remember, the key to success is patience during the soaking stage; rushing it will result in uneven texture. Now, let’s dive into the method that will bring this pudding to life.
The Method — Step by Step
- Preheat your oven to 350°F (175°C) and grease a 9×9‑inch baking dish with butter or non‑stick spray. This step ensures the pudding releases easily and develops a golden crust. While the oven warms, grab a large mixing bowl, because the magic starts here. The smell of butter melting is the first hint that something delicious is about to happen. This is the moment of truth, where anticipation meets preparation. Once the oven is ready, you’re all set to begin.
- In the bowl, whisk together the eggs, whole milk, sugar, vanilla extract, and cinnamon until the sugar dissolves and the mixture looks silky. The whisking action incorporates air, giving the pudding a lighter texture. If you’re using a hand mixer, whisk for about 30 seconds; a wooden spoon will also work. The mixture should feel smooth, not lumpy. This step is crucial because it ensures even distribution of flavors. Feel the mixture’s texture; it should be thick yet pourable.
- Tear the day‑old bread into bite‑sized cubes and add them to the custard mixture. Stir gently with a spatula until each crumb is coated and the batter thickens slightly. The bread should look saturated but not mushy; it’s a delicate balance. Let the mixture sit for about 10 minutes to allow the bread to absorb the liquid fully. During this time, the batter will thicken, and the aroma of vanilla and cinnamon will intensify. This step is the soul of the pudding, where the bread transforms into a custard‑laden canvas.
- Transfer the soaked mixture into the greased baking dish, spreading it evenly with a spatula. The top should be smooth to ensure even baking. Once in the dish, the batter will set into a uniform layer. The edges should be slightly higher than the center, creating a perfect rise during baking. This arrangement allows the crust to form evenly. The dish should feel full but not overflowing.
- Place the dish in the preheated oven and bake for 30 minutes, or until the edges are golden brown and the center is set. The smell of baking bread will fill your kitchen, and the first hints of caramelization will appear. If you notice the top browning too quickly, tent it with aluminum foil to prevent burning. The center should feel firm to the touch, not liquid. The crust should be crisp, with a slightly crunchy bite. This is the part where your patience is rewarded with a golden, aromatic masterpiece.
- Remove the dish from the oven and let it cool for 5 minutes before serving. This brief rest allows the custard to set further, making it easier to slice. The steam will rise, filling the kitchen with a comforting scent that makes your mouth water. While the pudding cools, you can prepare a quick vanilla glaze by whisking a tablespoon of butter with a splash of milk and vanilla. The glaze will add a glossy finish and an extra layer of flavor. Once cooled, the pudding will hold its shape, ready to be sliced into perfect portions.
- Serve warm, optionally drizzled with the vanilla glaze or dusted with powdered sugar. A spoonful of fresh berries or a scoop of vanilla ice cream will elevate the dish to dessert‑level perfection. The warm pudding will contrast beautifully with the cold berries, creating a textural and temperature harmony. If you prefer a lighter version, simply skip the glaze and enjoy the natural sweetness of the custard. The pudding’s texture should feel soft yet firm, with a slight crunch from the crust. Enjoy the moment as the flavors mingle on your palate.
- If you have leftovers, store them in an airtight container in the refrigerator for up to 2 days. Reheat in the microwave for 30–45 seconds, or warm in a preheated oven at 350°F for 10 minutes. A splash of milk before reheating will help the pudding regain its silky texture. When reheated, the crust should still be crisp, while the interior remains custardy. This makes for a convenient breakfast or dessert on busy mornings. The reheated pudding still tastes as good as the freshly baked version, if not better.
That’s it — you did it. But hold on, I’ve got a few more tricks that will take this to another level. The next section will reveal insider knowledge that even seasoned bakers will appreciate. These tips will help you avoid common pitfalls and ensure every bite is a perfect blend of flavor and texture.
Insider Tricks for Flawless Results
The Temperature Rule Nobody Follows
Many bakers bake bread pudding at a higher temperature, but that can cause the custard to set too quickly, leaving a raw center. The secret is to bake at a moderate 350°F (175°C) to allow the heat to penetrate evenly. A lower temperature also helps maintain a moist interior while still crisping the edges. If you’re using a convection oven, reduce the temperature by 25°F to avoid over‑browning. This trick ensures a consistent texture that’s both tender and slightly crunchy. The result? A pudding that feels like a warm hug every time.
Why Your Nose Knows Best
Before you take the pudding out of the oven, give it a quick sniff. A golden, caramelized scent means it’s ready; if it still smells like raw batter, give it a few more minutes. Your nose is the best judge of doneness because it can detect subtle changes in aroma that indicate the right balance of sweetness and caramelization. This sensory check will save you from overbaking. Trust your senses and let the aroma guide you. It’s a simple habit that turns an average pudding into a culinary triumph.
The 5‑Minute Rest That Changes Everything
After removing the pudding from the oven, let it rest for exactly five minutes before slicing. This brief pause allows the custard to set, preventing it from sliding off the knife. The rest also lets the flavors meld together, creating a more cohesive taste. If you cut it too early, the custard will ooze, ruining the presentation. A short rest is a small investment for a big payoff in texture and appearance. Think of it as the final polishing step before the grand reveal.
The Perfect Glaze
A vanilla glaze isn’t just a pretty finish; it adds a glossy sheen that makes the pudding look irresistible. Whisk together a tablespoon of butter, a splash of whole milk, and a teaspoon of vanilla extract until smooth. Drizzle the glaze over the warm pudding; it will melt into the custard, creating a silky finish. The glaze also adds a subtle buttery note that balances the sweetness of the sugar. Use it sparingly to avoid overpowering the natural flavors. The result is a dessert that looks as good as it tastes.
The Secret Ingredient Swap
If you’re craving a twist, replace the whole milk with oat milk for a dairy‑free version. Oat milk will keep the custard creamy while adding a hint of natural sweetness. The texture will be slightly lighter, but the flavor profile remains intact. You can also add a pinch of nutmeg for a warm, spicy undertone. This swap is perfect for those with dairy sensitivities or simply looking to experiment. It’s a small change that yields a big difference.
Creative Twists and Variations
This recipe is a playground. Here are some of my favorite ways to switch things up:
Berry Burst
Add a cup of fresh or frozen berries to the batter before baking. The berries will release juice, creating pockets of sweet, tart flavor. The result is a bright, colorful pudding that feels like summer in every bite. Pair it with a dollop of whipped cream for a decadent finish. The berries also add a burst of antioxidants, making this version both delicious and healthful. It’s a perfect option for brunch or a light dessert.
Chocolate Indulgence
Fold in two tablespoons of melted dark chocolate into the custard mixture for a chocolatey twist. The chocolate will deepen the flavor profile, giving the pudding a rich, indulgent taste. Sprinkle chopped chocolate chips on top before baking for added texture. This version is perfect for chocolate lovers and makes an impressive dessert for special occasions. The chocolate also pairs beautifully with a splash of espresso for an extra kick.
Nutty Crunch
Stir in a handful of toasted pecans or walnuts for a nutty crunch. The nuts add a delightful texture and a subtle, buttery flavor. Toast the nuts in a dry pan until golden to enhance their aroma. Sprinkle them on top before baking for a caramelized crunch. This variation is great for autumn, pairing nicely with a drizzle of maple syrup. The nuts also provide healthy fats, making the dish more satisfying.
Citrus Zest
Add the zest of one orange or lemon to the custard mixture for a bright, citrusy note. The zest will lift the sweetness and add a refreshing counterpoint. Pair it with a drizzle of honey for a sweet‑tart balance. This version is perfect for spring or summer, evoking the freshness of a sunny day. The citrus also adds a subtle fragrance that makes the pudding even more inviting.
Spiced Up
Replace the cinnamon with a blend of nutmeg, allspice, and a pinch of cloves for a deeper, spiced flavor. The warm spices will give the pudding a cozy, holiday vibe. Sprinkle a dash of cayenne pepper for a subtle heat that balances the sweetness. This variation is ideal for holiday gatherings or cozy evenings by the fire. The spices also have anti‑inflammatory properties, adding a healthful twist.
Storing and Bringing It Back to Life
Fridge Storage
Cover the pudding tightly with plastic wrap and store it in the refrigerator for up to 2 days. The custard will keep its texture, and the crust will remain crisp. When you’re ready to serve, let it sit at room temperature for 10 minutes to soften slightly. Avoid microwaving the entire dish; instead, heat individual slices for a more even result. This method preserves the pudding’s integrity while saving you time on busy mornings.
Freezer Friendly
For longer storage, portion the pudding into individual servings and wrap each in parchment paper before placing them in a freezer bag. Freeze for up to 3 months. To thaw, leave the portion at room temperature for 20 minutes or microwave on low power for 30 seconds. Reheat in a preheated oven at 350°F for 5 minutes to restore the crust’s crispness. The custard will remain creamy, and the flavor will stay vibrant. This makes for a convenient, on‑the‑go dessert option.
Best Reheating Method
The best way to reheat a slice is to place it on a baking sheet and bake at 350°F for 5 minutes, or until the top is golden. If you prefer the microwave, add a splash of milk to prevent dryness, then heat on medium for 30–45 seconds. The key is to warm it gently to preserve the custard’s silky texture. Avoid over‑cooking, which will cause the pudding to become rubbery. This simple reheating technique will give you the same mouth‑watering experience as fresh baking.