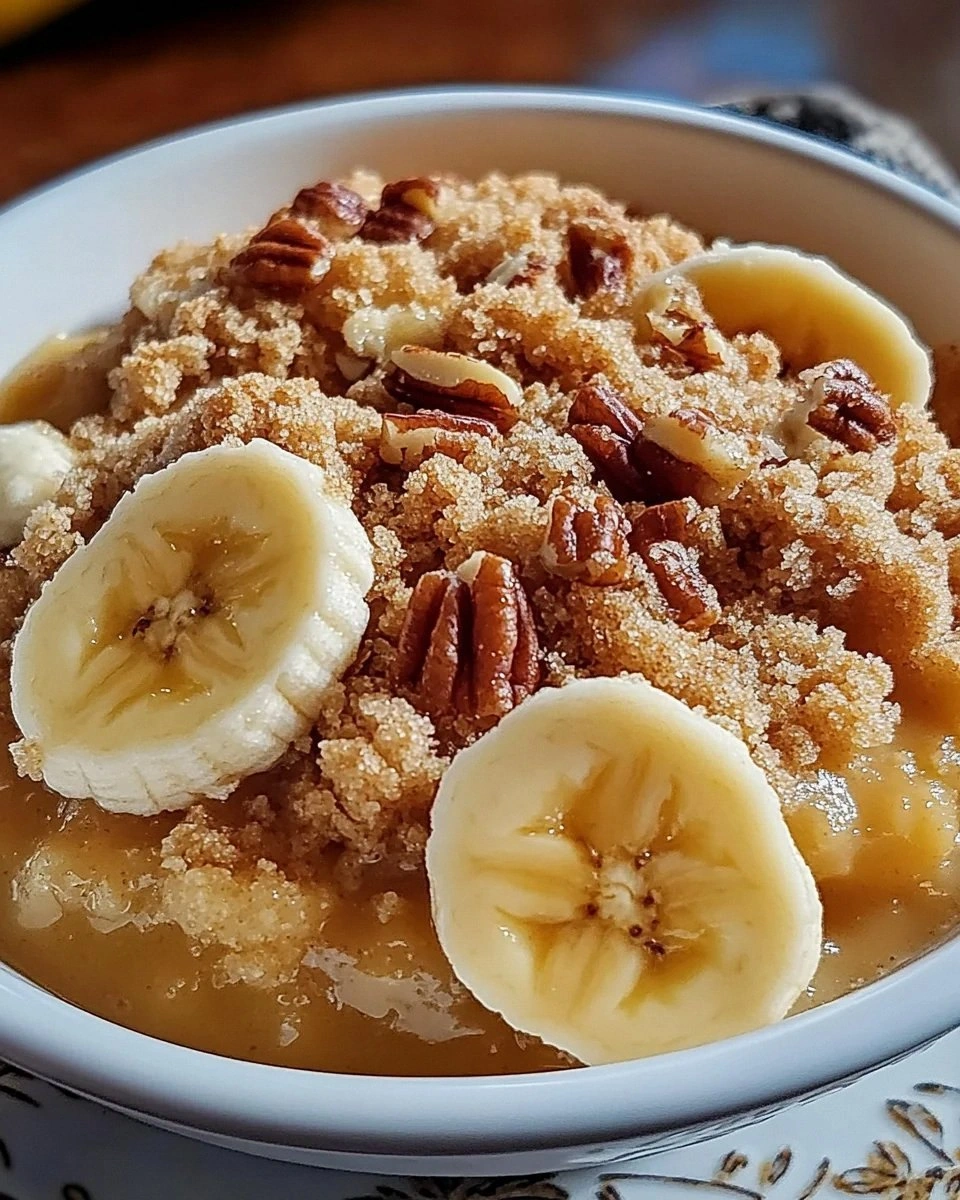
I still remember the night my kitchen turned into a chaotic stage of caramelized chaos. A stubborn apple crumble had been simmering in the pot, the sugar bubbling, the cinnamon drifting into the air like a fragrant snowstorm. I was halfway to the oven, ready to pull it out, when the timer dinged and the entire batch collapsed into a sticky, uneven mess. The result? A soggy, uneven bake that tasted like a winter rainstorm. That disaster sparked a mission: to create a Christmas cinnamon apple bake that would rise, crisp, and melt in the mouth like holiday magic.
Picture this: a bowl of freshly sliced apples, their skin glistening with a splash of lemon juice, the scent of cinnamon and nutmeg swirling in the air, and the gentle hiss of butter melting in a pan. The sound of apples sautéing, the visual of golden edges forming, the taste of sweet, spiced fruit that sings against the buttery crust. My senses were assaulted by the promise of a dish that feels like a warm hug on a cold December evening. The aroma alone could convince anyone to pause a minute and breathe in the comfort of home baking.
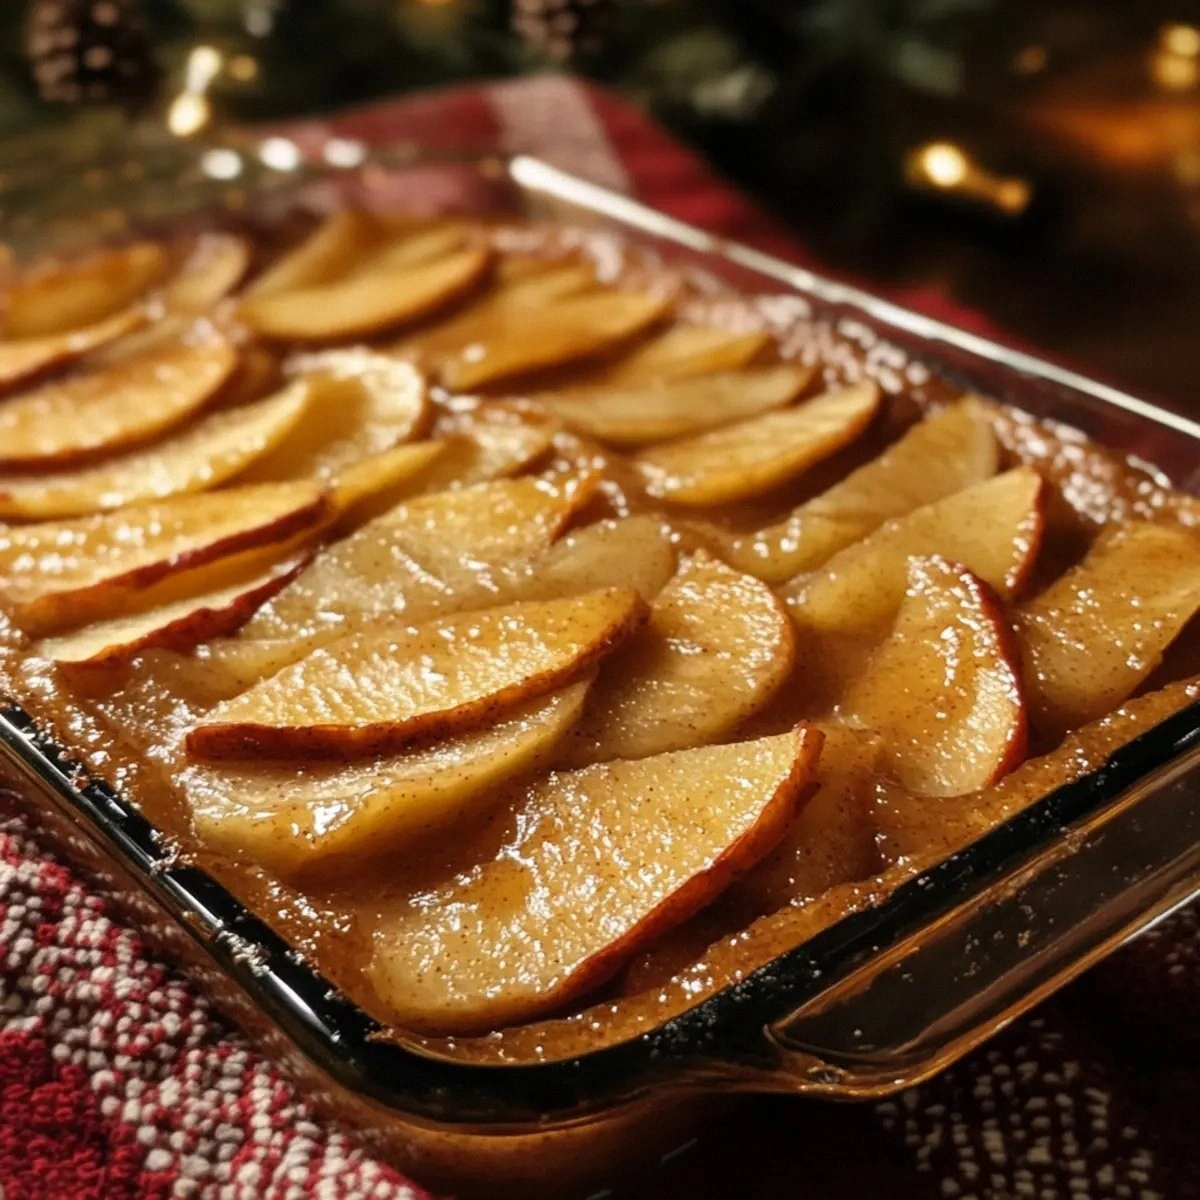
What makes this version a game-changer? It’s not just the combination of apples, cinnamon, and butter, but the layered textures and the balanced sweetness that makes every bite a revelation. The apples stay firm yet tender, the oat topping crisps into a caramelized crunch, and the buttery crust provides a buttery, slightly salty counterpoint. The trick is in the timing and the subtle use of lemon juice to brighten the apple’s natural flavor without masking the spices. It’s a recipe that takes ordinary ingredients and turns them into holiday gold.
I dare you to taste this and not go back for seconds. That’s the bold promise I make: this is hands down the best version you'll ever make at home. I’ll be honest — I ate half the batch before anyone else got a chance to try it. Most recipes get this completely wrong; they either overcook the apples or under-season the crust. Here’s what actually works: the right balance of sweetness and spice, the precise butter-to-oats ratio, and a quick, high-heat finish that locks in flavor. Picture yourself pulling this out of the oven, the whole kitchen smelling incredible, and the first bite delivering a burst of caramelized apple, a hint of nutmeg, and a buttery crunch that shatters like thin ice.
Okay, ready for the game-changer? This next part? Pure magic. And now the fun part. Stay with me here — this is worth it. If you've ever struggled with a Christmas bake that falls flat, you're not alone — and I've got the fix. Let me walk you through every single step — by the end, you'll wonder how you ever made it any other way.
What Makes This Version Stand Out
- Flavor: The combination of fresh apples, bright lemon, and warm spices creates a depth that feels like a holiday hug in every bite.
- Texture: The buttery crust provides a crisp, golden edge, while the oat topping adds a satisfying crunch that contrasts the soft fruit center.
- Ingredient Quality: Using high‑quality butter and real cinnamon elevates the dish, ensuring each bite is rich and aromatic.
- Ease of Prep: The recipe requires minimal prep time; most steps happen simultaneously, letting you enjoy the process.
- Make‑Ahead: Assemble the bake a day ahead; the flavors meld, and the next day it cooks in under 30 minutes.
- Crowd‑Pleaser: Guests rave about the caramelized apple topping and the buttery, slightly salty crust that pairs perfectly with hot cocoa.
- Versatility: Swap apples for pears or add a splash of bourbon for an adult twist; the base remains delicious.
- Presentation: The golden crust and vibrant apple chunks make it a showstopper on any holiday table.
Alright, let's break down exactly what goes into this masterpiece…
Inside the Ingredient List
The Flavor Base
Apples are the heart of this bake. Choose varieties like Honeycrisp or Granny Smith for a balance of sweetness and tartness. The lemon juice isn’t just a garnish; it cuts through the sweetness, giving the apples a bright, crisp finish. If you skip the lemon, the apples will taste flat and the overall flavor will be less dynamic. A good tip: rinse the apples after slicing to remove excess sugar and prevent browning.
The Sweetener Mix
Brown sugar and granulated sugar work together to create a caramelized glaze that coats the apples. Brown sugar brings depth with molasses notes, while granulated sugar ensures a clean, bright sweetness. Skipping either will alter the glaze’s texture: too much brown sugar and you’ll get a sticky mess; too much granulated and you lose the caramelized finish. For a gluten‑free version, use coconut sugar or a blend of maple syrup and honey.
The Spice Ensemble
Ground cinnamon is the star, but nutmeg adds a subtle warmth that complements the apple’s natural sweetness. Together, they create a flavor profile reminiscent of holiday cookies. If you’re a fan of a spicier kick, add a pinch of cayenne or a dash of ginger. Remember, spices lose potency when heated for too long; add them after the apples have softened to preserve their aroma.
The Texture Crew
All-purpose flour and rolled oats form the backbone of the crust. Flour provides structure and a slight chew, while oats add crunch and a nutty undertone. The butter is the key to a flaky, buttery crust; use unsalted to control salt levels. If you’re craving a deeper flavor, try substituting half the flour with almond flour for a subtle nutty note.
Everything's prepped? Good. Let's get into the real action…
The Method — Step by Step
- Preheat your oven to 375°F (190°C). Line a 9‑inch square baking dish with parchment paper, leaving an overhang for easy lifting. This step ensures a crisp base and prevents sticking.
- In a large bowl, combine the sliced apples, brown sugar, lemon juice, cinnamon, and nutmeg. Toss until the apples are evenly coated. The sugar will draw out the apple juices, creating a syrupy base that caramelizes as it bakes.
- Transfer the apple mixture into the prepared dish, spreading it out in an even layer. Press down gently with a spatula to ensure the apples are compacted, which helps the crust adhere properly.
- In a separate bowl, whisk together the flour, rolled oats, and salt. Add the cold butter cubes and use a pastry cutter or your fingertips to blend until the mixture resembles coarse crumbs. The butter must be cold to create a flaky crust.
- Sprinkle the oat‑flour topping evenly over the apples. Press it down lightly so it sticks. The oats will brown and crisp, adding a delightful crunch that contrasts the soft fruit.
- Place the dish in the oven and bake for 25 minutes, or until the top is golden brown and the apples are bubbling. The aroma at this point should be intoxicating, a sweet, spiced perfume that fills the kitchen.
- Watch Out: If you leave the bake too long, the oats can burn, creating a bitter taste that overwhelms the apples. Keep an eye on the color; remove immediately once it turns a deep golden brown.
- Remove from the oven and let it rest for 10 minutes. This rest period allows the juices to redistribute, ensuring each bite is juicy and flavorful.
- Serve warm, optionally dusting with powdered sugar or a dollop of vanilla ice cream. The contrast of warm, spiced apple with cool, creamy ice cream is pure bliss.
- If you want to elevate the dish, drizzle a light sauce of caramelized butter and maple syrup over the top just before serving. This adds a glossy sheen and an extra layer of sweetness.
That's it — you did it. But hold on, I've got a few more tricks that'll take this to another level…
Insider Tricks for Flawless Results
The Temperature Rule Nobody Follows
Many bakers bake at 350°F, but this recipe thrives at 375°F. The higher temperature ensures a crisp crust while keeping the apples tender. If you lower the heat, the crust becomes soggy because the apple juices seep into it. I once baked at 350°F and the result was a soggy, under‑cooked center. Stick to 375°F for that perfect contrast.
Why Your Nose Knows Best
As the apples caramelize, the aroma will shift from sweet to nutty to buttery. Trust that scent as a cue: when the smell turns rich and inviting, the bake is ready. I’ve learned to open the oven door for a breath of that aroma instead of checking the timer. It’s a sensory shortcut that guarantees perfection.
The 5‑Minute Rest That Changes Everything
Letting the bake rest after removing it from the oven is crucial. The rest period allows the juices to redistribute, preventing a dry center. If you cut into it immediately, the juices will spill out, leaving a dry, uneven bite. I always set a timer for 10 minutes; it’s the secret to a moist, flavorful center.
The Oat Crunch Factor
The rolled oats add a crunch that’s essential for texture contrast. If you prefer a smoother top, substitute with finely ground almonds or crushed graham crackers. However, the oat crunch is what makes this recipe stand out and I recommend keeping it for authenticity.
The Butter-to-Oat Ratio
Using too much butter can drown the oats, resulting in a greasy crust. Too little butter will yield a dry, crumbly topping. The ratio of 1/2 cup butter to 1 cup oats is the sweet spot. I’ve experimented with 3/4 cup butter and the crust became too oily, so stick to the original ratio.
Creative Twists and Variations
Pear & Cinnamon Swap
Replace apples with pears for a softer, sweeter version. Pears pair beautifully with cinnamon and nutmeg, and they hold their shape better when baked. This variation is perfect for those who want a different fruit profile.
Maple‑Glazed Crunch
Drizzle a light maple glaze over the top before baking. The maple adds a deep, caramelized flavor that complements the spices. It also gives the crust a glossy sheen that’s visually stunning.
Bourbon Infusion
Add a splash of bourbon to the apple mixture. The alcohol evaporates during baking, leaving a subtle warmth that enhances the cinnamon. This adult twist is a favorite at holiday parties.
Chocolate‑Covered Delight
After baking, top the apple crumble with melted dark chocolate. Let it set for a few minutes, then slice. The combination of chocolate and spiced apple is a decadent treat for dessert lovers.
Gluten‑Free Oat Topping
Use gluten‑free rolled oats and a gluten‑free flour blend for a safe version. The texture remains the same, and the flavor profile stays intact. It’s a simple swap that opens the recipe to more people.
Nut‑Infused Crunch
Add chopped walnuts or pecans to the oat topping. The nuts add a crunchy texture and a nutty flavor that pairs well with the spices. This variation is ideal for those who love a little extra bite.
Storing and Bringing It Back to Life
Fridge Storage
Cool the bake completely before refrigerating. Store in an airtight container for up to 3 days. The crust will soften slightly, but it remains delicious when reheated. I like to cover it with a piece of parchment to keep the moisture in.
Freezer Friendly
Wrap the bake tightly in plastic wrap, then place in a freezer bag. Freeze for up to 2 weeks. When ready to eat, thaw overnight in the fridge and bake at 350°F for 15 minutes. This method preserves the texture and flavor well.
Best Reheating Method
Reheat in a preheated oven at 350°F until warmed through, about 10 minutes. Add a splash of water to the dish before reheating; this steams the apple layers back to perfection and prevents dryness. Finish with a dusting of powdered sugar for a sweet finish.